


 Published:November 11, 2026
 Time to read:5 min
Setting up Power Platform Pipelines for Multi-environment Deployments
A Short Overview of the Article
A Short Reference About the Author
Introduction
Manual Deployment vs. Pipelines
Setting up Power Platform Pipelines
Step 1. Install the "Pipelines App"
Pipelines are installed as a Dynamics 365 app from the admin center:
Go to admin.powerplatform.microsoft.com.
In the left navigation, open the "Manage", then Dynamics 365 apps. This shows the list of applications available for installation.
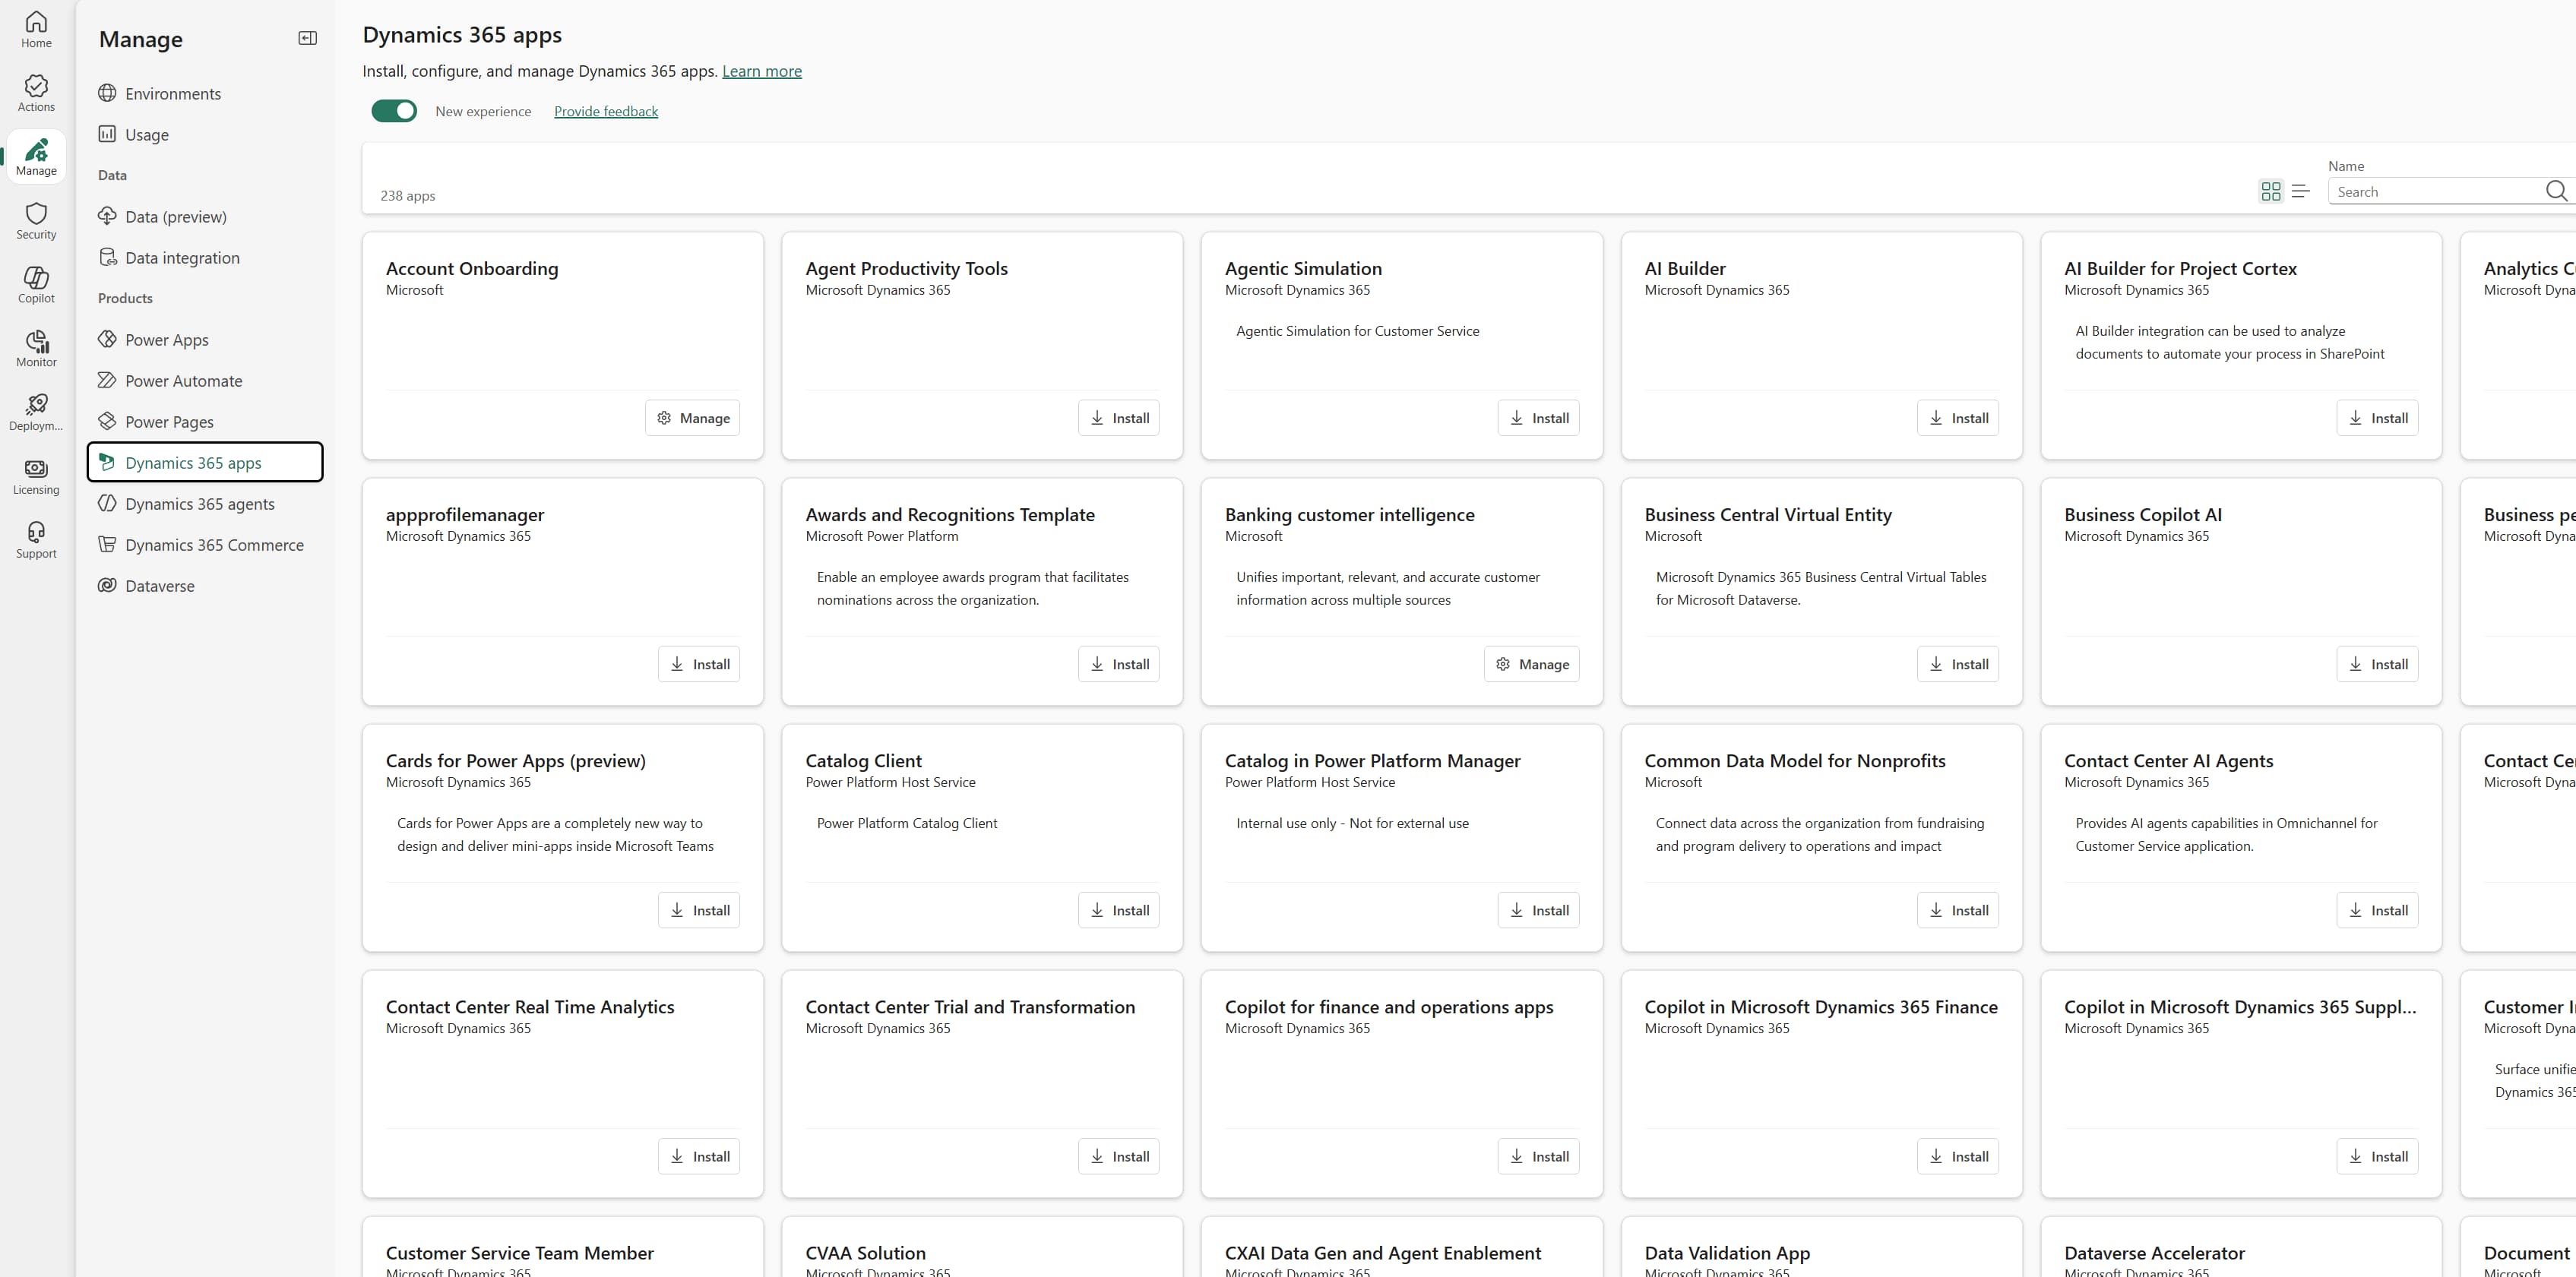
Search for the "Pipelines" and locate the "Power Platform Pipelines". Click on the "Install".
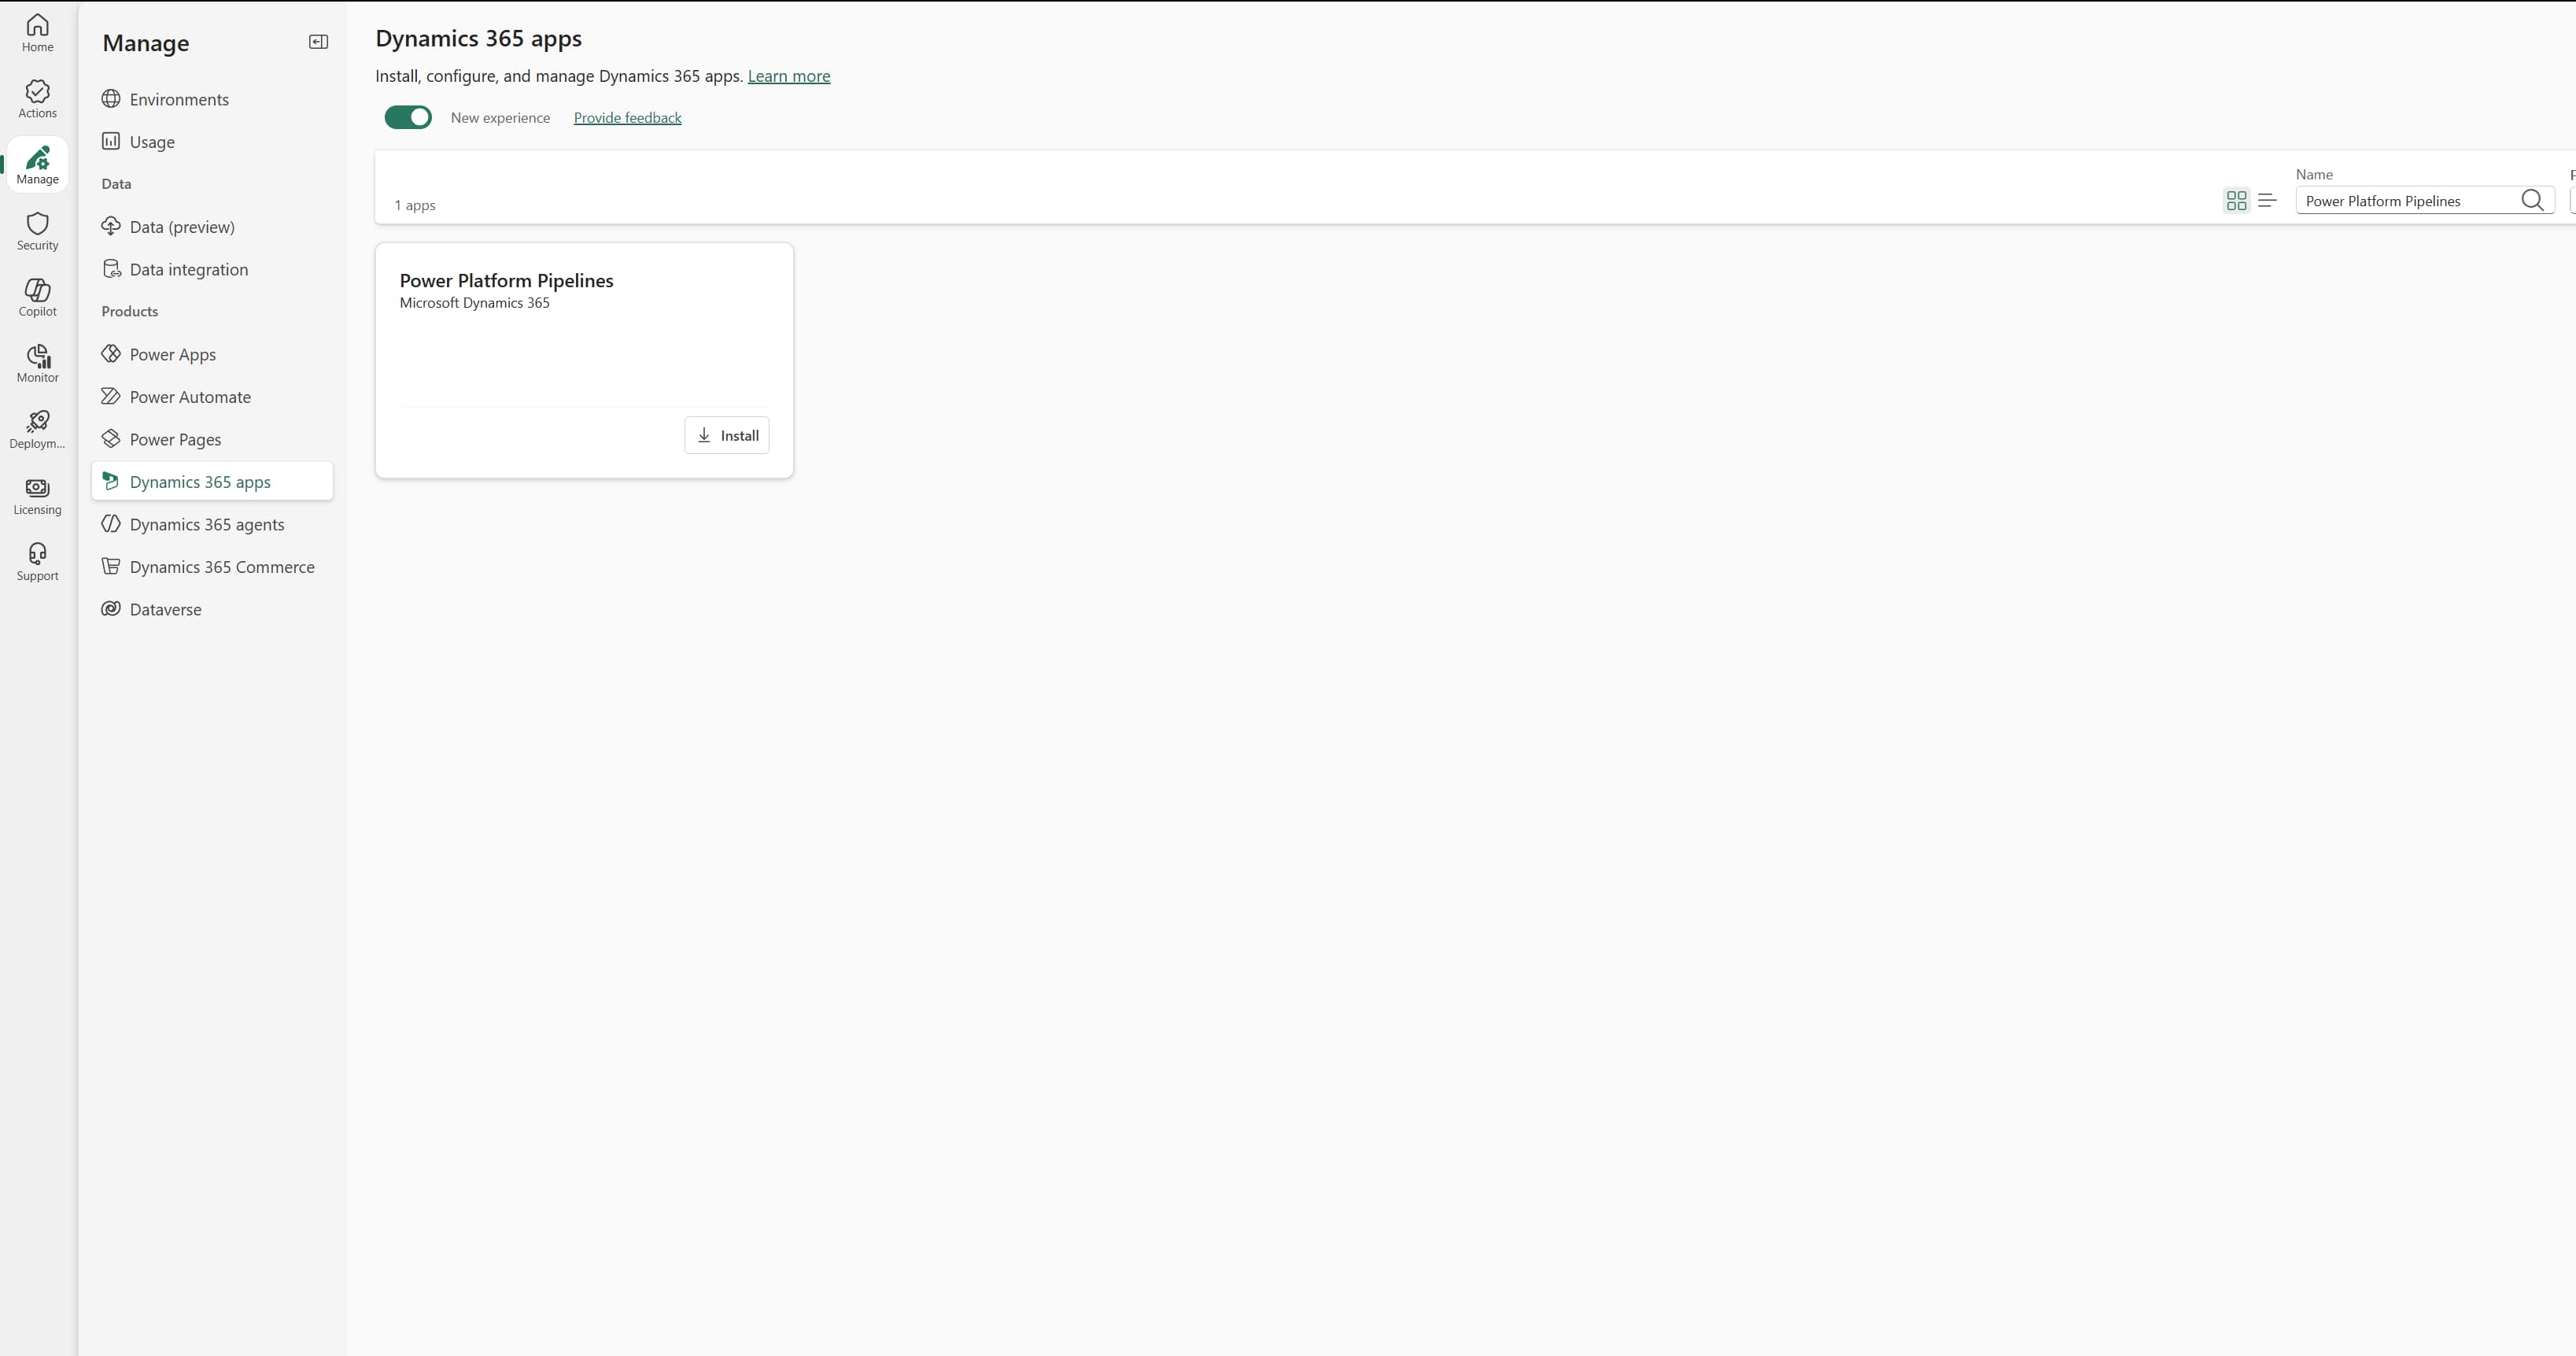
In the next window, choose the environment you want to install the app on.
! Note. This has to be a developer environment. The "Pipelines Configuration" data (environment records, stage records, deployment history) lives inside this environment, so it needs to be the one you can control, and that will not be deleted or reset.
Accept the "Terms of Service" and click on the "Install".
Installation takes a few minutes to complete. Once it finishes, the environment is ready for configuration.
Step 2. Open the "Deployment Pipeline Configuration App"
Open your Power Apps environment, such as https://example.crm.dynamics.com/.
In the top bar, click on your portal/app name to open the app switcher.
Select the "Deployment Pipeline Configuration" from the list.
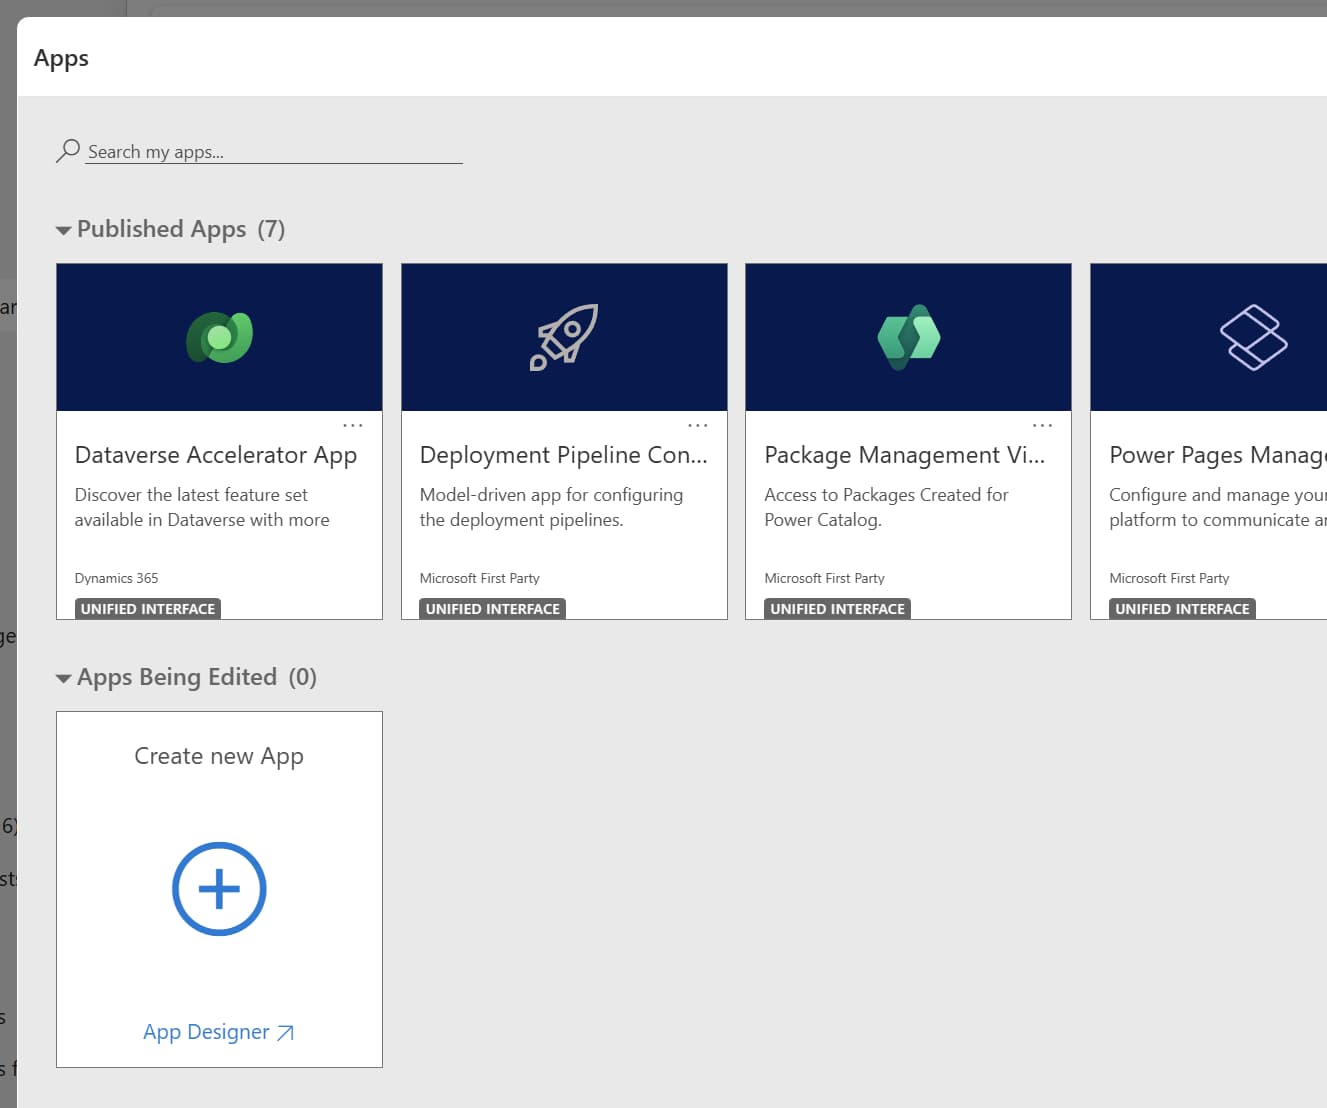
! Note. You need the "Global Administrator" rights, or the specific administrator role for pipelines, to open and configure this app. Without it, the app either will not appear in the list or will open without the ability to save the changes.
! Note. The configuration happens in two parts: first in the environments, then in the pipelines themselves.
Step 3. Register your environments
Before a pipeline can move anything anywhere, the "Pipelines" needs to know which environments exist and what role each one plays. For a typical "Development → Staging → Production" structure, you have to register three environment records:
Click on the "+ New" in the top ribbon to create a record.
Name it, for example, "Development".
Set the "Environment Type".
For a development environment, choose the "Development Environment". The equivalent types exist for staging and production.
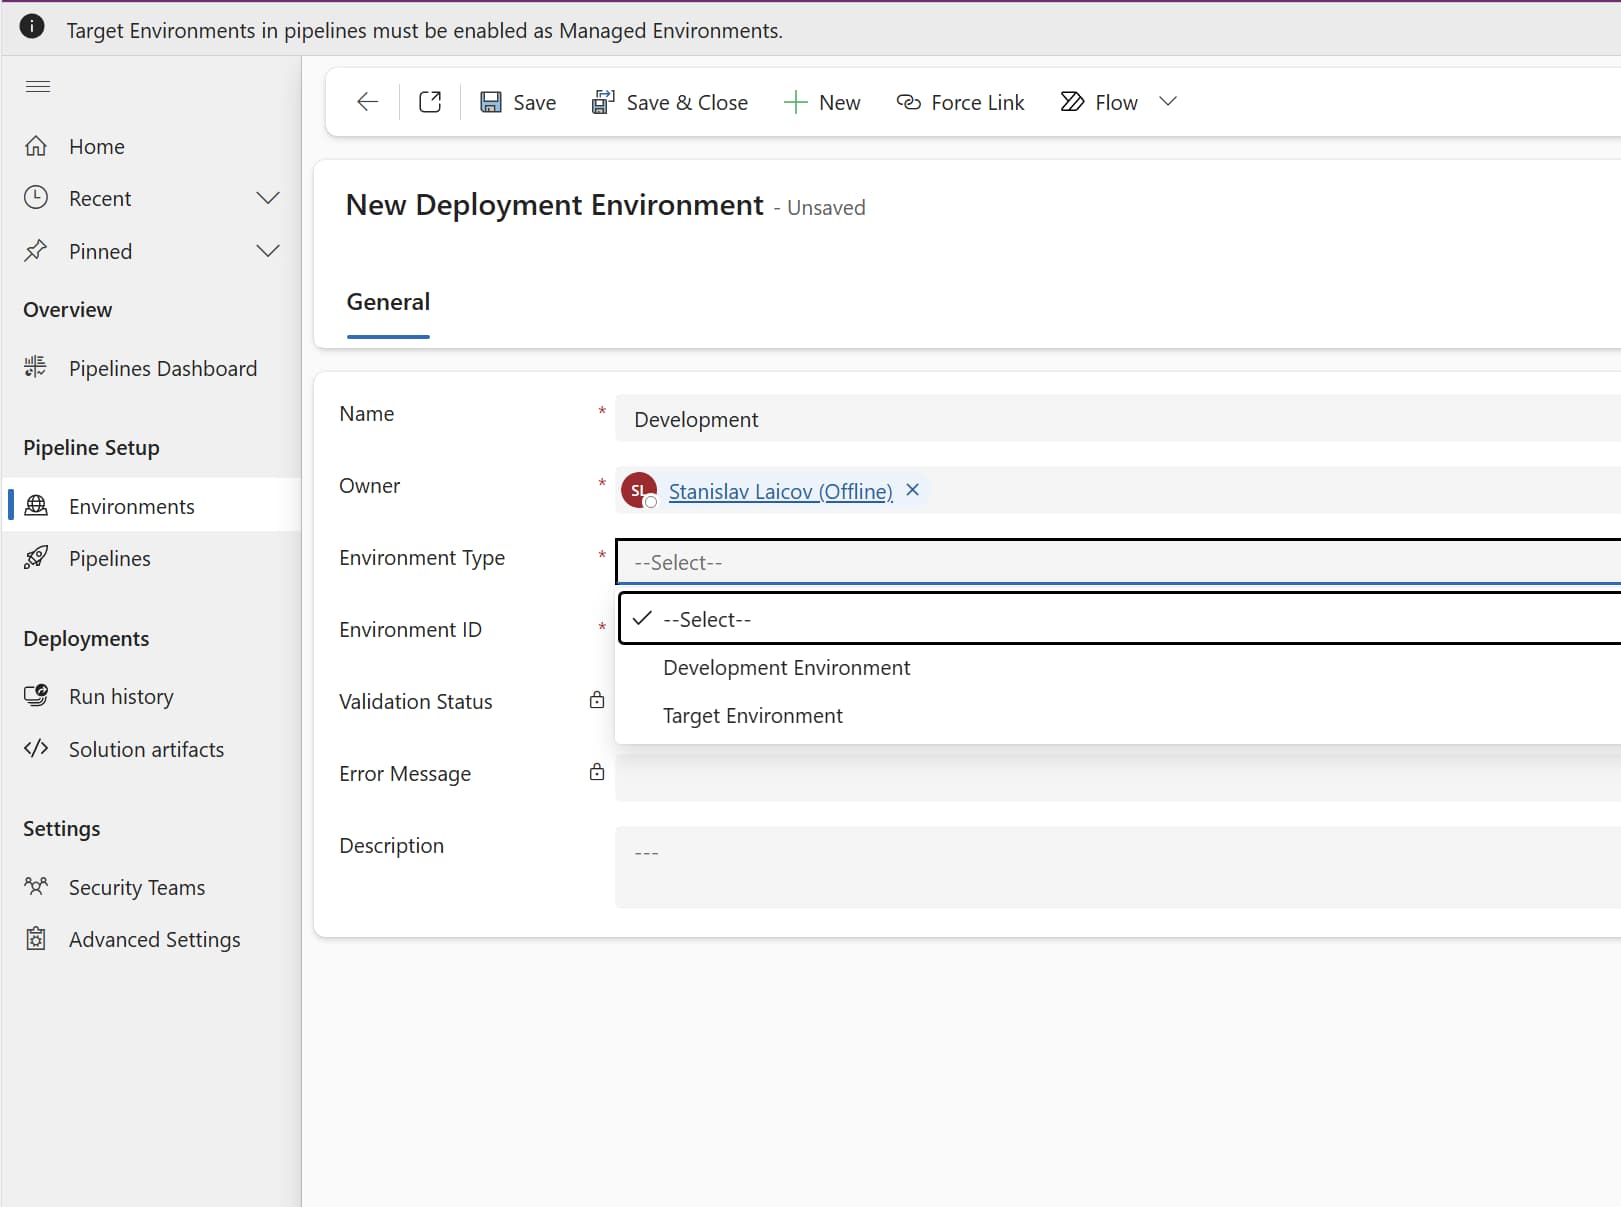
Fill in the "Environment" ID.
To get this, open the "make.powerapps.com", select the target environment, and copy the "Environment" ID from the browser's address bar.
Click on the "Save & Close".
The record goes through validation automatically. If everything matches, the "Validation Status" will change from "Pending" to "Success". If it fails, the most common cause is a mistyped or mismatched "Environment" ID.
! Note. If validation keeps failing or the record will not link properly, it is often because pipelines were configured before through the older, simplified interface. A leftover association is still pointing at that old configuration. To fix it, open the environment record and choose the "Force Link" in the top ribbon. This detaches any stale links and re-associates the record cleanly with your new setup.
! Note. Repeat this for every environment in your structure. In our case, the "Staging" and "Production" as the target environments, in addition to the "Development Environment" where the pipeline configuration itself lives.
! Note. Depending on the project, you may register one target environment or several: it depends entirely on how many release stages your process needs.
Step 4. Create a pipeline and link the "Development Environment"
In the site map, select the "Pipelines" and click on the " + New".
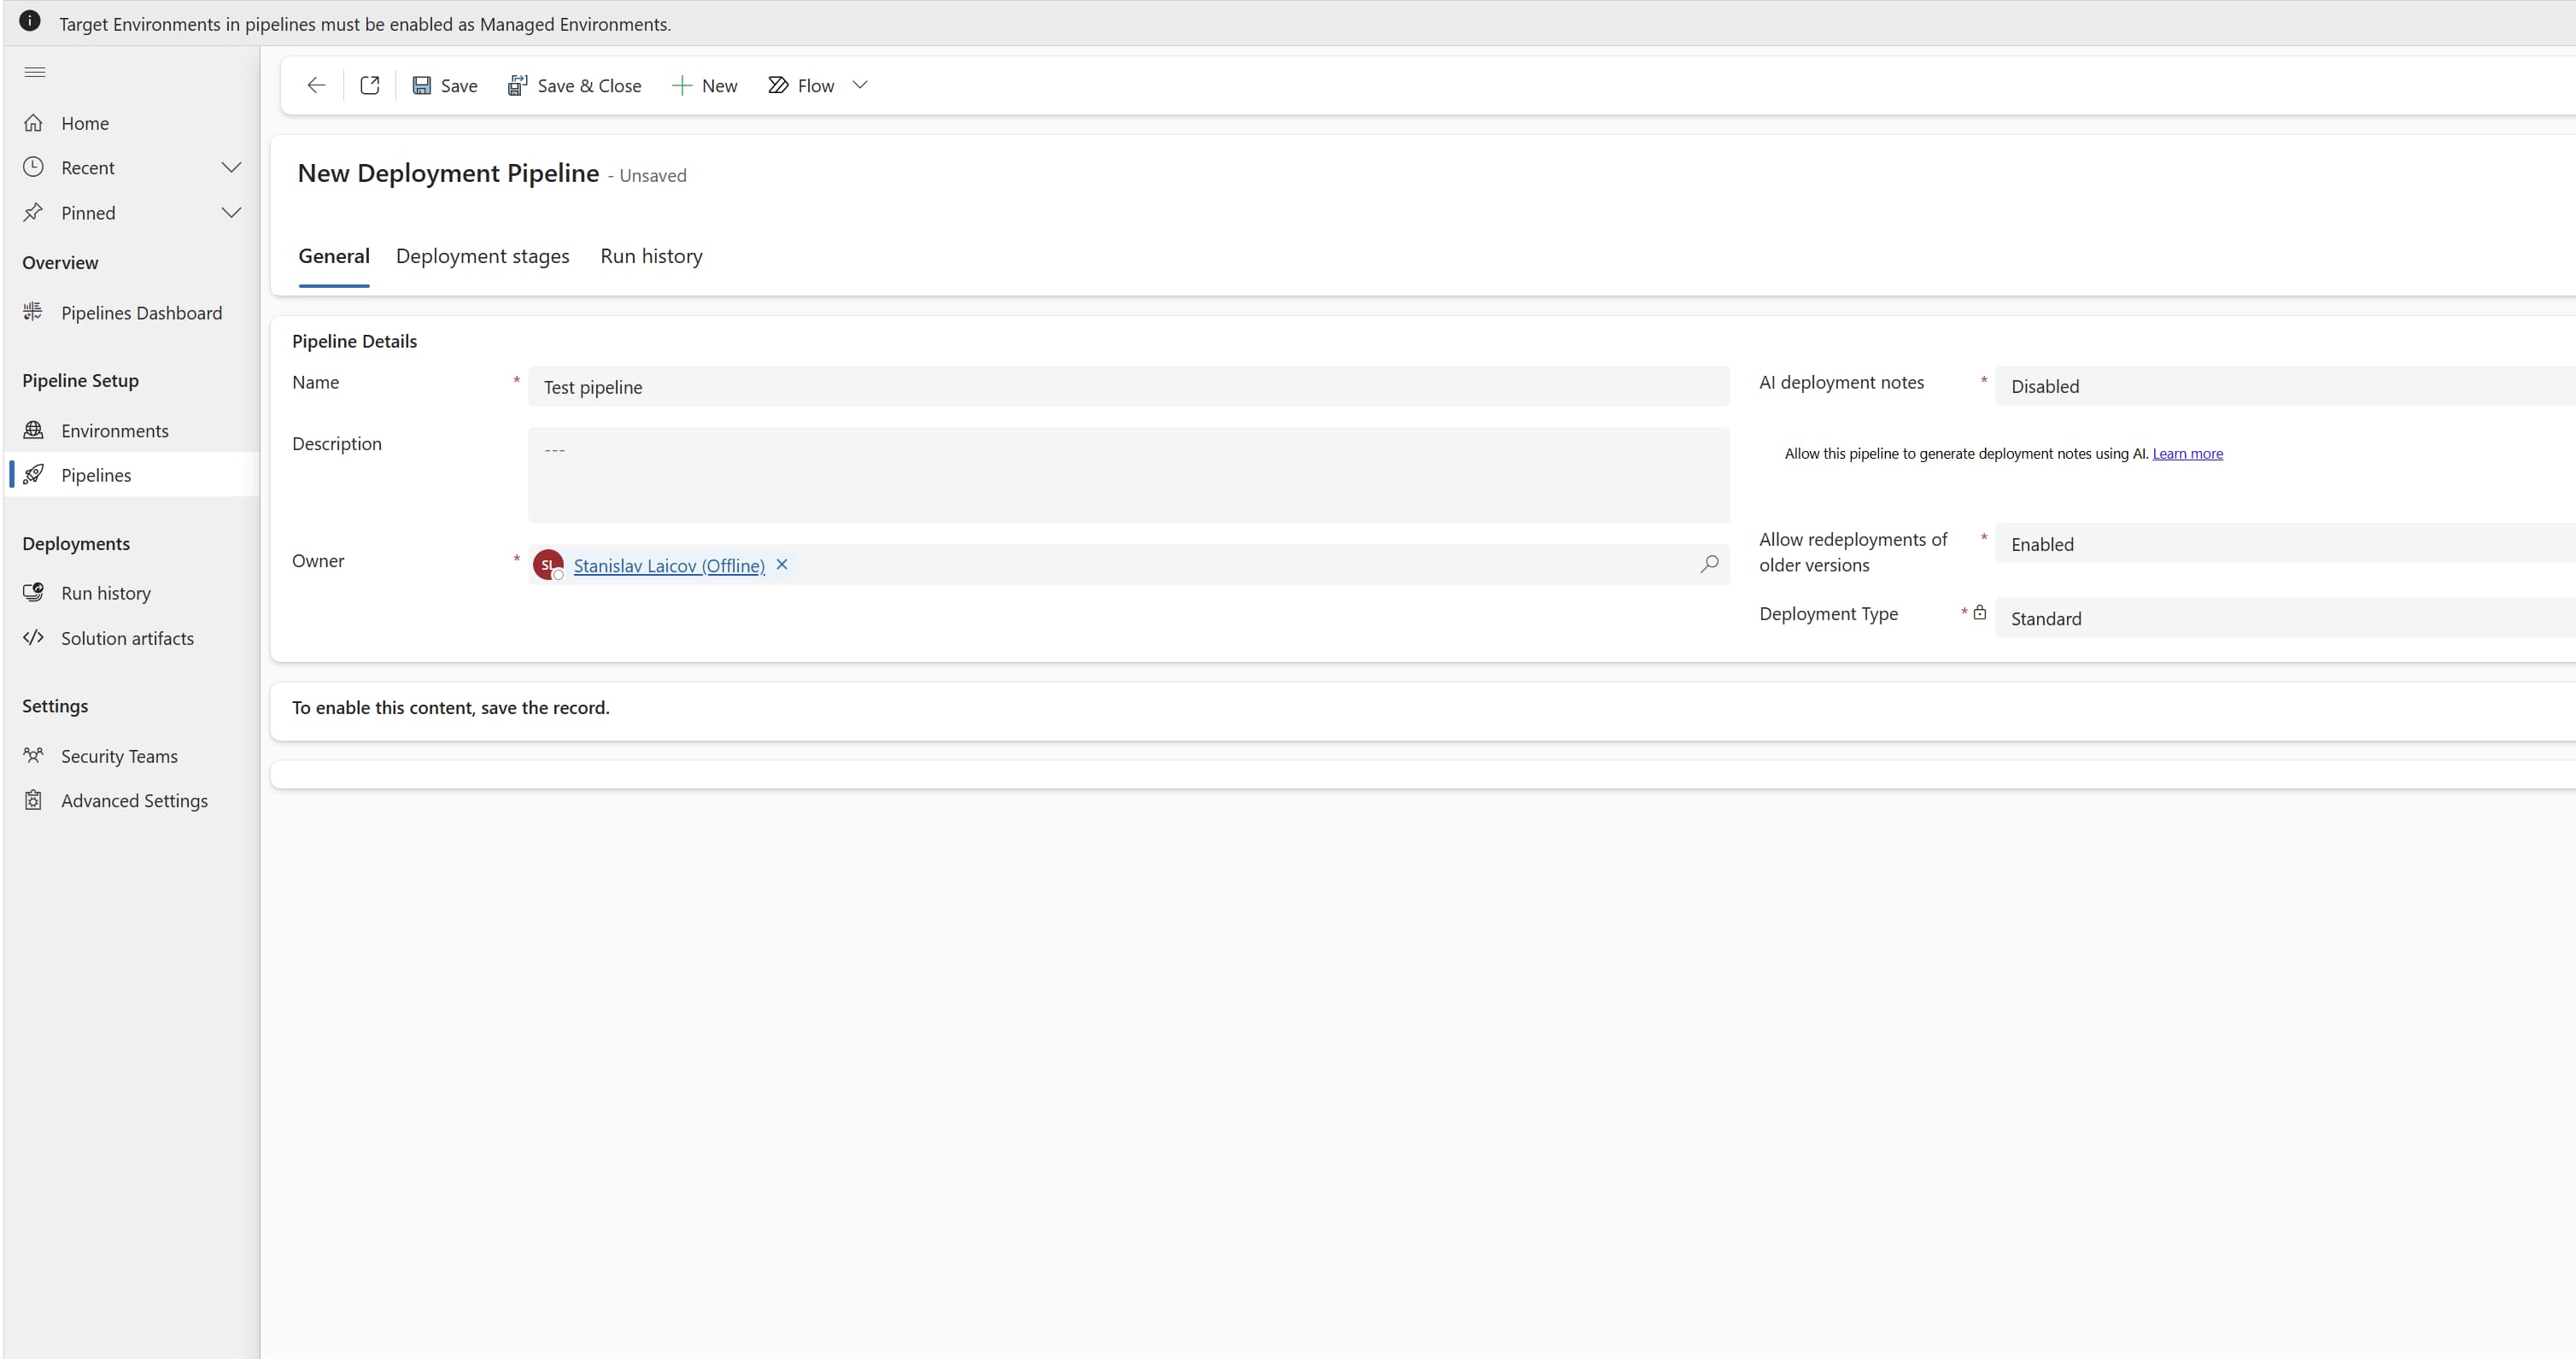
Name the pipeline, and then click on the "Save".
The form will be reloaded, and the additional sections will become available.
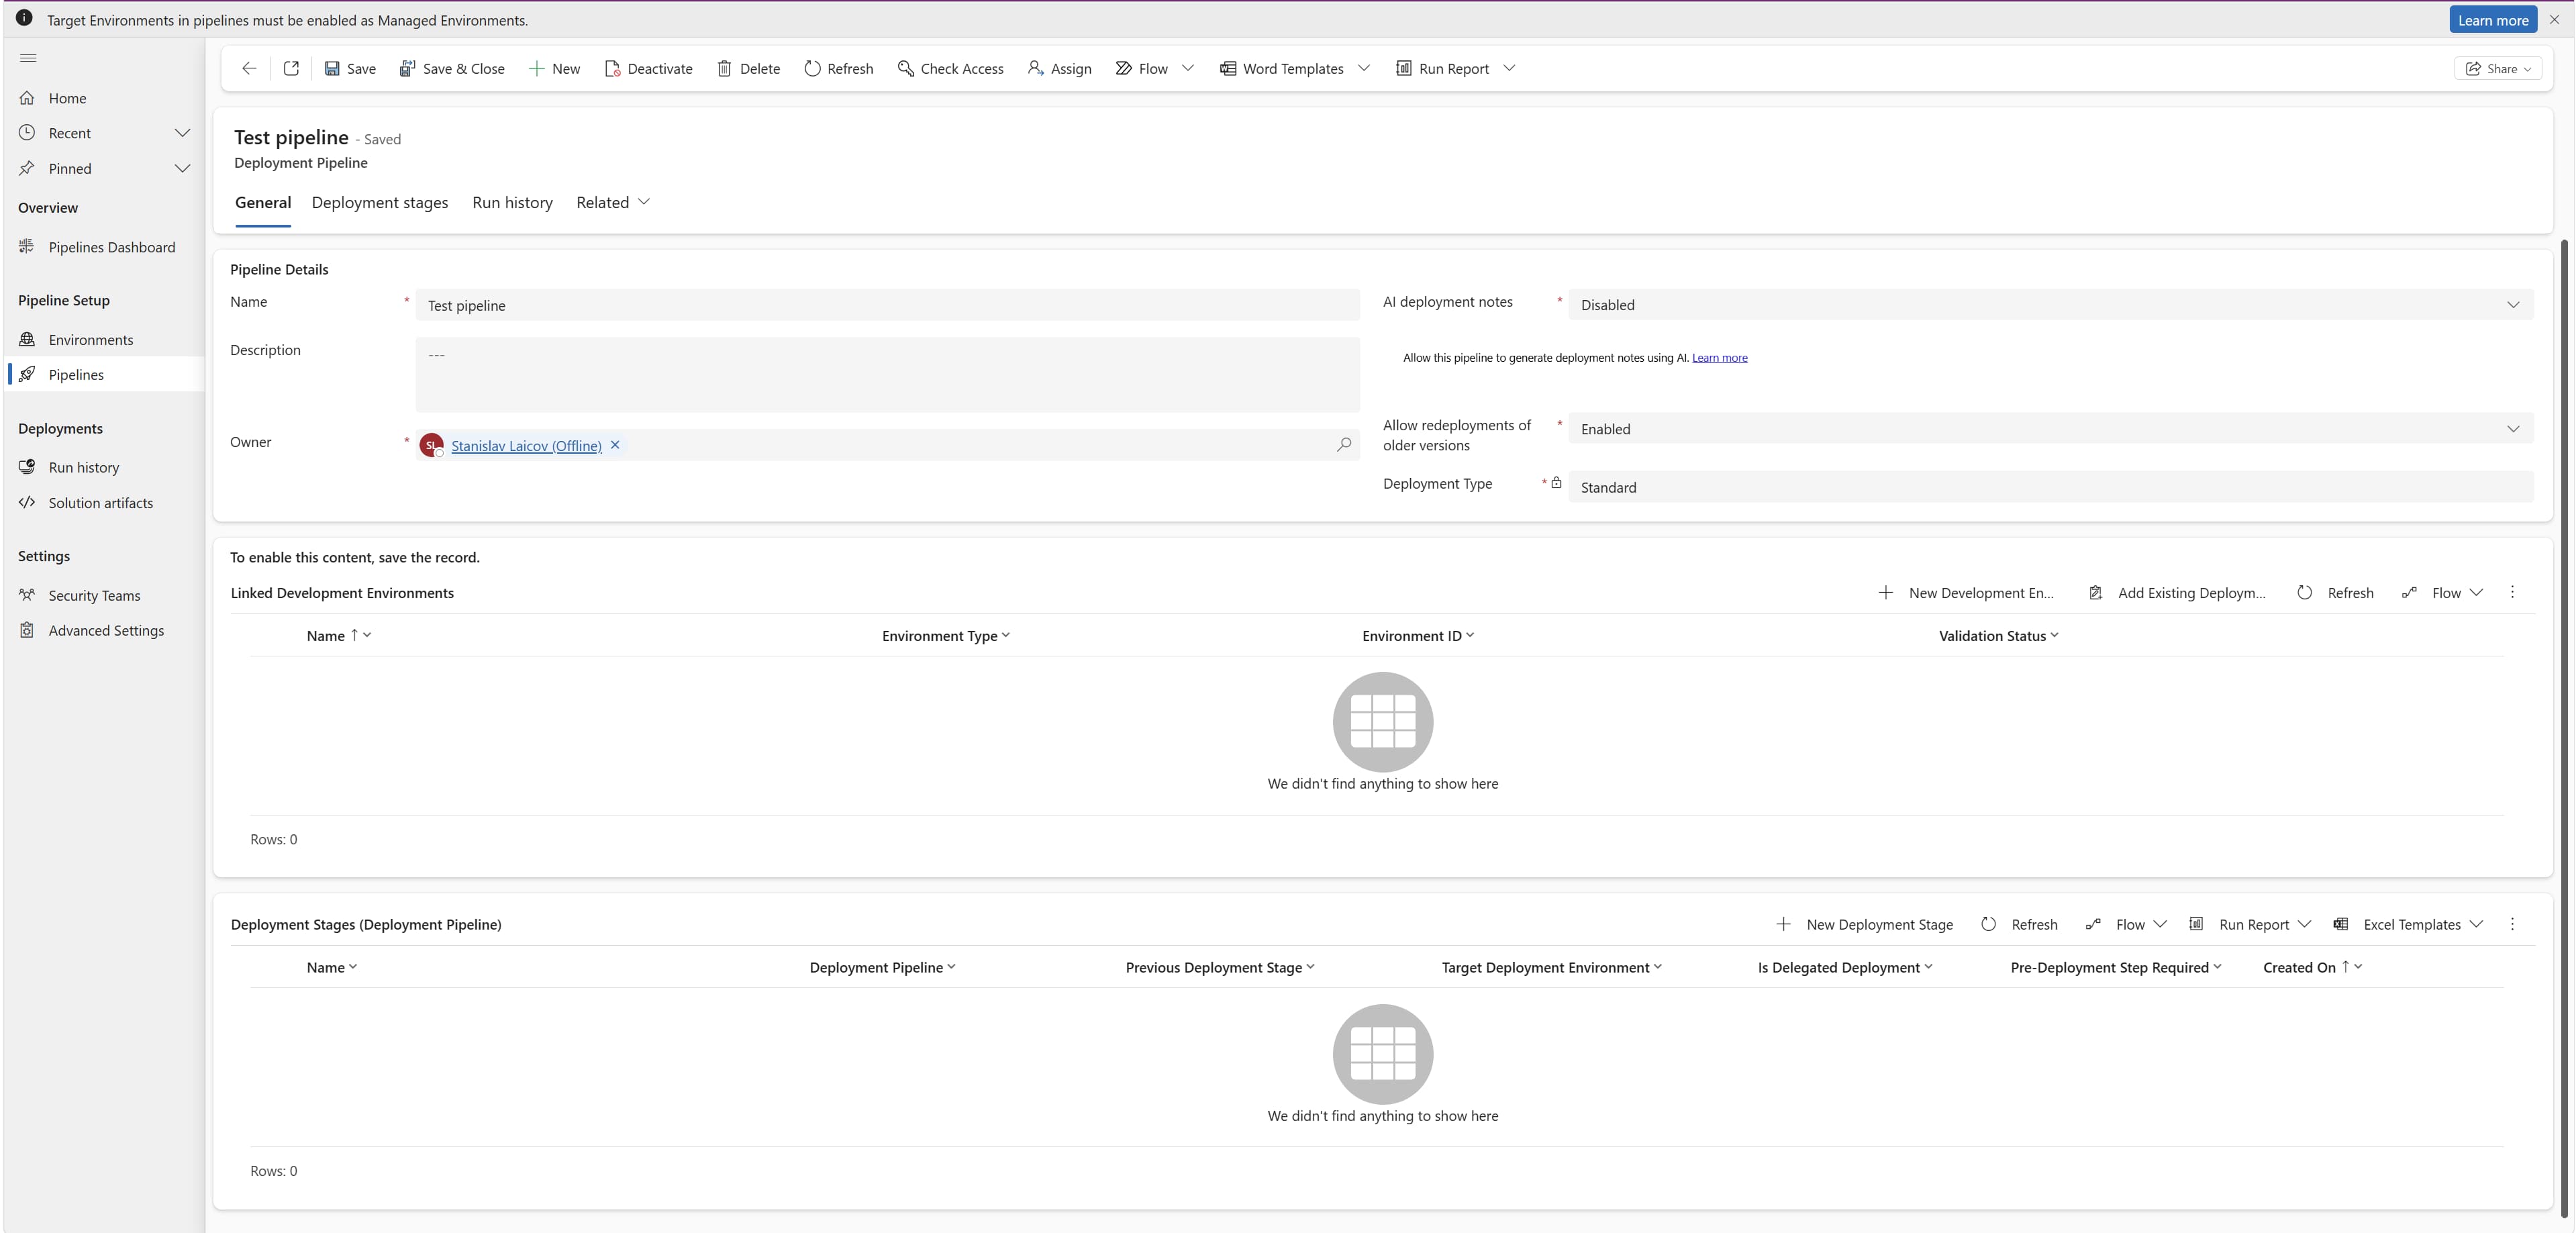
Go to the "Linked Development Environments", click on the "Add Existing Deployment Environment", and select the "Development Environment" you have registered in Step 3.

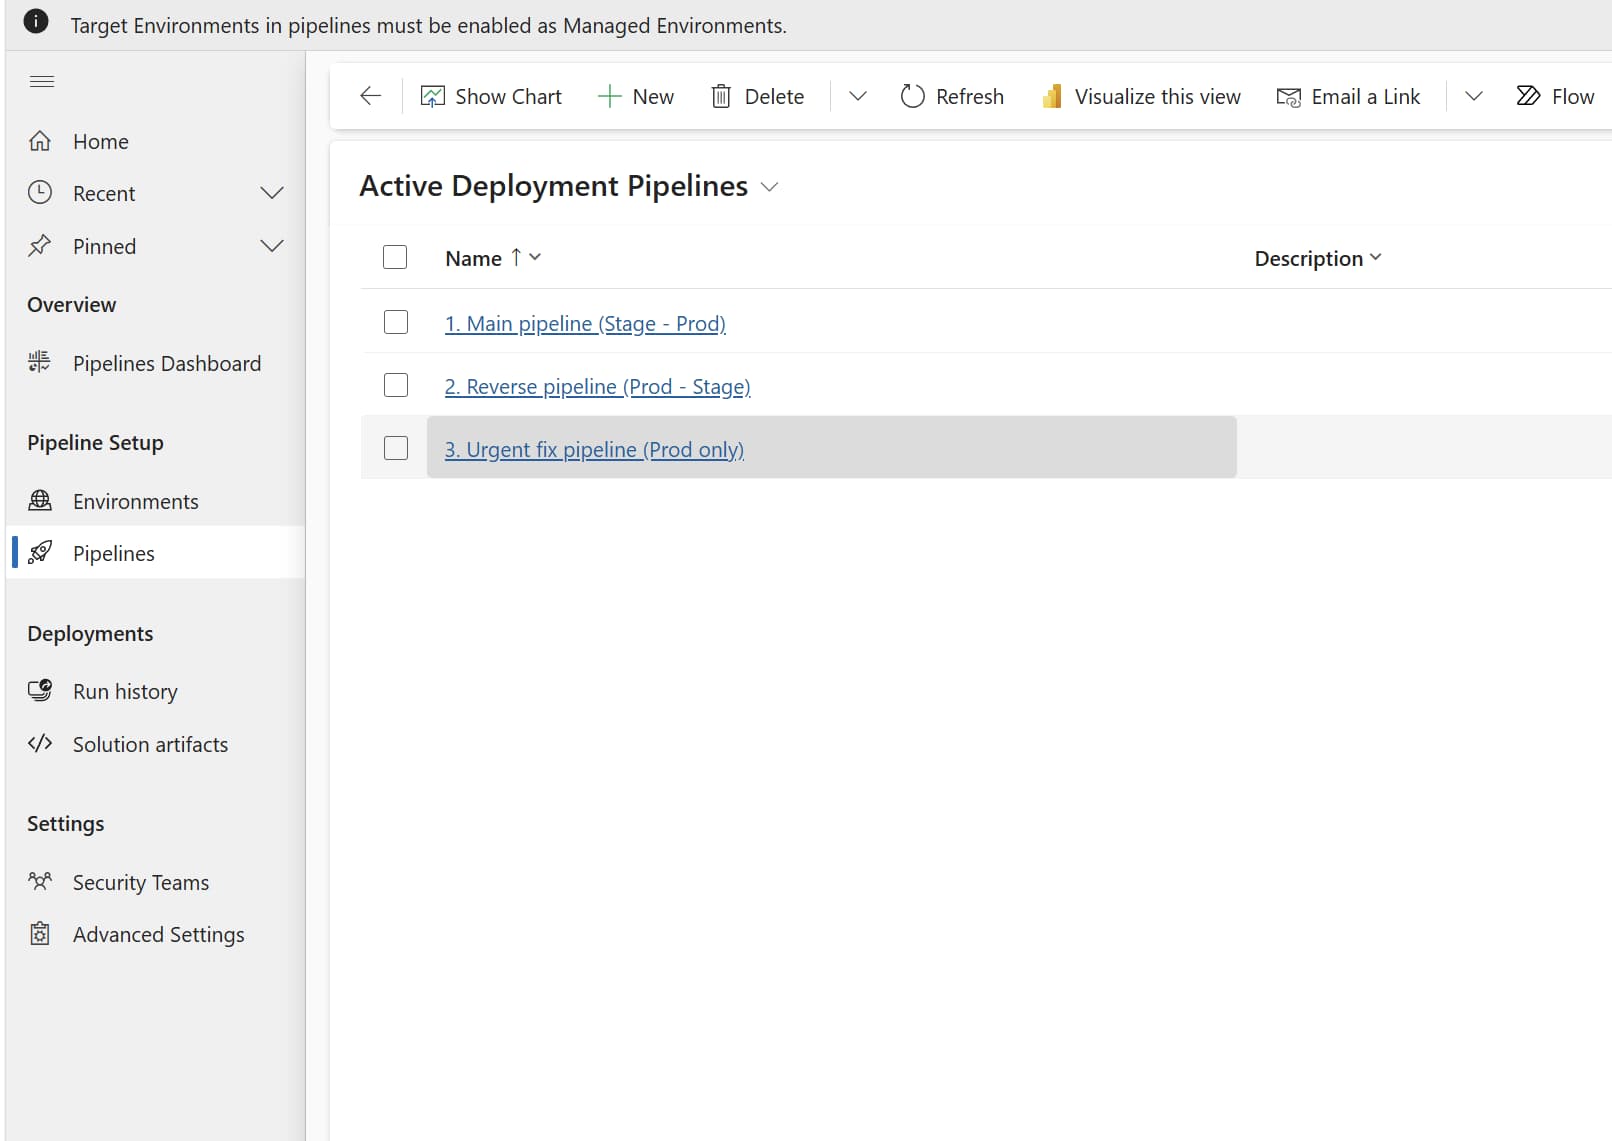
! Note. How many pipelines you need depends on your release process. A common setup we use across the projects consists of three separate pipelines:
The Main Pipeline: "Development → Staging → Production", for regular releases.
The Reverse Pipeline: "Production → Staging", for pulling a stable production state back down for testing or hotfix validation.
The Urgent Fix Pipeline: "Production" only, for hotfixes that need to skip the full chain and go straight to the live environment.
! Note. Each of these is configured as its own pipeline record, following the same steps below.
Step 5. Define the "Deployment Stages".
"Deployment Stages" are the actual steps a solution passes through inside a pipeline.
Go to the "Deployment Stages" and select the "New Deployment Stage".


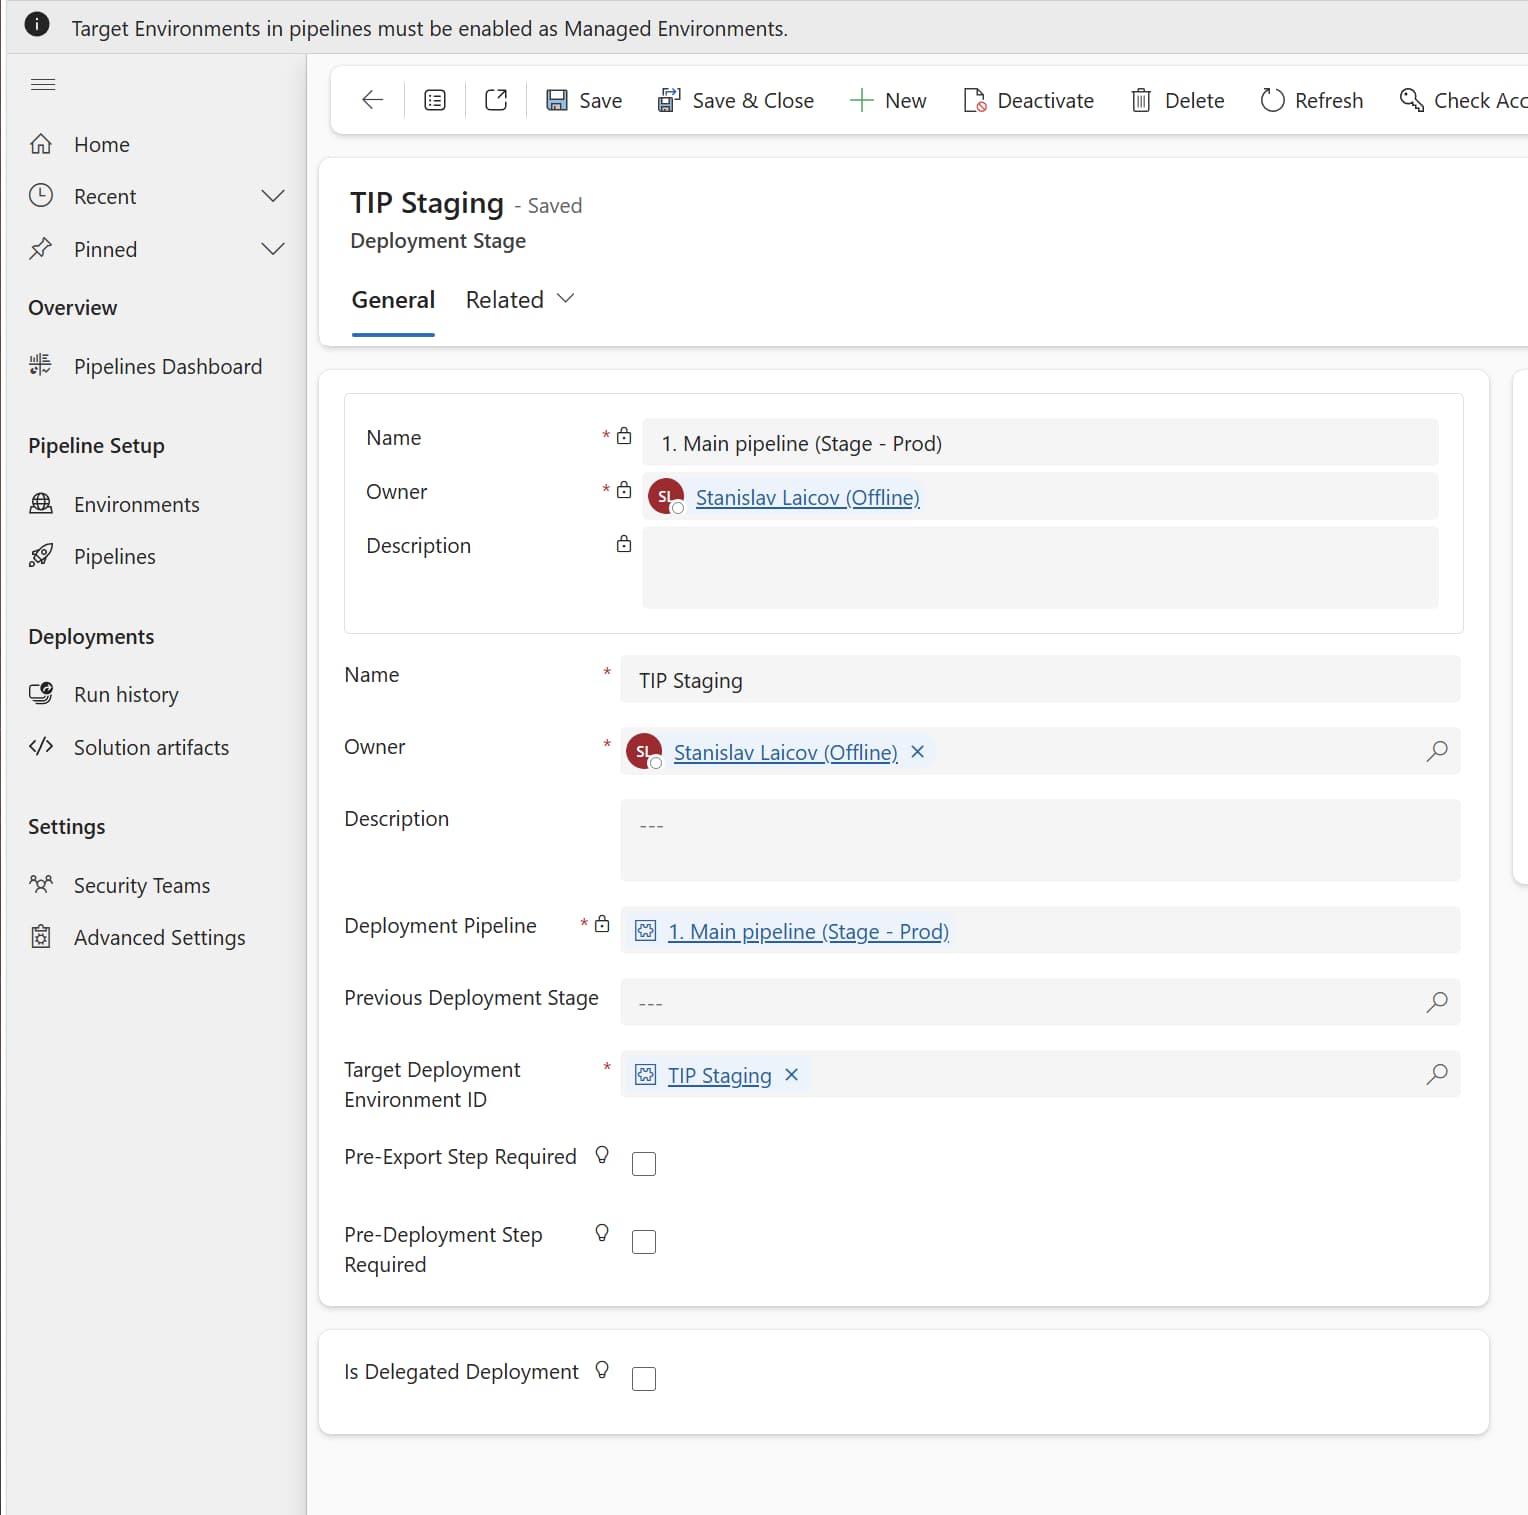
Create the first stage: "Staging".
Give it a name.
Set the "Target Deployment Environment" ID by looking up the "Staging Environment" record.
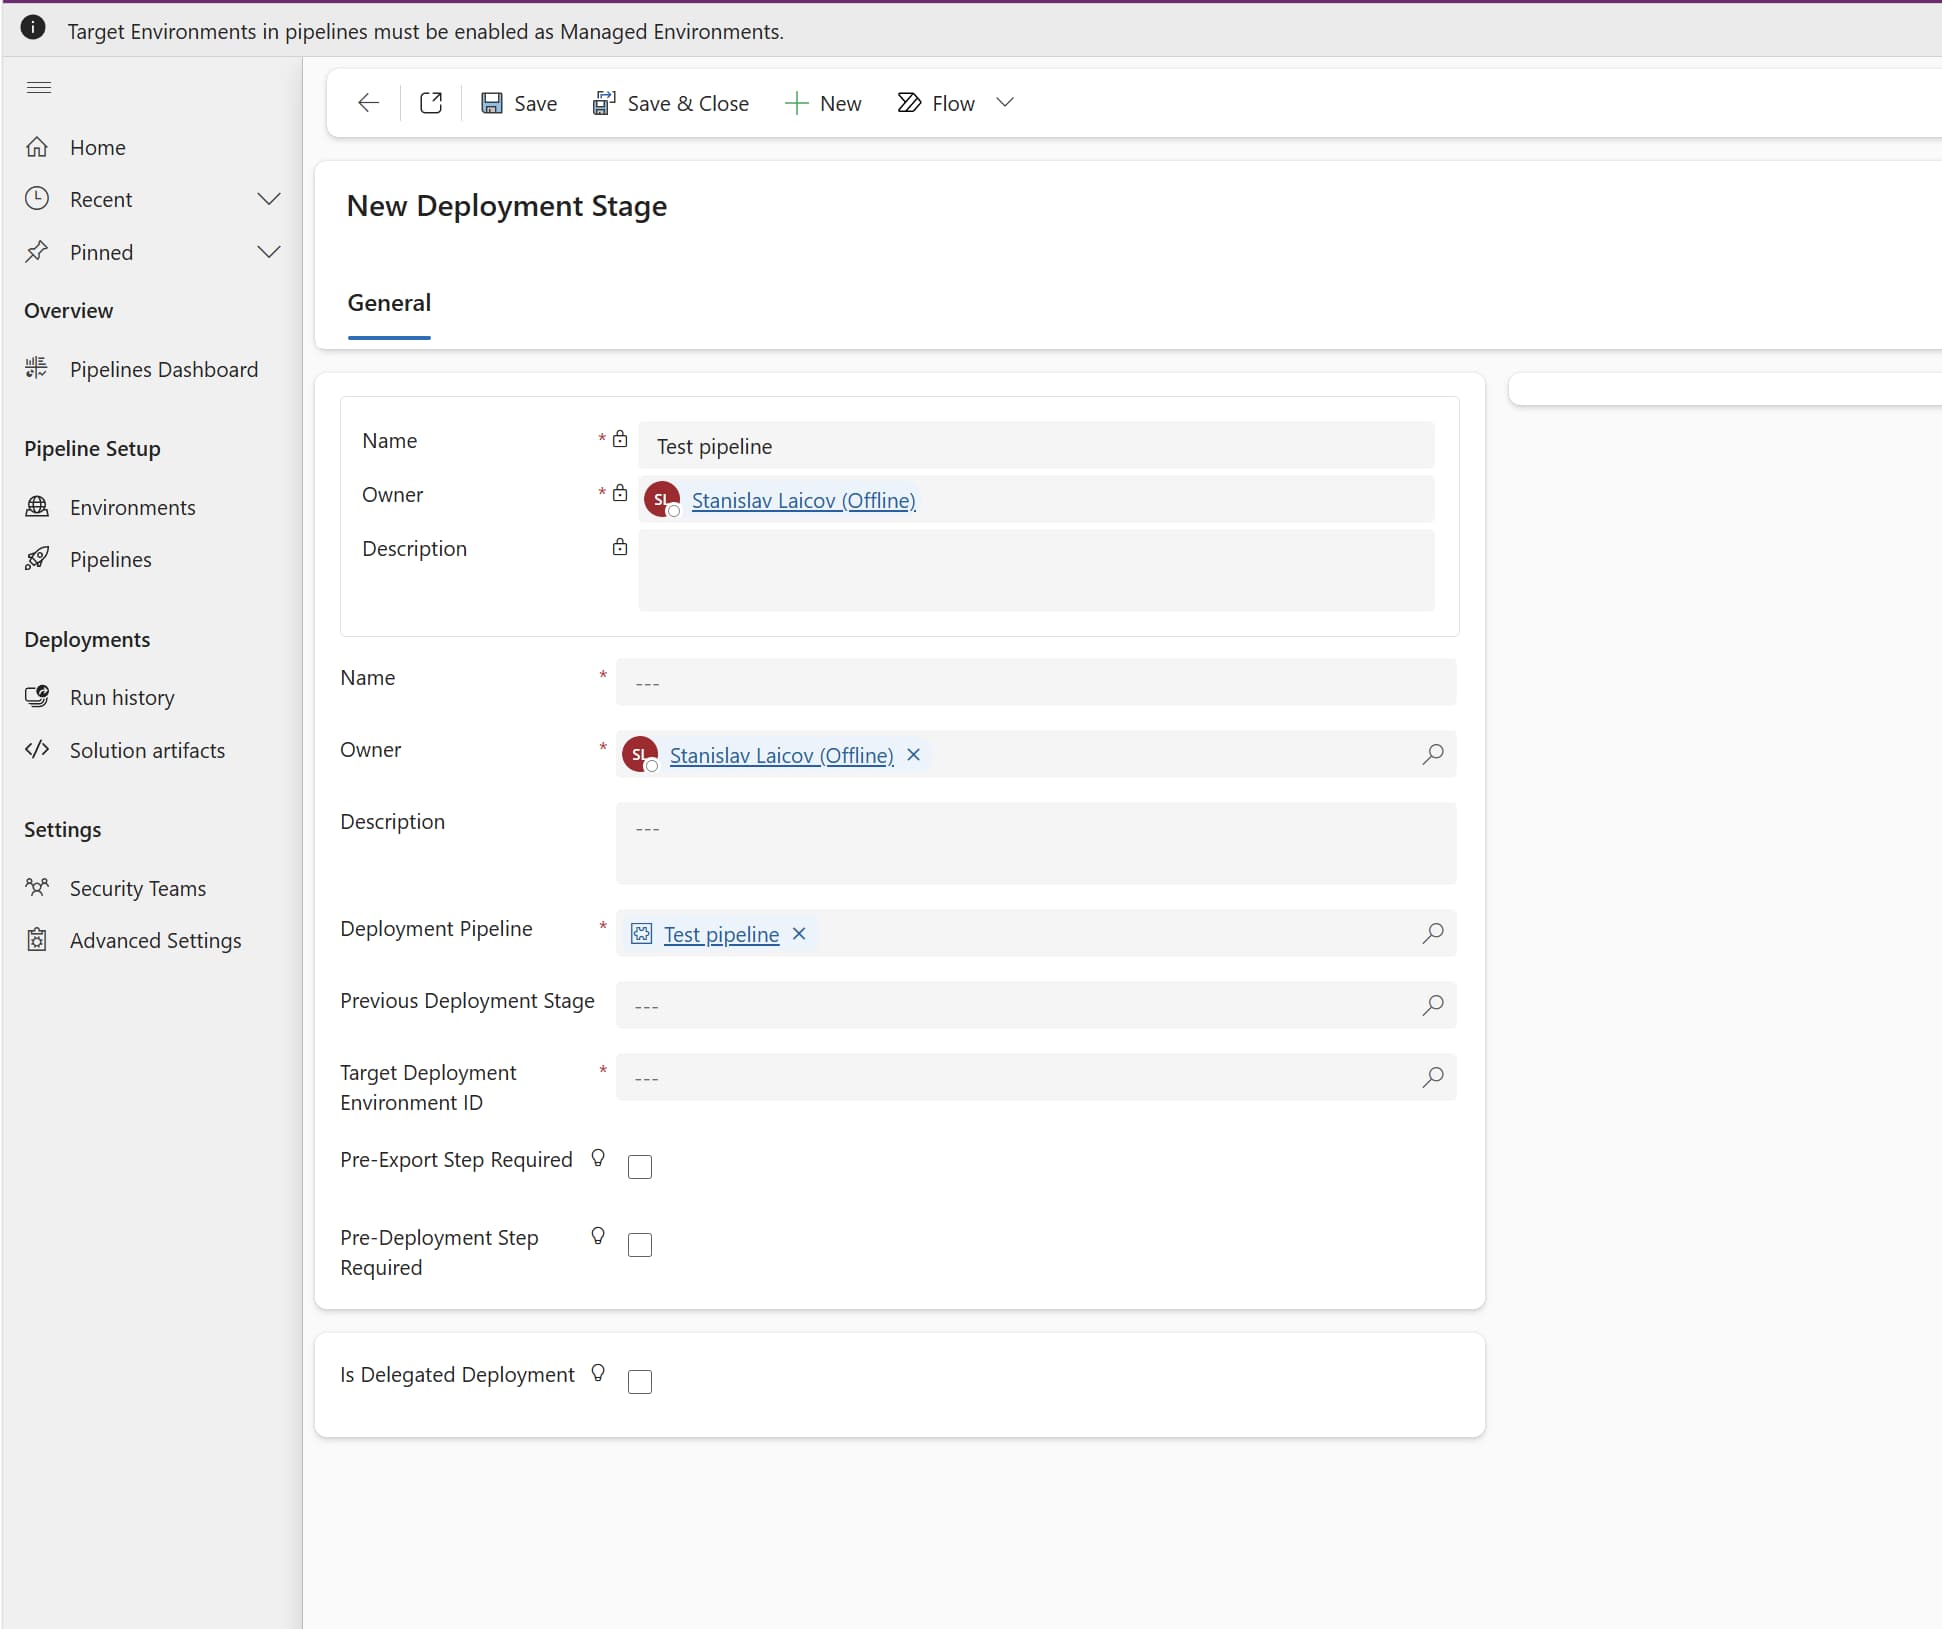
Leave the "Previous Deployment Stage" empty, since the "Staging" is the first stop after the "Development".
Click on the "Save & Close".
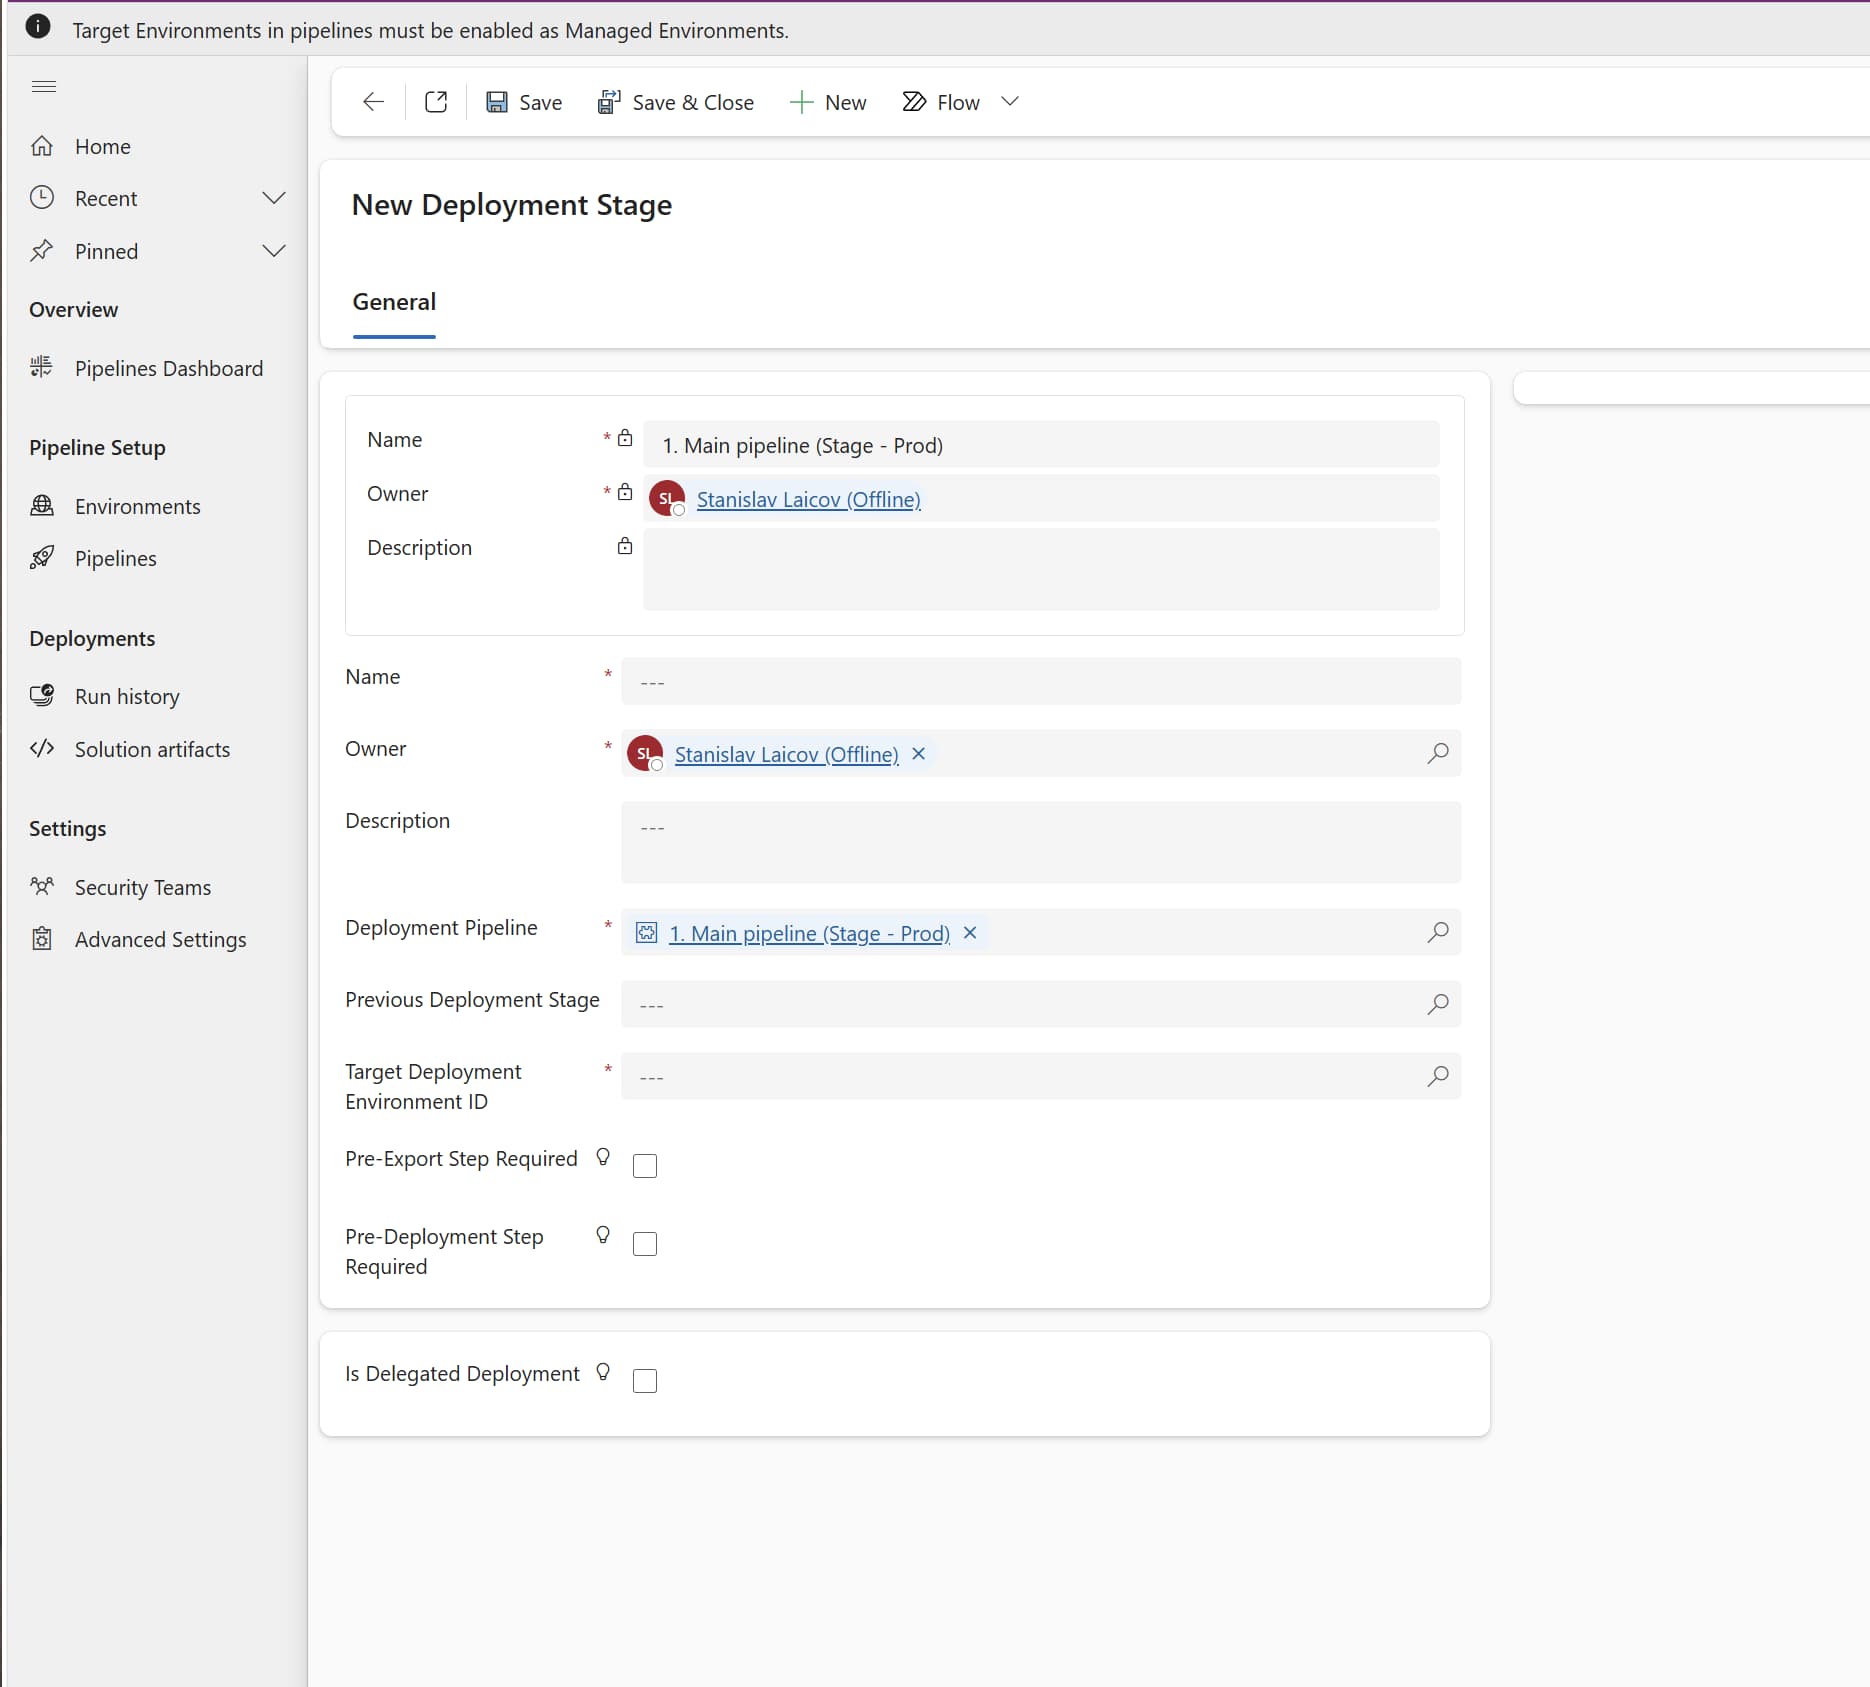
Create the second stage: "Production".
This time, set the "Previous Deployment Stage" to the "Staging".
Set the "Target Deployment Environment" ID to the "Production" environment.
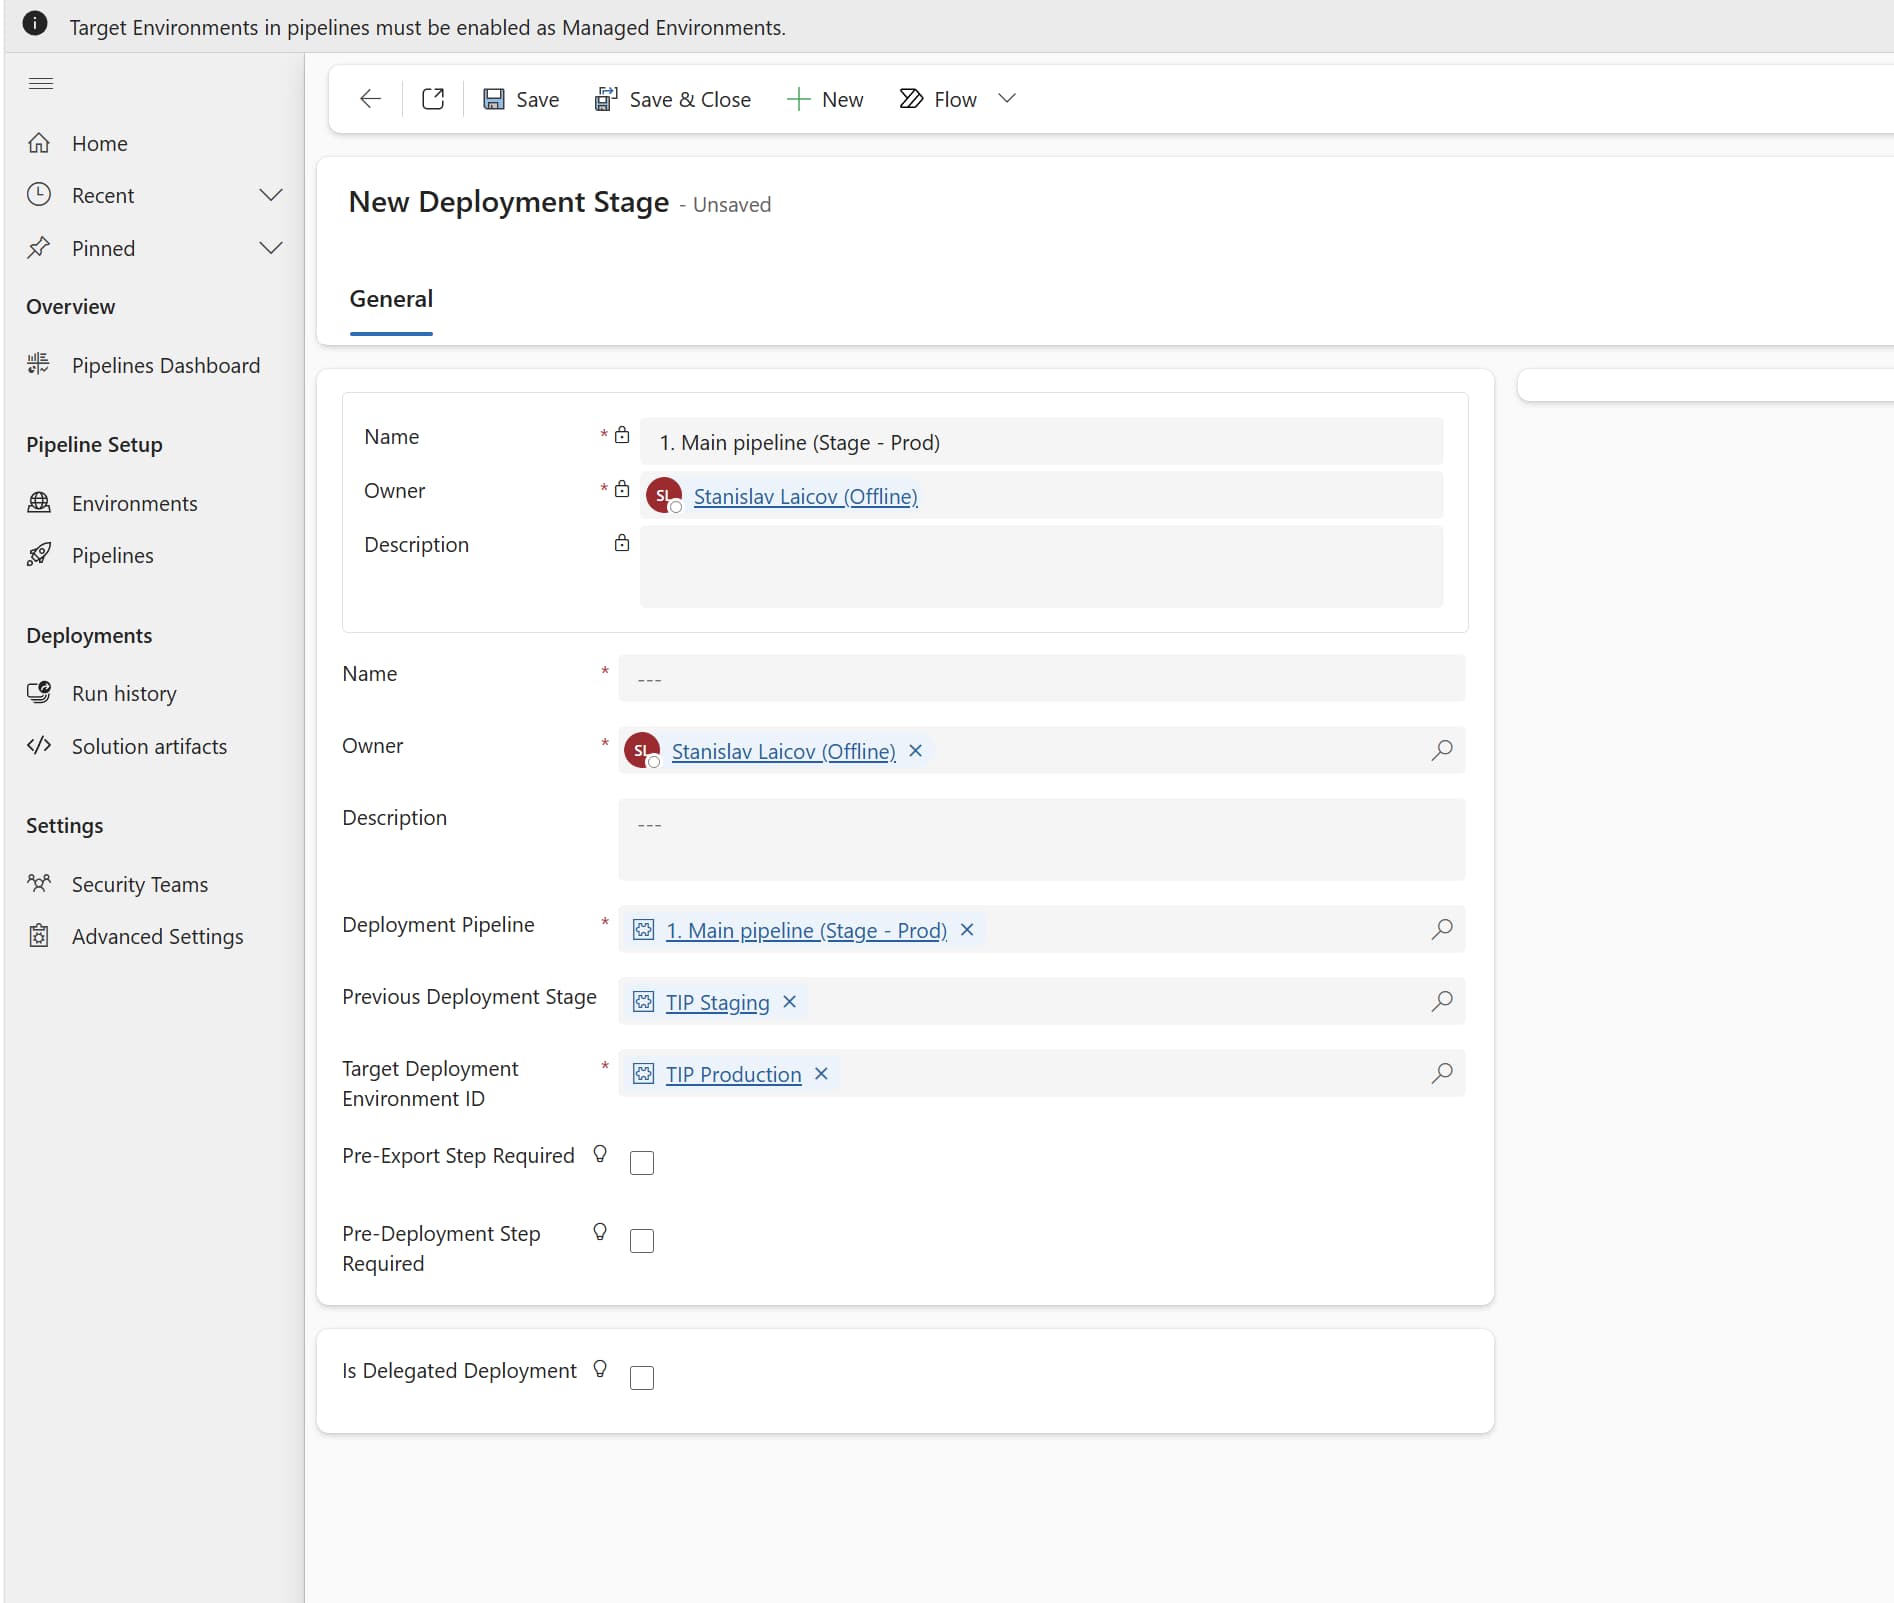
Click on the "Save & Close".
Press the "Save & Close" button on the pipeline.
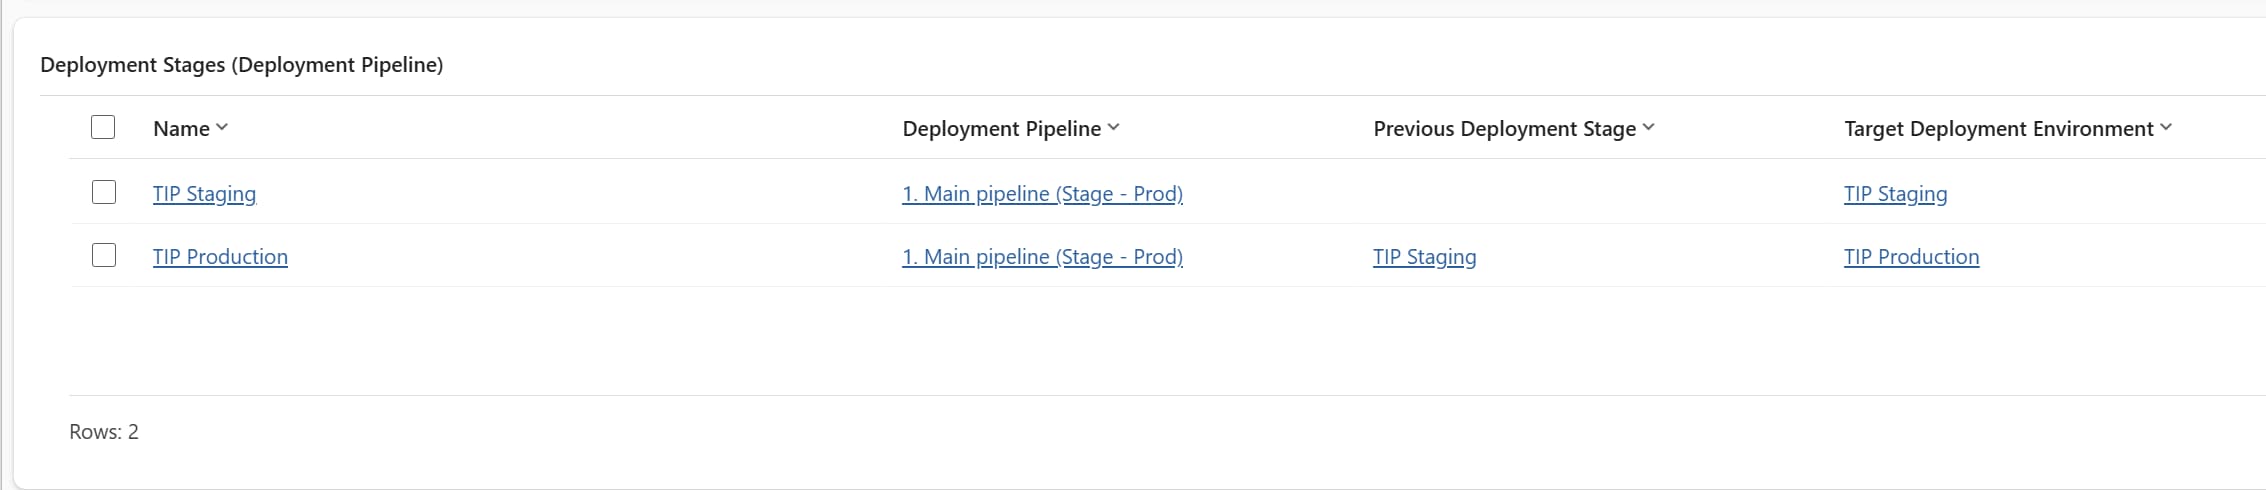
Your first pipeline is now completed. For any additional pipelines, such as the reverse or urgent fix pipelines mentioned above, repeat the same process, adjusting the stage order to match. A reverse pipeline, for example, starts at the "Production" (no previous stage) and ends at the "Staging".
! Note. An urgent fix pipeline may consist of a single "Production" stage with no chain at all.
Deploying a Solution Through a Pipeline
With the configuration in place, deployment goes through these stages:
Go to the "make.powerapps.com", open the "Solutions", and select the solution you want to deploy.
Click on the "Deploy" in the ribbon.
On the deployment page, pick the pipeline you want to use from the list of configured pipelines.
Press the "Deploy" here on the first stage (for example, "Staging").
In the dialog, choose the "Now", then the "Next". The pipeline runs a validation check. Once it passes, click on the "Deploy".
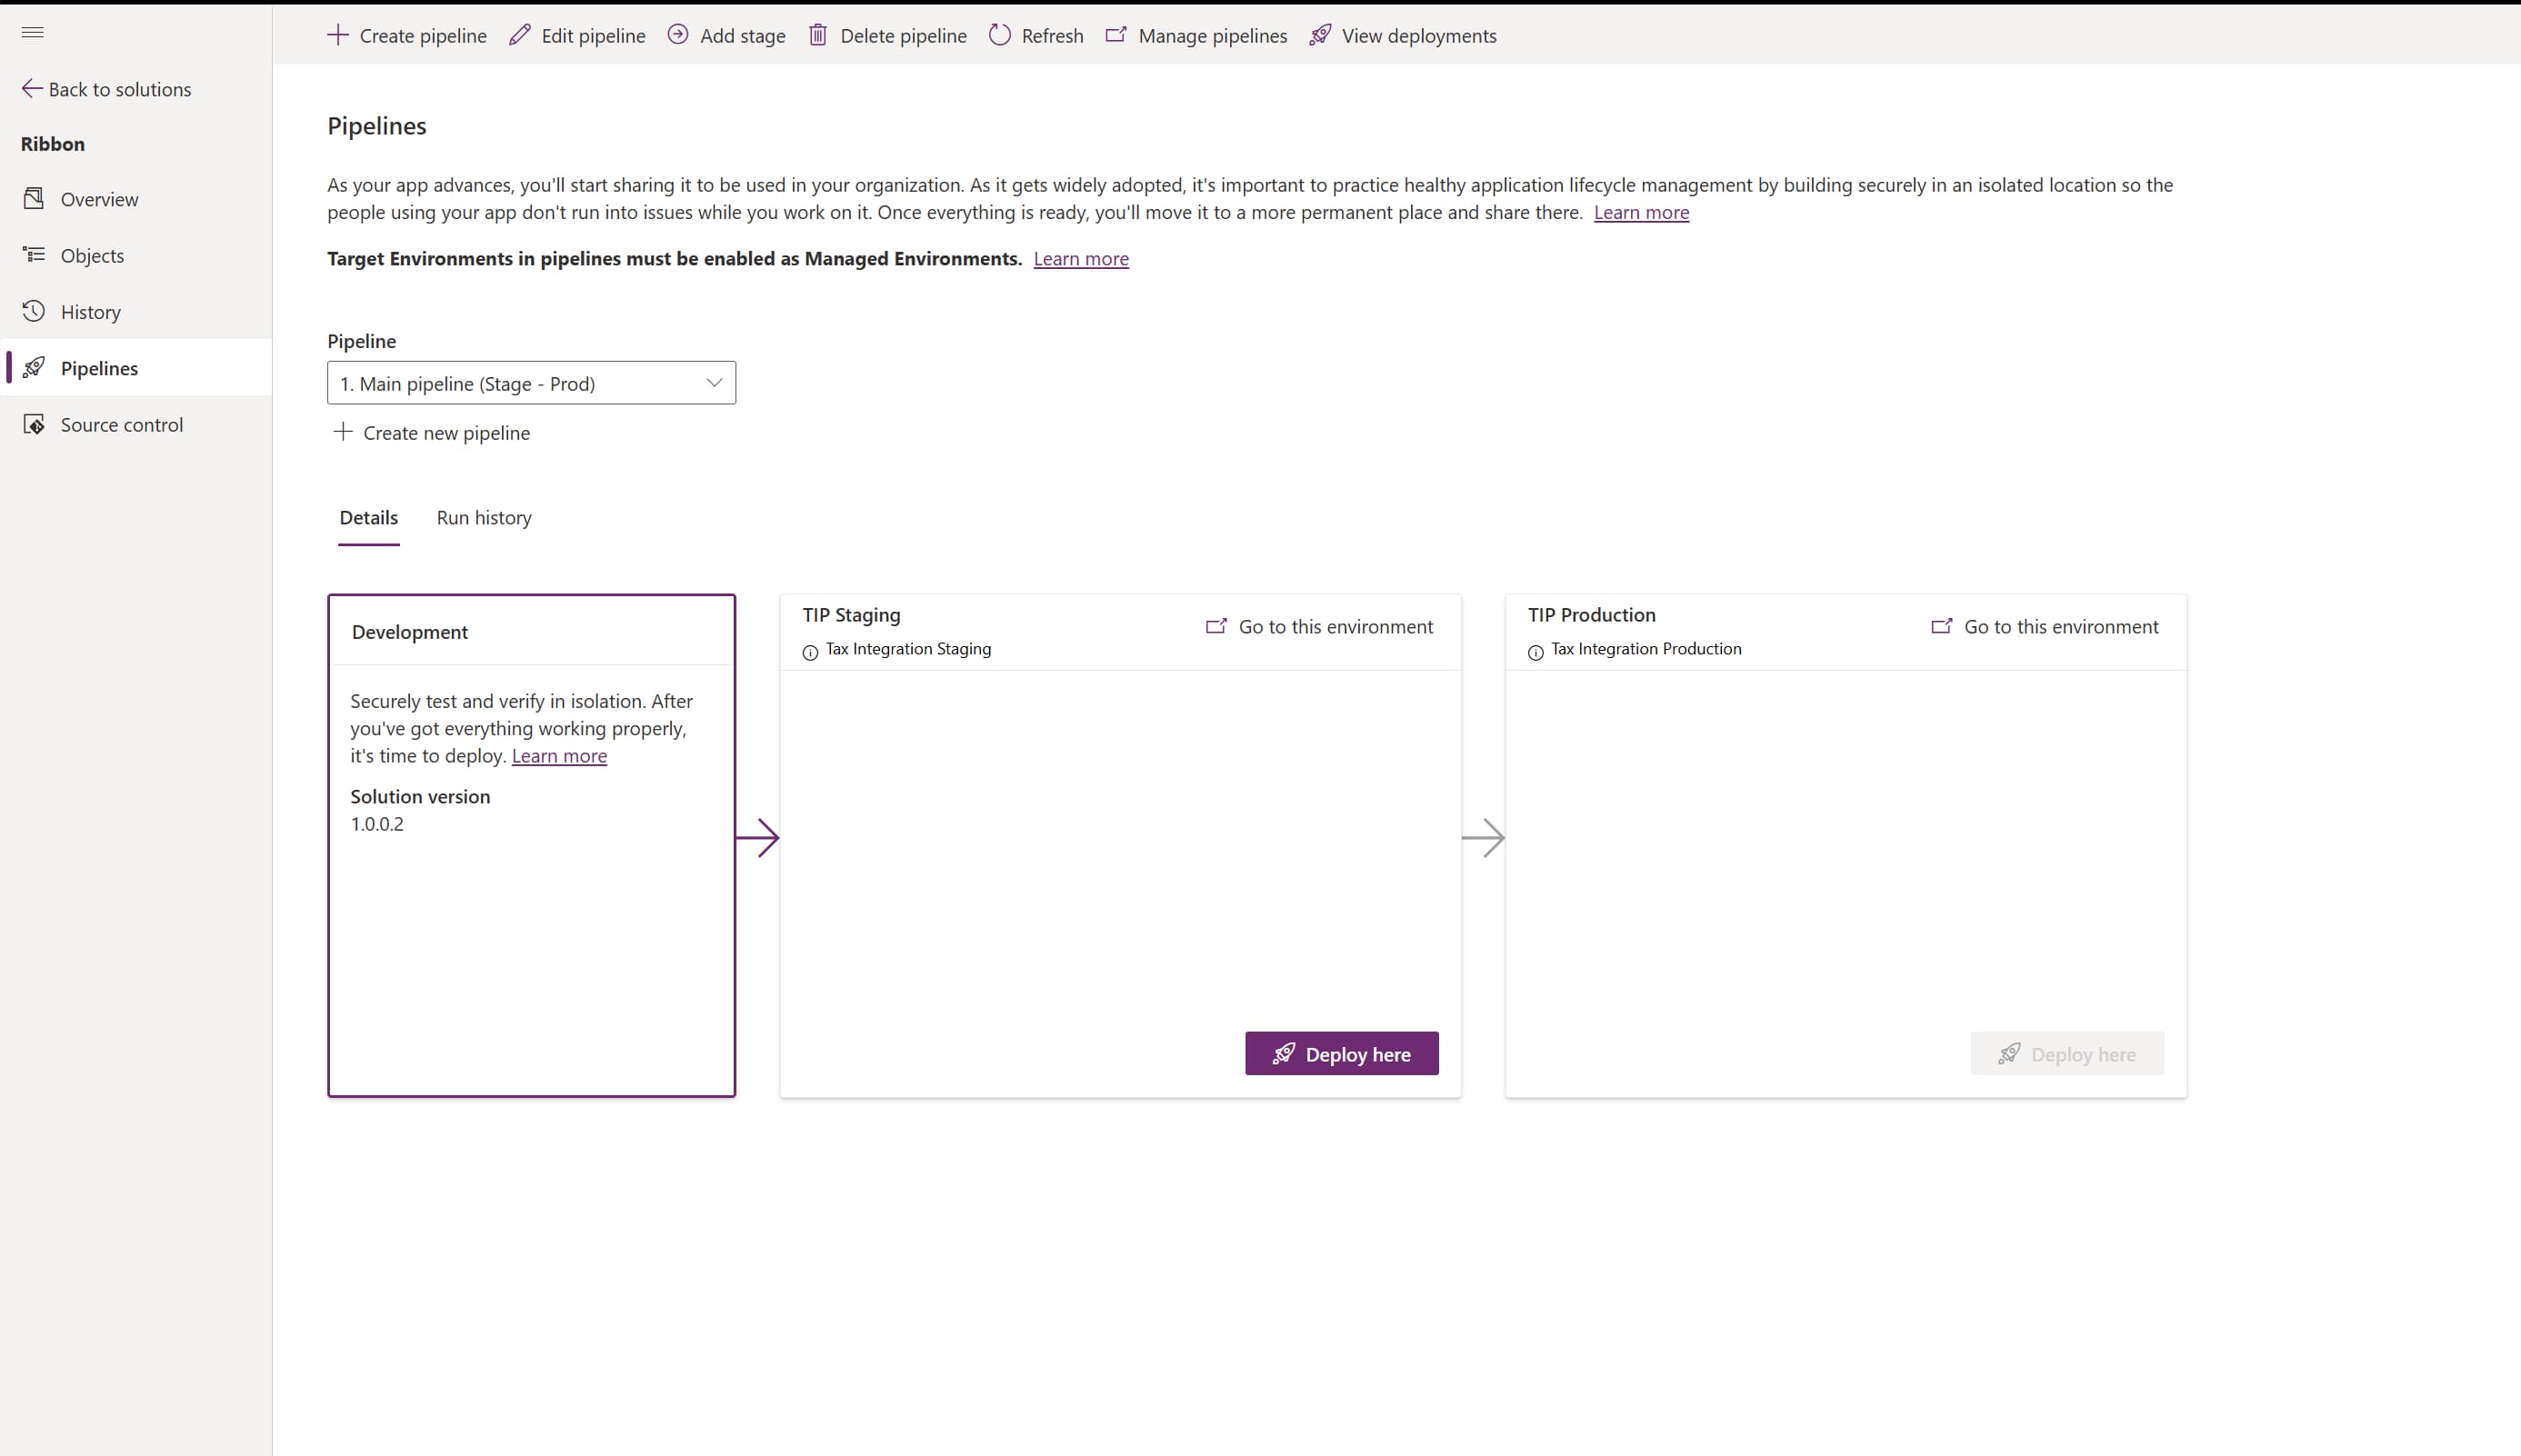
The solution is installed automatically on the target environment. Once that finishes, the "Deploy Here" becomes available on the next stage ("Production", in our example). If you need to release a newer version before promoting to the next stage, you can redeploy to the same stage. Clicking on the "Deploy Here" again pulls and installs the latest version, and that version eventually moves forward.
You can track the deployment status at any time from the "Deployment" section in the solution list, which shows the current state of every stage the solution has passed through, along with a full history and downloadable archives of every version deployed.
! Note. Unlike manual deployment, pipelines let you queue up multiple solutions at once. Trigger a deployment for each solution you need to release, and Power Platform manages the queue, processing the solutions in order rather than requiring you to wait for each one to finish before starting the next.
Where it Comes in Handy
What to Keep in Mind
Conclusion
Related Content
Frequently Asked Questions that May Interest You
In a developer environment. That environment hosts the pipeline configuration, environment records, stages, and deployment history, even though the actual deployments target separate Staging and Production environments.
Global Administrator rights, or a role that specifically includes pipeline administration permissions.
Yes. Triggering a deployment for several solutions queues them automatically, and Power Platform processes the queue without requiring each deployment to finish before the next starts.
Also, both managed and unmanaged solutions are automatically exported and stored in the pipeline host for every deployment.
The new Power Platform Pipelines is a great alternative to Azure DevOps. It is easy to set up and maintain, plus it has a more user-friendly interface for installation and configuration. This option is perfect for simpler projects, managed environments, and small companies. However, it has limited capabilities for complex workflows and is not suitable for enterprises and large companies. If there are multiple development environments, the only tool for creating proper CI/CD pipelines is Azure DevOps. It provides extensive integration and scalability, but it also requires technical specialists and tenant admin support.
You can learn more here: https://learn.microsoft.com/en-us/power-platform/alm/pipelines
Table of contents: