
A Short Overview of the Article
This "how-to" guide explores how to use Excel to import and export data in Customer Engagement and model-driven apps.
It is particularly helpful when migrating data from systems that support Excel exports, or when uploading records directly from Excel files on the user’s computer and is aimed at business users working with Excel-based data operations in Microsoft Dynamics 365.
A Short Reference About the Author
Andrei is an experienced Project Manager whose team successfully works with technologies such as Dynamics 365, Power Platform, Azure, Copilot, and more, with a personalized approach to each client. He also has rich expertise working with Data Management.
Introduction
Managing data efficiently is a fundamental skill in Microsoft Dynamics 365. Gaining a solid grasp of data formatting and mapping is crucial for enabling smooth data transfer. Effective data management delivers dependable insights, streamlined workflows, and better customer interactions, making it vital to maximize the value of Microsoft Dynamics 365.
Read the article to strengthen your data management capabilities and elevate your business operations through accurate Excel imports and exports.
But before going forward, it is reasonable to get acquainted with the article How To Import and Export Data in Microsoft Dynamics 365 on the UDS Blog.
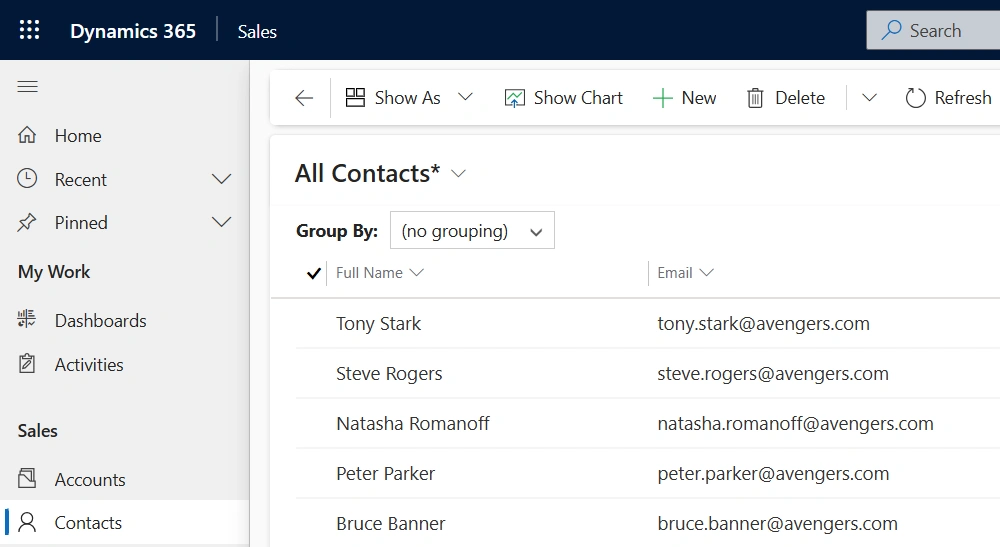
Importing an Excel File
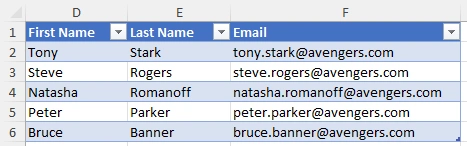
Assuming you are already familiar with our previous article about data import and that your import file is ready, we will import an Excel file containing several Contact records that we plan to add to the system.
There are two main options to import data from the Dynamics interface:
From the table interface:
-
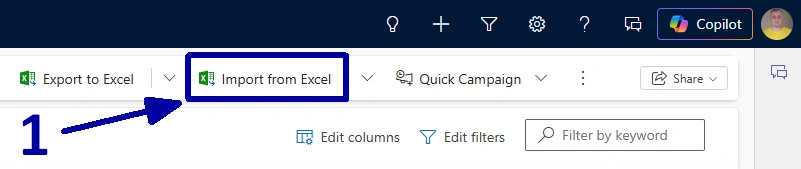
Open the “Contacts” table and look at the ribbon near the end. In some cases, the option may be hidden behind the three-dot menu. There you will find the “Import from Excel” button (1).
-
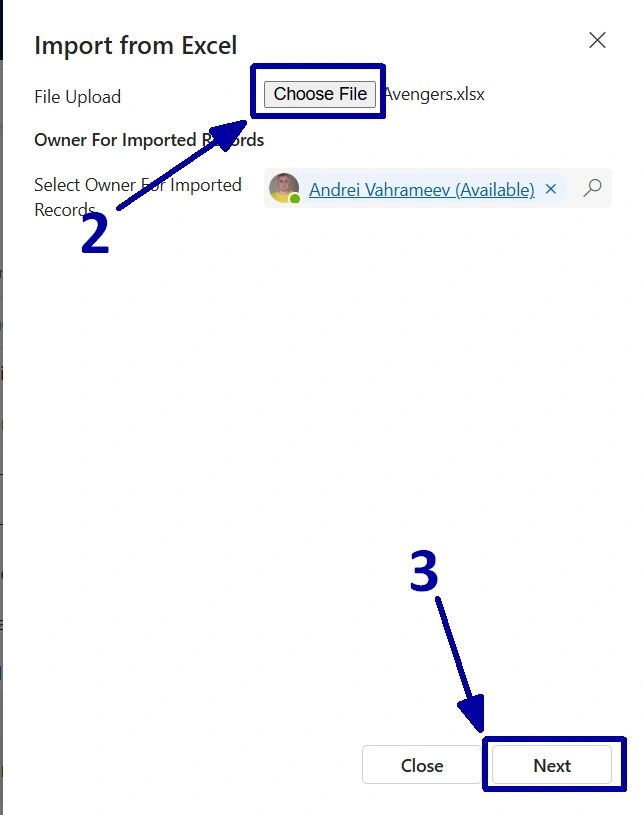
Click on it to open the sidebar, then select the “Browse” (2) and choose the file you want to upload. After that, click on the “Next” (3).
-
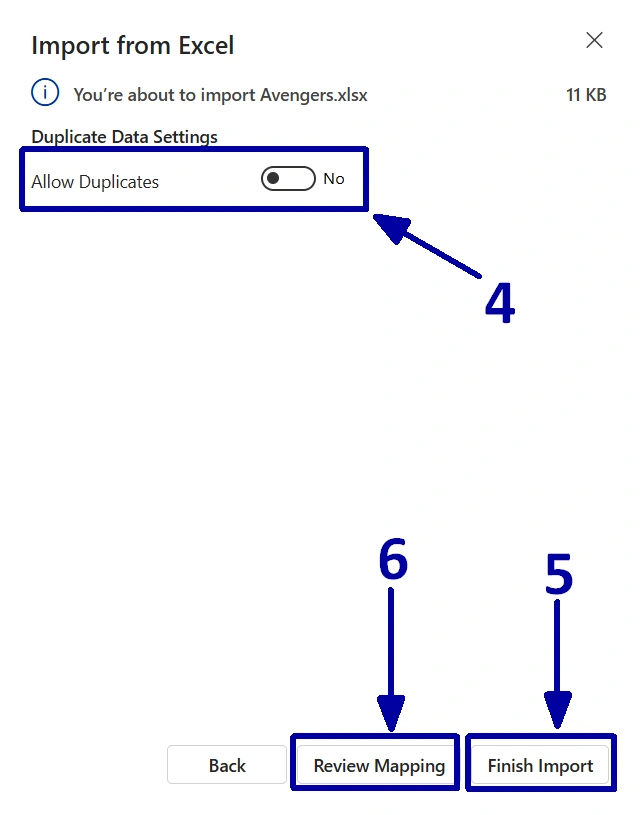
On the next sidebar page, you can choose whether to allow or prevent duplicate creation (4). Once you get more comfortable with the import process, you can even click on the “Finish Import” (6) right away to start it. But for now, if you are still learning, it is better to select the “Review Mapping” (5).
-
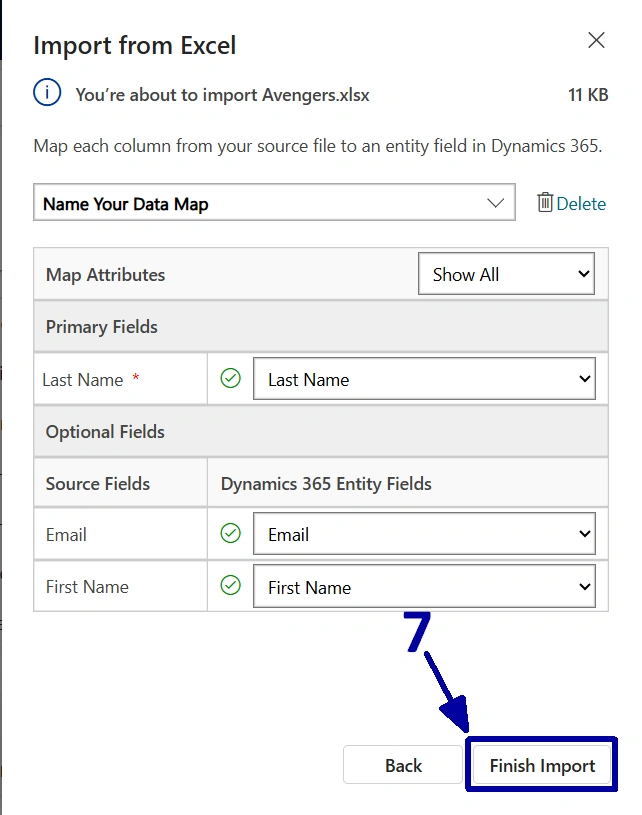
On this sidebar page, you can map columns from your document to the corresponding columns in the system, if needed. In most cases, the mapping is correct by default, but sometimes it needs a bit of adjustment, which is another good reason to choose the “Review Mapping” on the previous step. Once the mapping is confirmed, you can complete the import by clicking on the “Finish Import” (7).
-
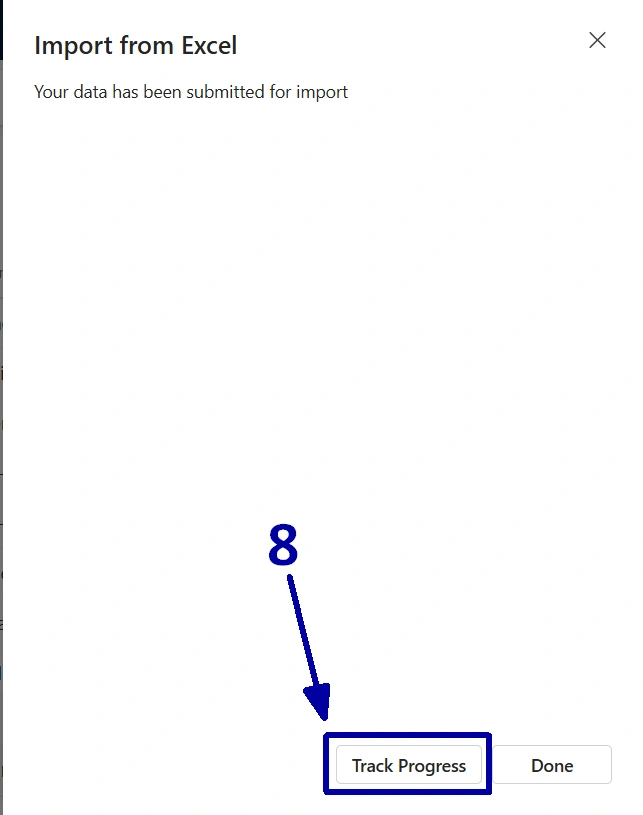
The next sidebar page will let you open (8) a new tab where you can monitor the import process.
-
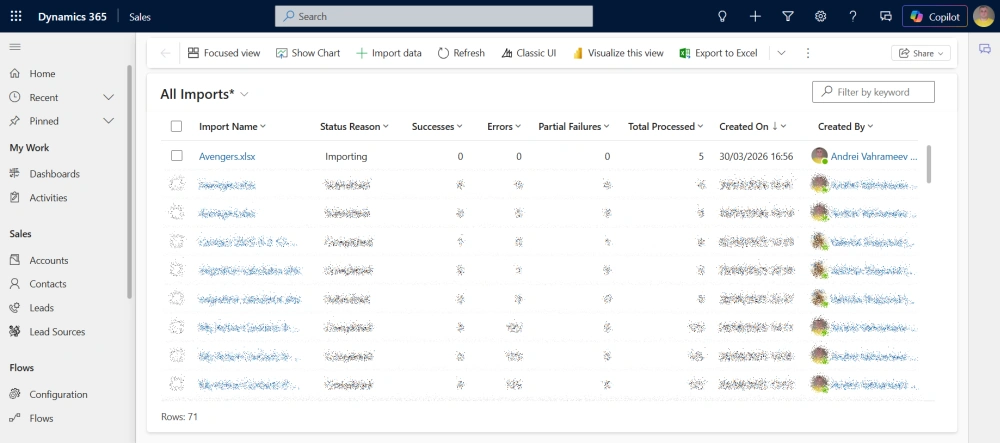
It will take you to the Imports page that shows all imports and their current status.
-
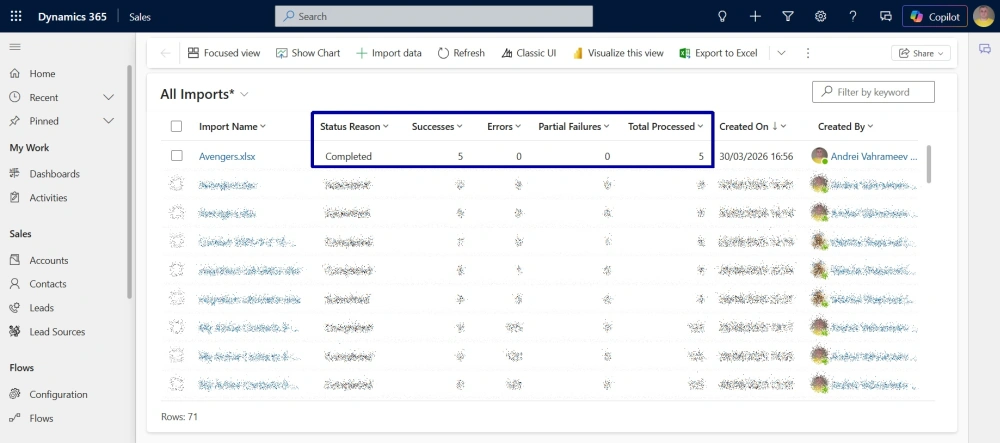
After refreshing this view, pay close attention to the selected columns, as they show how the import has been processed. The “Total Processed” column shows the number of records found in the import file. The “Errors” and the “Partial Failures” columns indicate whether anything unexpected has happened during the import. The “Successes” column shows how many records have been imported without issues. Ideally, the numbers in the “Successes” and the “Total Processed” must match.
-
Now, open the CRM and check the newly created records.
As you can see, all contacts have successfully been added to the CRM.
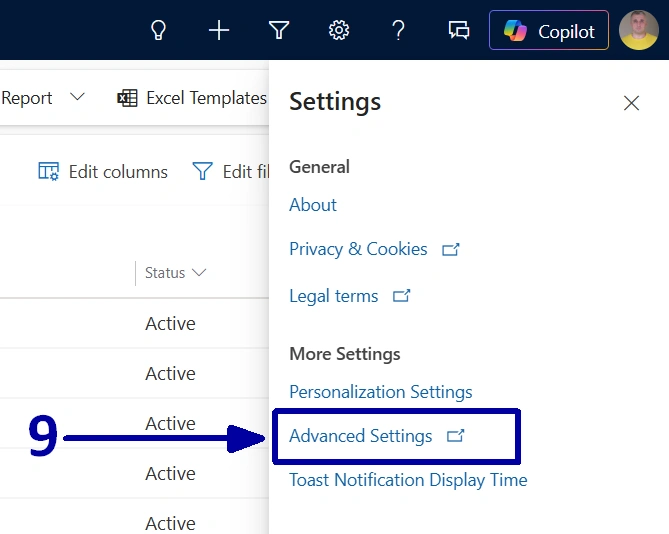
From Advanced Settings:
-
Open the “Settings” and select the “Advanced Settings” option (9).
-
Now, select the “Data Management” item on the left and choose the “Imports” option.
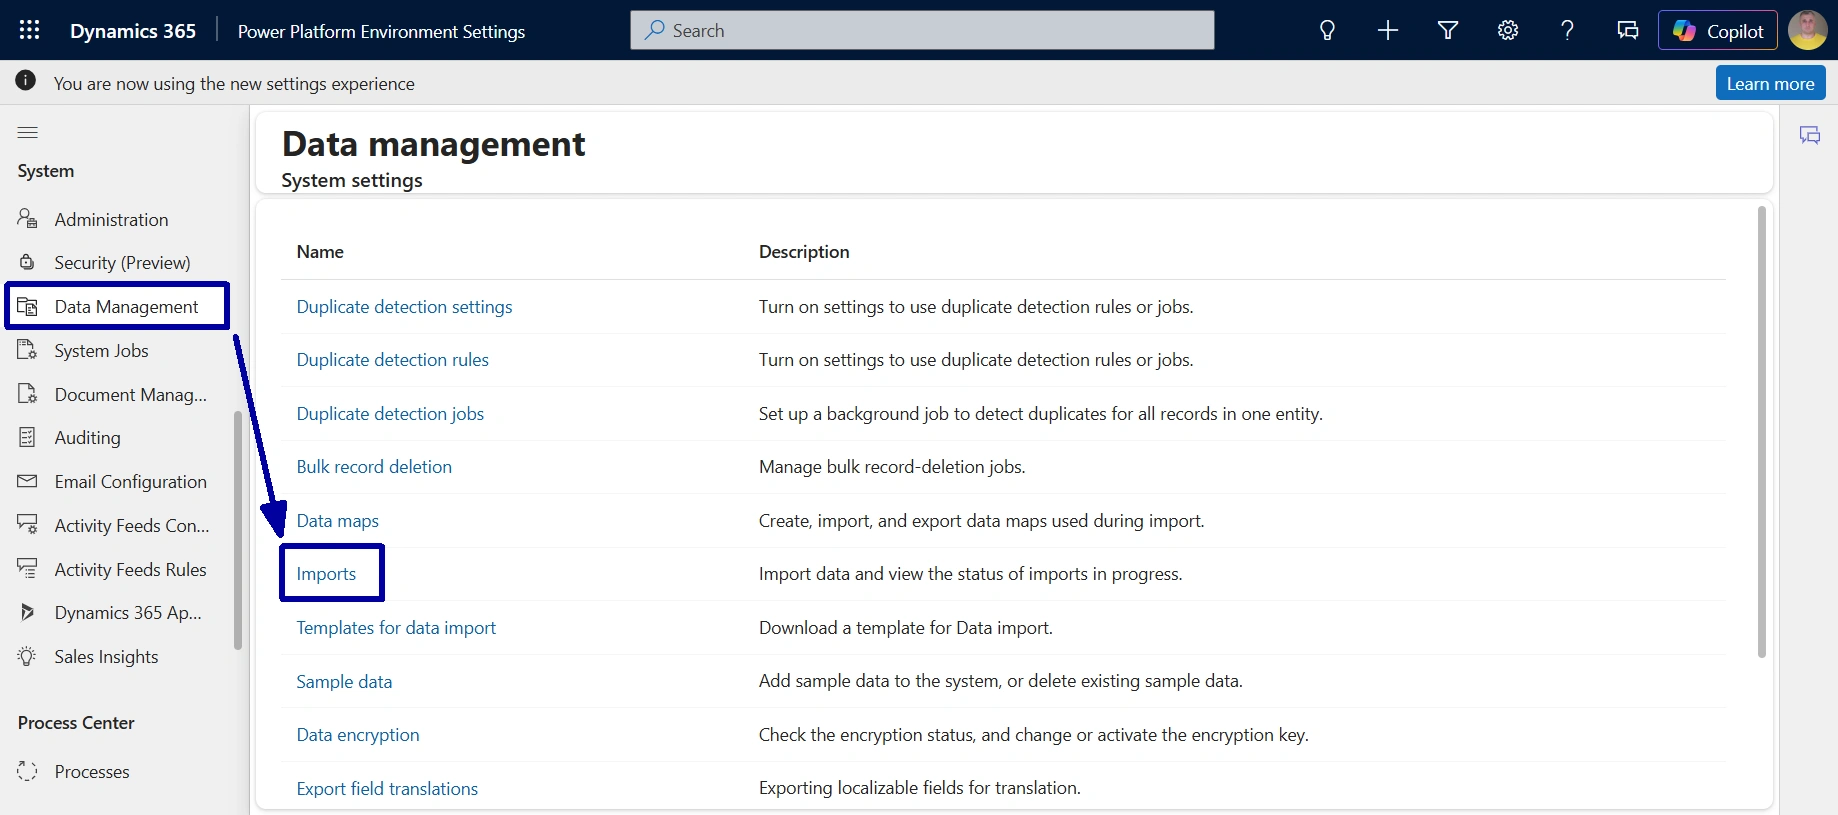
-
As a result, you will be redirected to the Imports page, which you are already familiar with. Click on the “+ Import Data” on the ribbon, and a sidebar will open on the right to guide you through the import process almost exactly as in the first option.
! Note. The main difference is that, since you are importing the file outside a specific table, the system does not know which table to assign the new records to. Because of that, at the “Map record type” step, you need to select the appropriate “Entity Mapping” option (10).
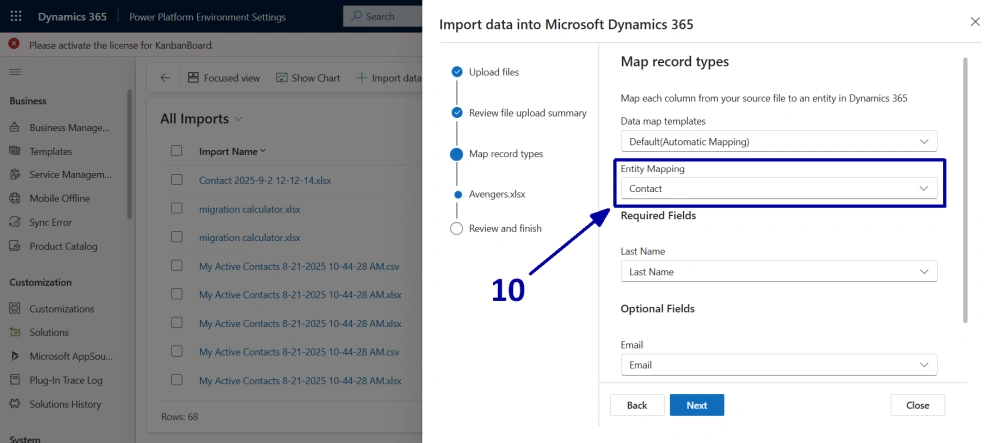
The rest of the import process is similar. You just need to monitor it and fix any errors if they appear.
Automation with Scheduled Data Imports/Exports, Power Automate, APIs, and Integrations
While manual Excel imports and exports are useful for one-time or occasional tasks, many organizations benefit from automating these processes. Automation reduces manual effort, minimizes errors, and ensures that data is always up to date across systems.
Microsoft Dynamics 365 supports several automation approaches, including Microsoft Power Automate, APIs, Azure-based services, and third-party integrations.
Common automation approaches include the following:
-
Scheduled Data Imports/Exports
You can configure recurring data operations to automatically move data in and out of Dynamics 365. These are typically implemented using background jobs, integration tools, or Azure services.
-
Automation with Power Automate
Microsoft Power Automate enables low-code automation by creating flows that trigger based on events or schedules. It integrates natively with Dynamics 365 and many external systems.
-
API-based integrations
Dynamics 365 provides REST APIs (such as the Web API) that allow developers to integrate external applications directly with the platform. This approach is more flexible and better suited to complex scenarios.
-
Azure-based integrations
Using Microsoft Azure services (such as Logic Apps, Azure Functions, or Data Factory), you can build scalable and enterprise-grade integration solutions.
Automation allows users to benefit from the following capabilities:
- eliminating repetitive manual imports and exports
- reducing human error in data handling
- ensuring standardized data synchronization across systems
- supporting growing data volumes and business complexity
Conclusion
Thus, mastering data import and export in Microsoft Dynamics 365 is essential for maintaining accurate, consistent, and actionable data across your organization. Whether performing manual Excel imports or leveraging advanced automation tools such as Power Automate, APIs, and Azure integrations, a well-structured approach to data management ensures smoother operations and better decision-making.
By applying the practices outlined in this article, you can minimize errors, improve efficiency, and create a scalable data strategy that supports your business growth and long-term success.
Keep in mind that success depends on careful preparation and a solid understanding of data structures and mapping. With these fundamentals in place, you are well-equipped to fully leverage Microsoft Dynamics 365 for your business operations.
Frequently Asked Questions that May Interest You
In Microsoft Dynamics 365, supported formats for Excel import include Excel (.xlsx), CSV, and XML. Using system-generated templates is recommended, as they simplify Dynamics 365 data management and ensure accurate data mapping.
While not mandatory, using Excel templates in Dynamics 365 Customer Engagement and Model-driven apps Dynamics 365 is highly recommended. These templates align with Dynamics 365 system fields, making Excel imports to Dynamics 365 faster, more accurate, and easier to manage.
During Dynamics 365 data management, common import issues include incorrect formatting, missing required fields, duplicate records, and mismatched columns. Proper preparation helps avoid errors when performing Dynamics 365 Excel import tasks.
With Excel export Dynamics 365, you can export data via Advanced Find or directly from views in Model-driven apps in Dynamics 365. This functionality supports efficient Dynamics 365 data management by allowing users to analyze and share data outside the system.
Related Content
UDS blog articles:
- How to Create a Personal View in Microsoft Dynamics 365 (Classic Interface)
- How To Delete a Personal View in Microsoft Dynamics 365 (Classic Interface)
- How To Share Personal View in Dynamics 365
- How to Create a Table in the Dataverse
- Local CSV Upload and Parsing
- Mastering Data Import to Dynamics 365