
Mastering Data Import to Dynamics 365

Quite often, clients ask how to create or edit multiple entries in Dynamics or how to migrate data to Dynamics from other systems.
In this article, we will explain how to do this by using standard functionality.
After you have installed Dynamics 365 and have done customizations, if needed, the next step is filling the database with the records. Those might be Contacts, Accounts, or any other entry from your system.
You can fill in the database by:
- using standard functionality of Data Import from Excel/CSV or XML files
- using Dynamics API through custom code
The second option is rather hard. It requires developers to get involved and is appropriate to apply if you have a complicated data structure with a lot of relationships and hierarchies.
Further, we will review more closely how to import data from Excel/CSV or XML files. The process is pretty simple.
Import Data from Excel File
Download template from Dynamics - Settings - Data Management - Templates for Data Import
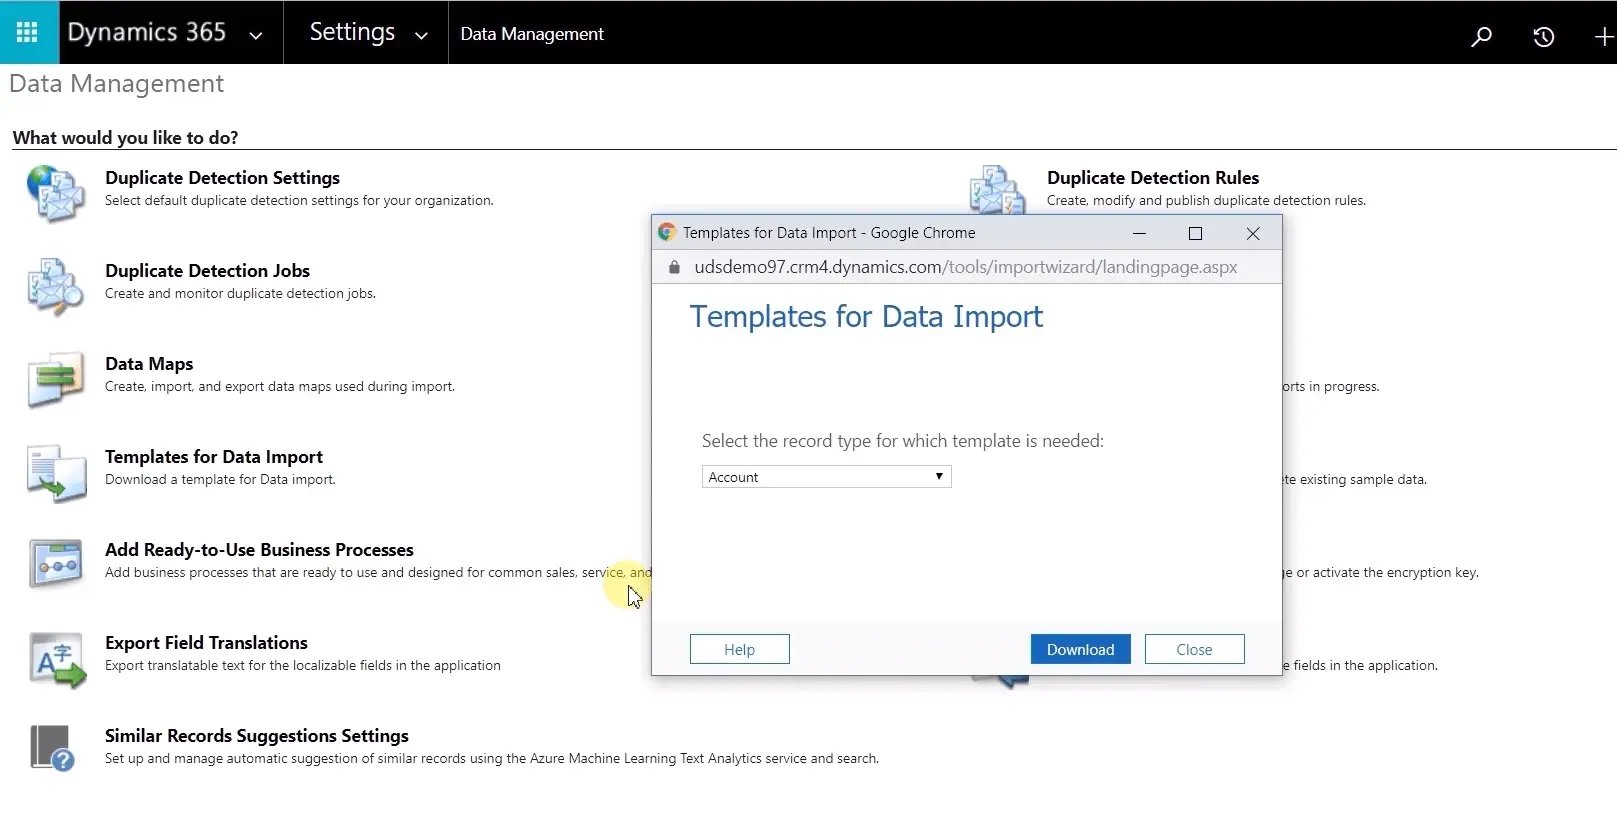
Then select the entity for which you want to import data - Download the template for it.
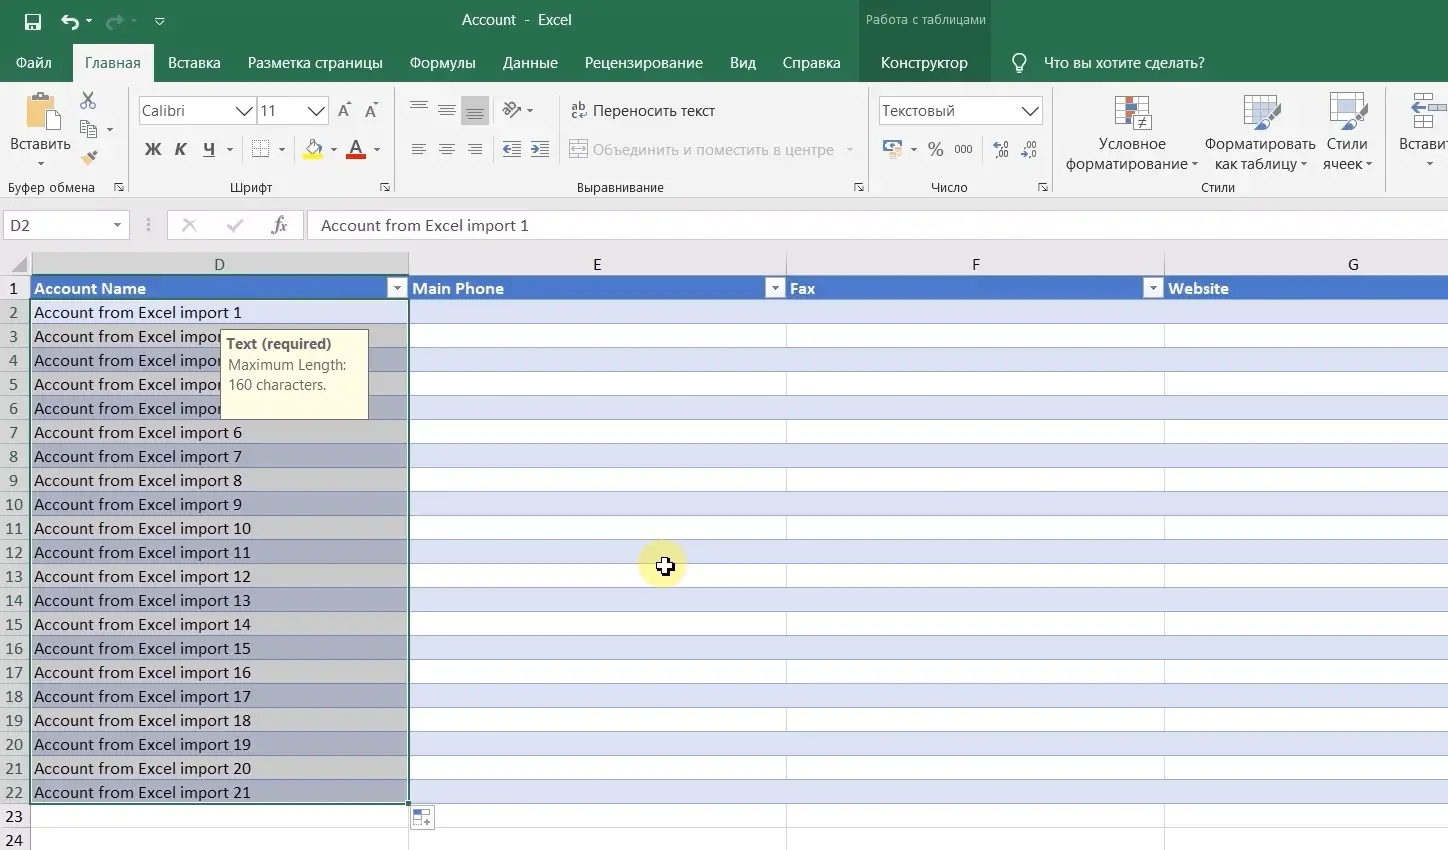
An Excel file with Template will be downloaded to your PC. Open that file and enter the needed entries.
In the Excel file, you will see columns with headers that match your fields in Dynamics. Also, you can see needed data types like optionsets/lookups/dates.
Pay attention that you should fill in data according to the proposed field format. Otherwise, failures will occur while importing.
After you have added all the needed data and saved the Excel file, you need to open Settings - Data Management - Import - Import Data - Choose the already created file and proceed with the import. If your Excel file was filled in correctly, shortly, you will see successfully created entries in your Dynamics.
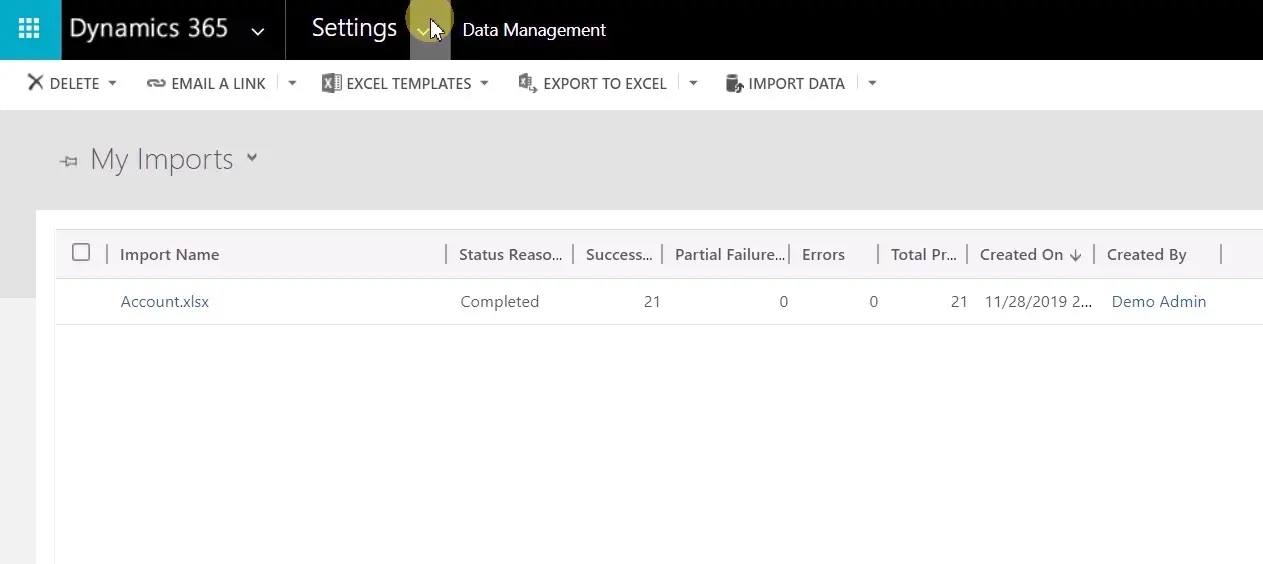
If not, you will see error logs and information about the failure.
Import Data from CSV or XML Files
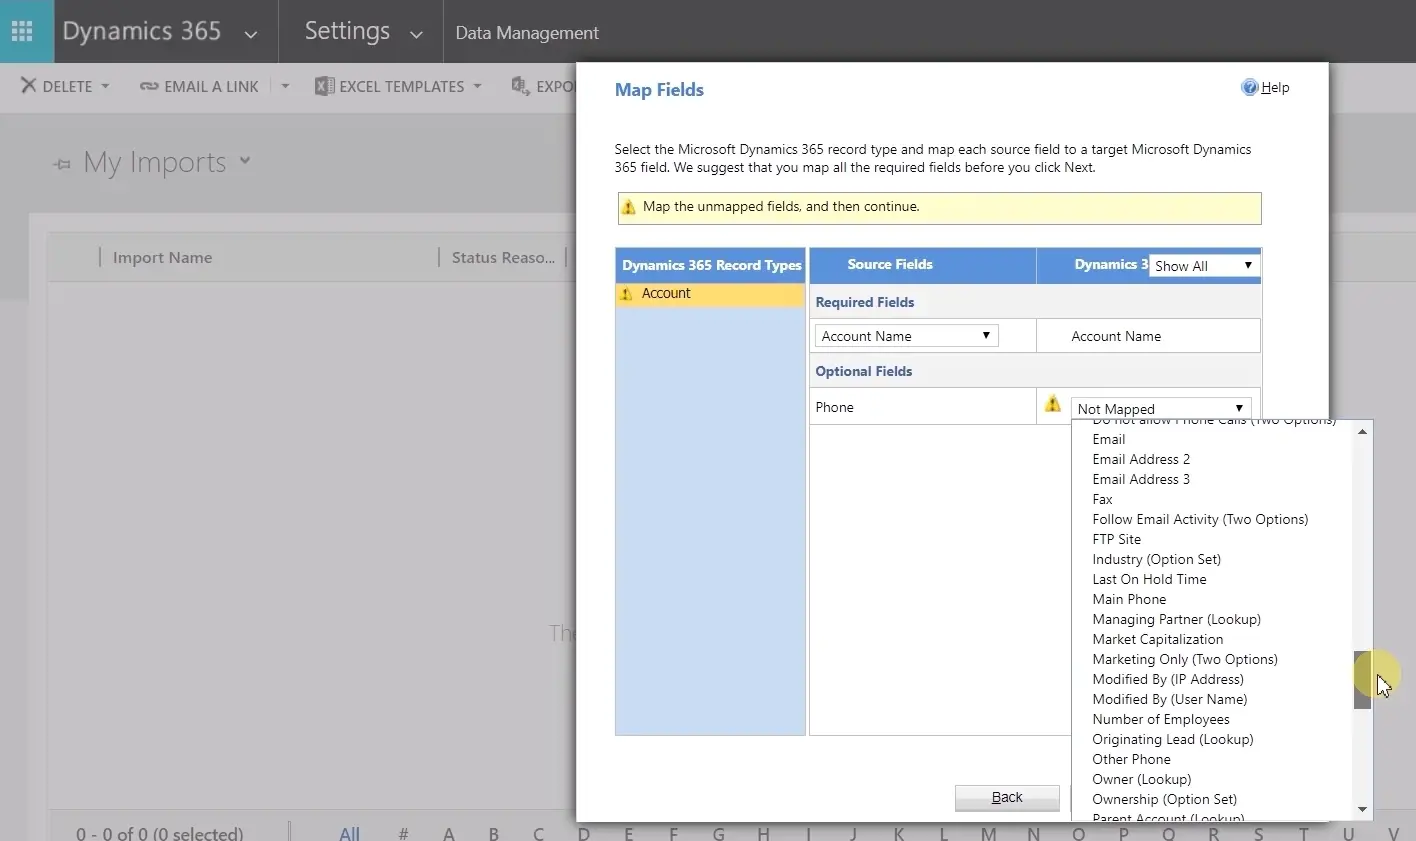
The procedure is mostly the same as with Excel files. The only difference is that you can create the mapping between columns and fields from Dynamics manually.
There is no need to download a template for it. Create a file on your PC, add headers to the table, fill needed information, and save the file.
Then go to Settings - Data Management - Data import. Instead of Excel import, you will see the window for manual mapping between columns from the CSV file and attributes from Dynamics.
After you map them, you can proceed. Pay attention that the data format from the CSV file must be the same as in your Dynamics attributes. Otherwise, failures will occur while importing.
That’s it! Now you have needed data in your System. The process is really simple and can be done by a regular Dynamics 365 user with appropriate rights.
If you have any problems or questions regarding data import, feel free to contact us.