
Introduction
In Microsoft Dynamics 365, a view represents records from a specific table, encompassing filtering, sorting, and selecting a set of columns. System and public views can only be created by administrators, but they are accessible to all users with permission to access the respective table. Personal views can be created by any user with system access and are, by default, only available to their owners. You can discover the creation process in detail in our tutorial How to Create a Personal View in Microsoft Dynamics 365
But how can you share this easily creatable type of view? How can you make other users see and utilize your prepared record representation? Let's explore this in the materials below.
Video
Where Can Any User View Personal Perspectives in The Dynamics 365 Application?
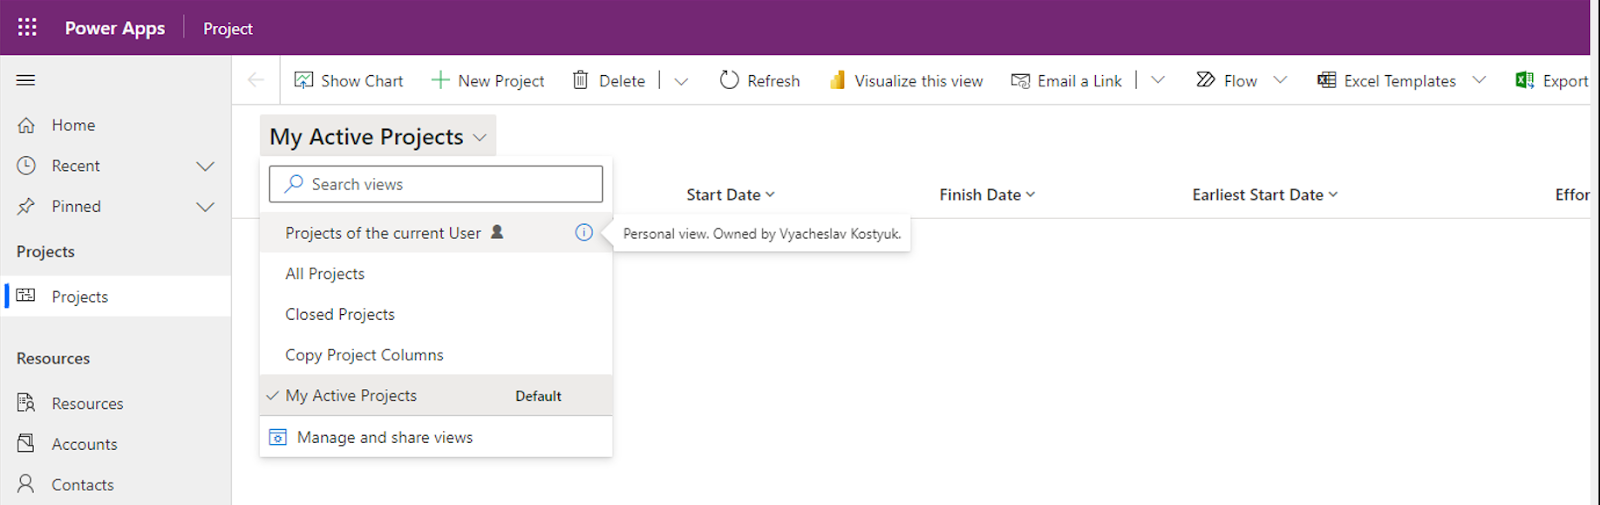
Open the drop-down list of views and examine the complete list. The typical icon identifies personal views (👤), while system views lack this icon.
Additionally, you can click the information button (🛈) on the right side.

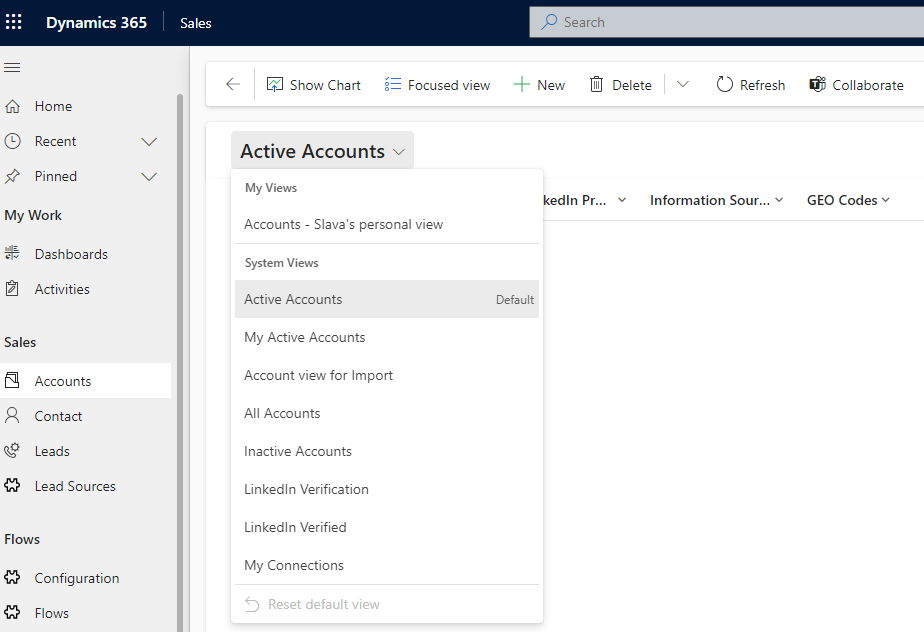
Also, in some updated Microsoft Dynamics 365 interfaces, you may notice two distinct sections based on the view type. Here, personal views are displayed below the label "My views."
How You Can Share a Personal View in Dynamics 365
Option A: Navigating from the modern interface
This option is not available in all UI versions of Dynamics 365 Apps. If you do not see screens like the one below, please proceed with option B.
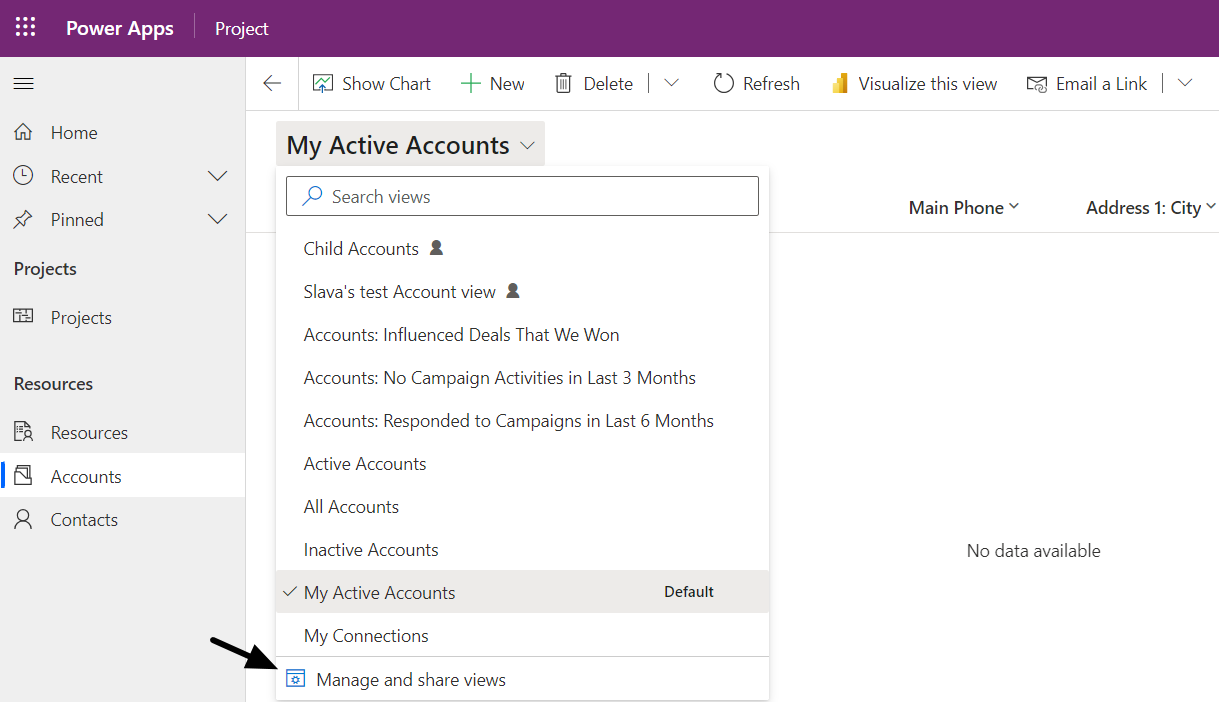
• Open the corresponding table, expand the views list, and press “Manage and Share views.”
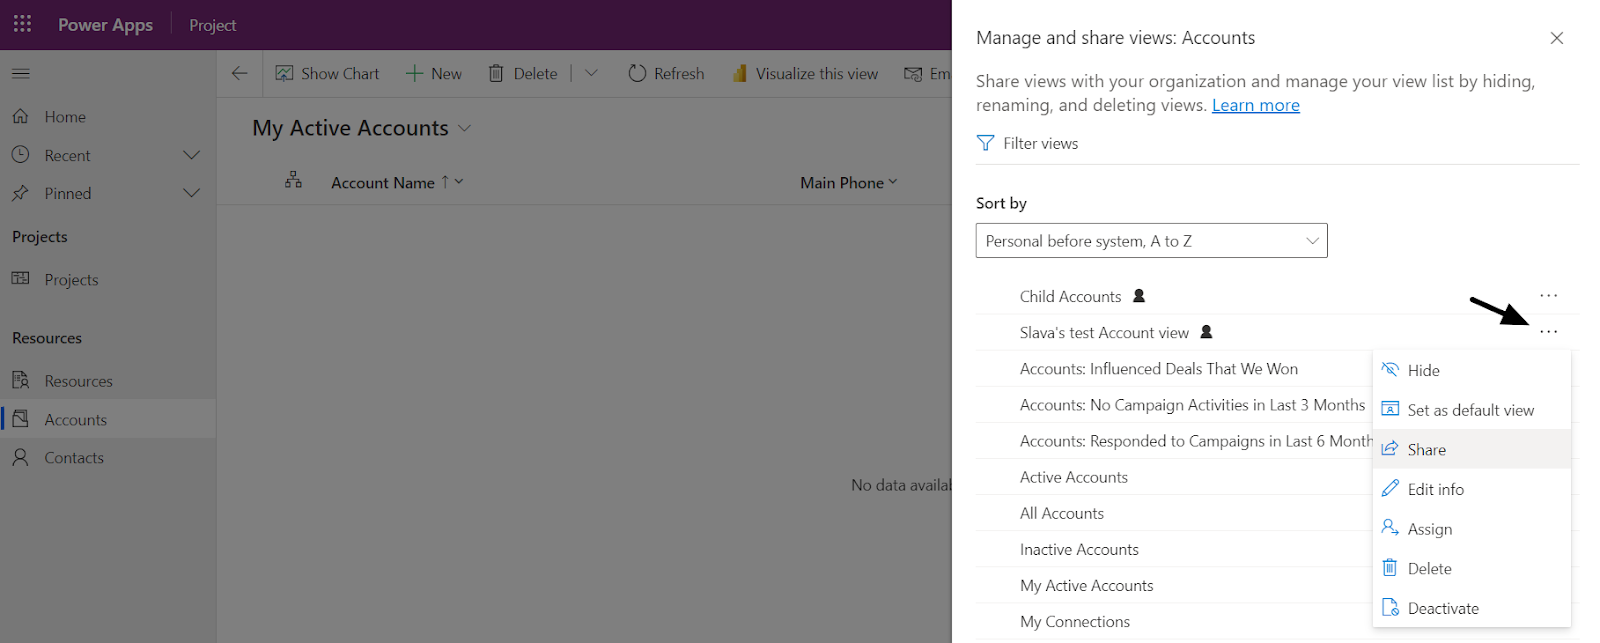
• To find the necessary view, press “...” and “Share.”
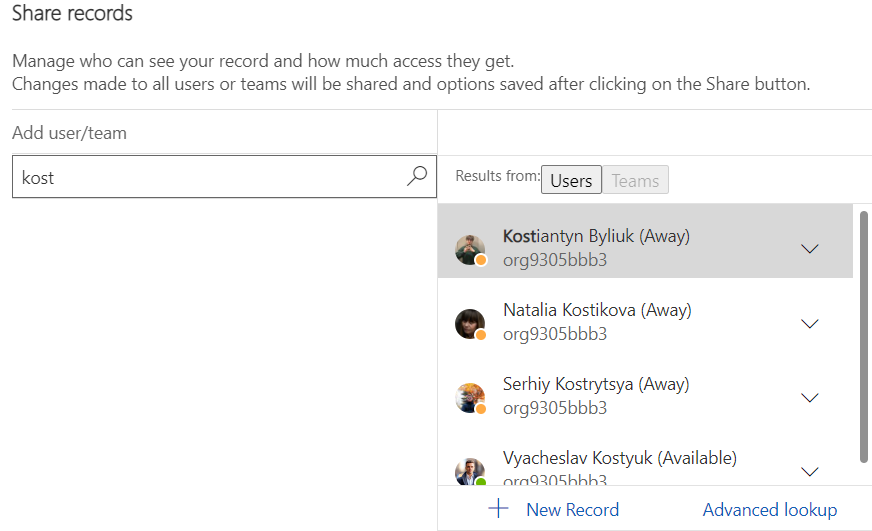
• Then select the user, choose privileges, and press "Share."
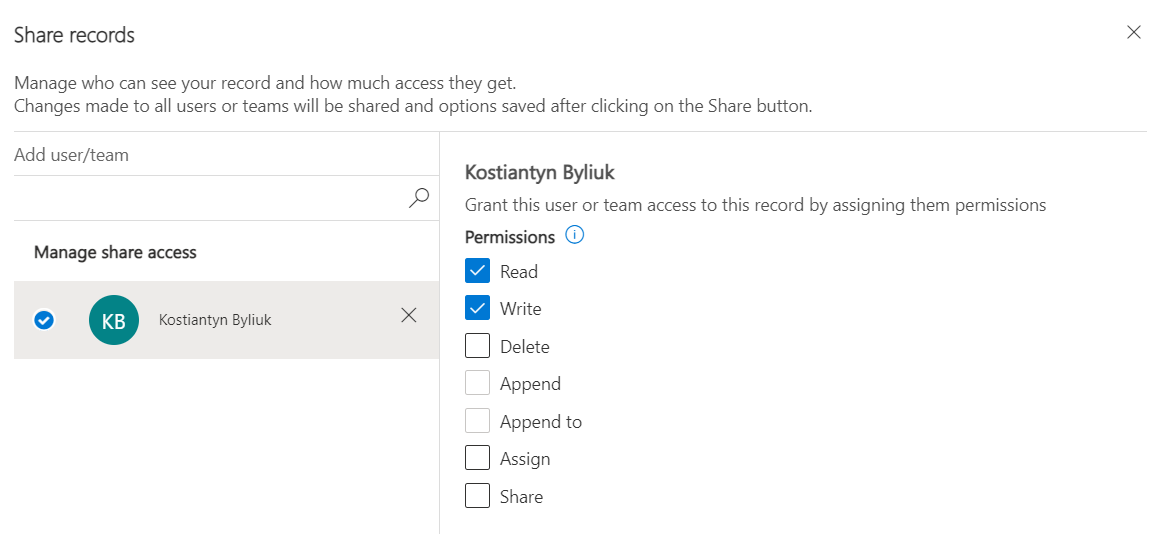
A bit of information about privileges:
• Read: Allows users to view the contents of the shared view.
• Write: Allows users to modify the shared view by changing the filter criteria or sorting options.
• Assign: Enables users to assign the shared view to other users or teams.
• Append: Allows users to add records to the result set of the shared view. For example, if the view shows all accounts the user owns, the user can append additional accounts to the view.
• Append To: Allows records owned by the user to be added to the result set of the shared view owned by another user.
• Create: Permits users to create new records based on the criteria defined in the shared view.
• Delete: Enables users to delete records from the result set of the shared view.
• Share: Allows users to share the view with other users or teams.
• Assign Role: Grants users the ability to assign security roles to other users or teams.
• Access Team Templates: Allows users to access and use team templates.
• Append To/Assign: A combination of "Append To" and "Assign" privileges.
Option B: Old-fashioned way (classic interface)
1. Navigate to the Entity:
• In the upper-right corner of an app or make.powerapps.com, select Settings (⚙️) > Advanced Settings > "Advanced Find" button. This button is usually represented by a funnel icon and is located in the top right corner of the screen.

2. Define Your Query:
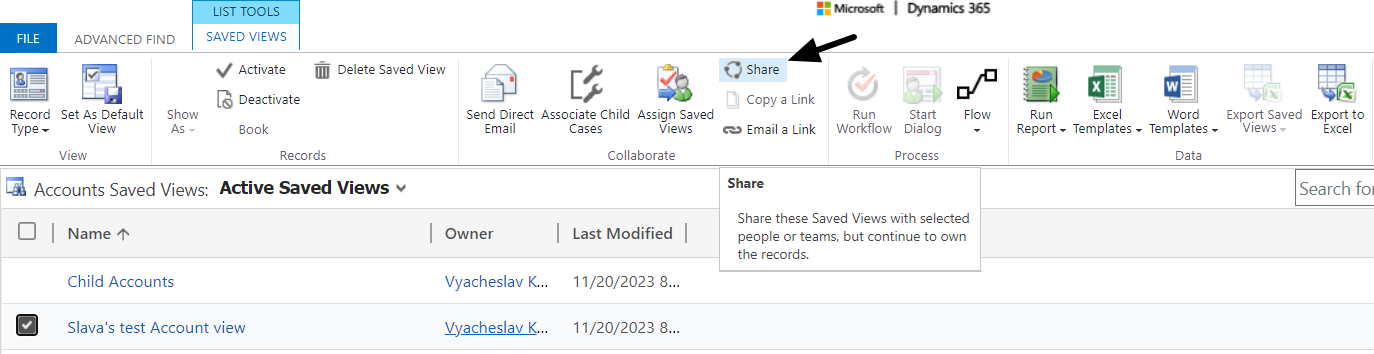
• In the Advanced Find window, press the “Saved views button.”
• Now, you can see the list of views.
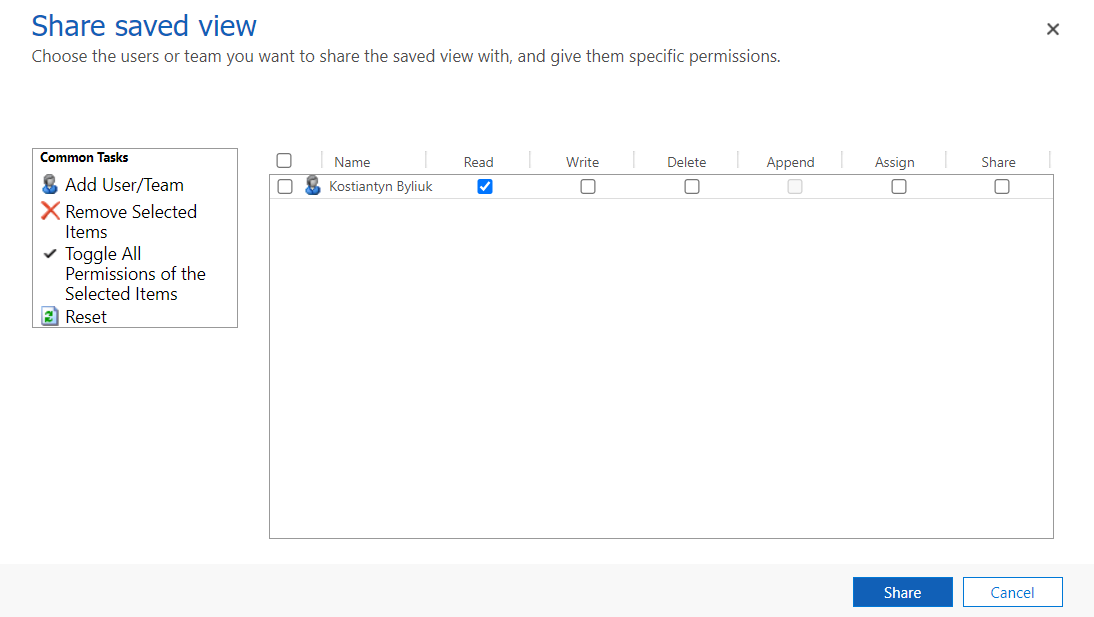
• Select the appropriate view by pressing the checkbox and press “Share.”
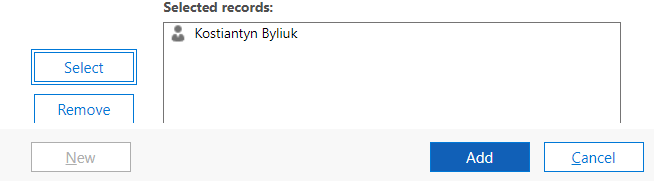
• Press “Add User/Team.”

• Press the checkbox near the User or Team you want to share the view with.
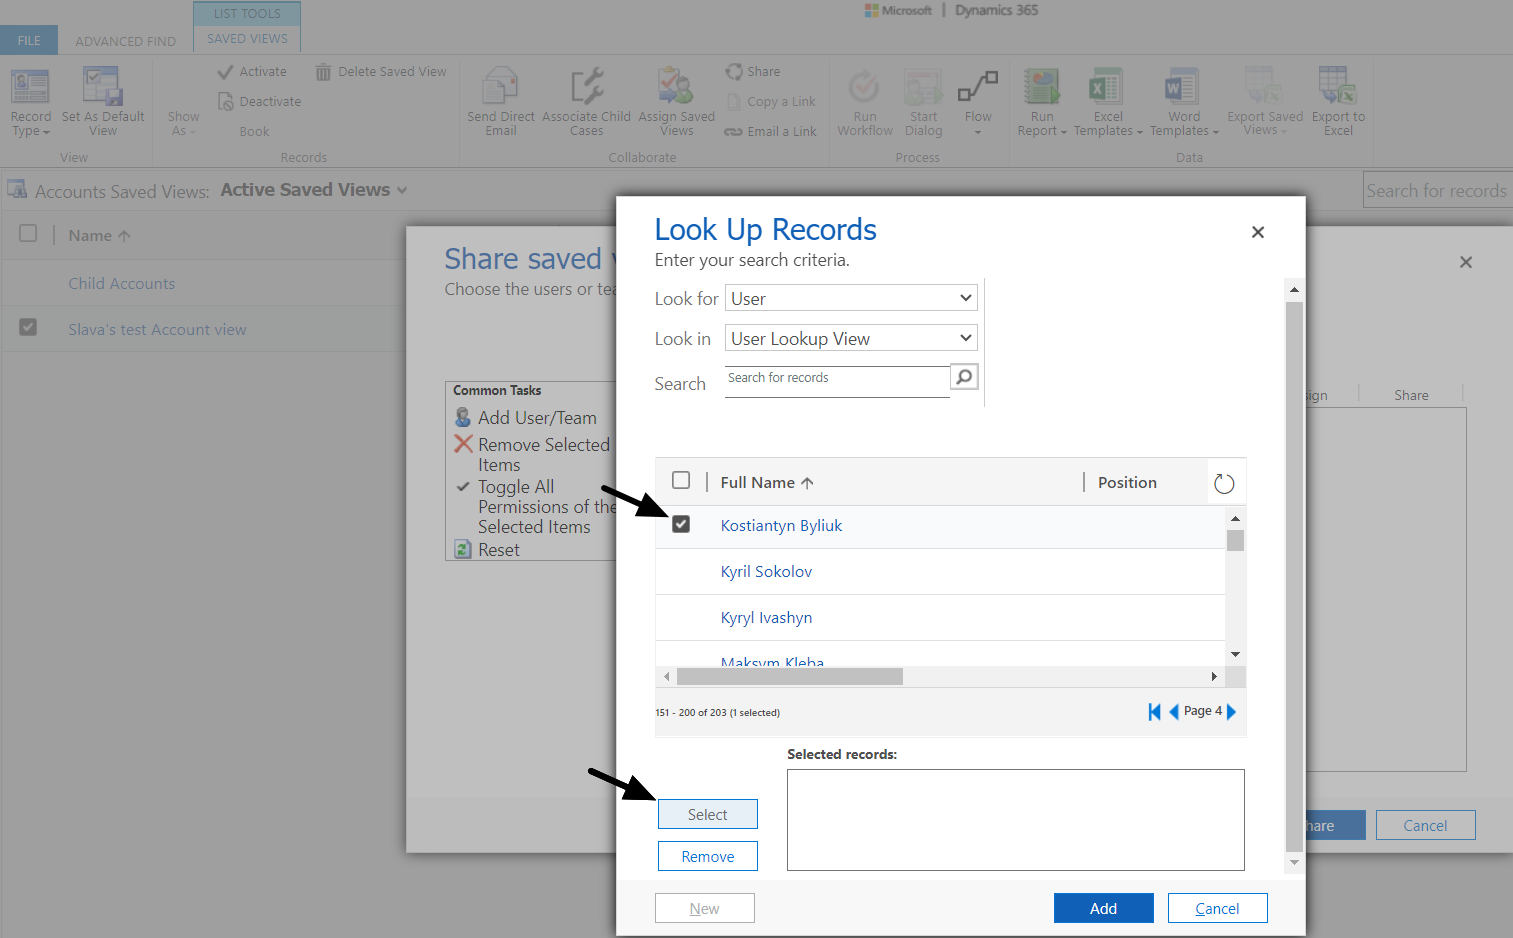
• Press “Select”, then press “Add.”
• After that, select the corresponding privileges you want to provide and press “Share.”
Summary
Anyone with access to the system can create personal views, but availability to other users can be managed by sharing that view and providing appropriate rights. In this video, we have covered simple steps to achieve this.
If you would like to delete your personal view for some reasons, follow this instruction to succesfully complete the process: How To Delete a Personal View in Microsoft Dynamics 365
If you have any questions, do not hesitate to contact us anytime.
You can find more useful video tutorials on our YouTube channel: UDS SYSTEMS.