
Introduction
Efficiently scheduling emails within Dynamics 365 Customer Insights can enhance your communication strategy by allowing you to send messages at optimal times. This step-by-step guide will walk you through activating enhanced email features for the timeline, enabling you to schedule emails for later delivery. By leveraging this functionality, you can ensure emails are sent at the most opportune moments, considering the recipient's working hours and time zone.
Advantages of Scheduling Emails from Timeline in Dynamics 365 Customer Insights:
• Optimal Timing for Engagement: Scheduling emails allows you to send messages at times when your recipients are most likely to engage. By considering working hours and time zones, you can optimize the delivery timing, increasing the chances of your emails being opened and read.
• Efficient Time Management: With the ability to schedule emails, you can plan and organize your communication strategy more efficiently. This feature enables you to set up multiple emails in advance, ensuring a consistent and well-timed flow of communication without manual intervention.
• Global Reach with Time Zone Consideration: For organizations with a worldwide audience, scheduling emails considering time zones is crucial. Dynamics 365 Customer Insights for Sales allows you to tailor your communication to each recipient's local time, promoting a personalized and considerate approach to engagement.
• Increased Productivity and Consistency: Scheduling emails enhances productivity by automating the sending process. This consistency in communication helps maintain a regular presence in the minds of your audience. It reduces manual intervention and lets your team focus on other critical tasks.
Prerequisites
Before proceeding with scheduling emails, please ensure that the following prerequisites are met:
• Access Rights: Confirm that you possess the required access rights within Dynamics 365 Customer Insights for Sales to modify app settings and enable productivity tools.
• Enhanced Email Activation: Access the "App Settings" and enable the "Enhanced email for timeline" feature in the "Productivity Tool" section.
Step-by-Step Guide to Schedule Emails
Step 1. Access App Settings:
• Navigate to the "Sales Hub" in Dynamics 365.
• Go to "App Settings" and select "General Settings."
Step 2. Enable Productivity Tool:
• Within General Settings, locate and click on "Productivity tool."
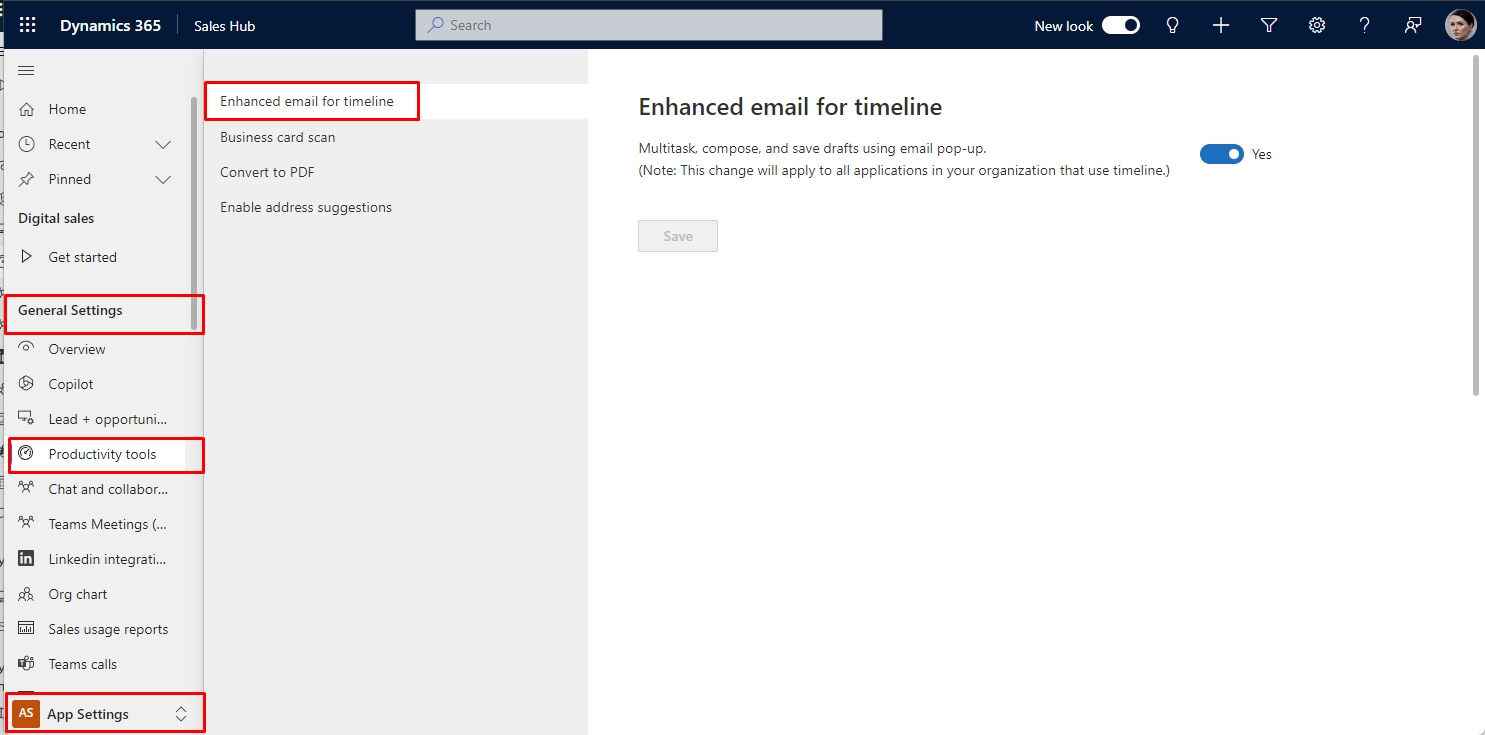
Step 3. Activate Enhanced Email for Timeline:
• Under Productivity tool settings, find "Enhanced email for timeline."
• Set the checkbox to "Yes" to activate enhanced email features for the timeline.
• Confirm your changes. (Note: This setting will apply across all applications in your organization that use the timeline).

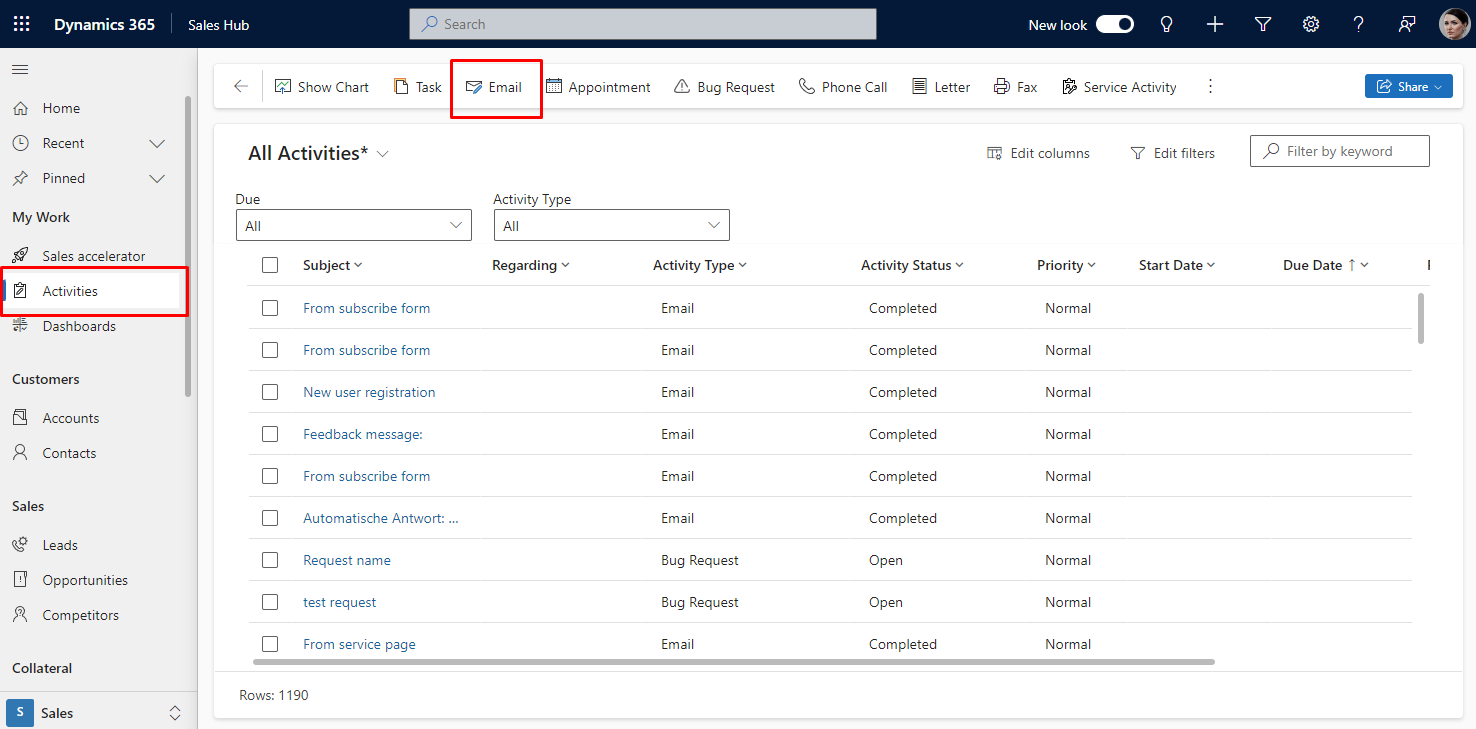
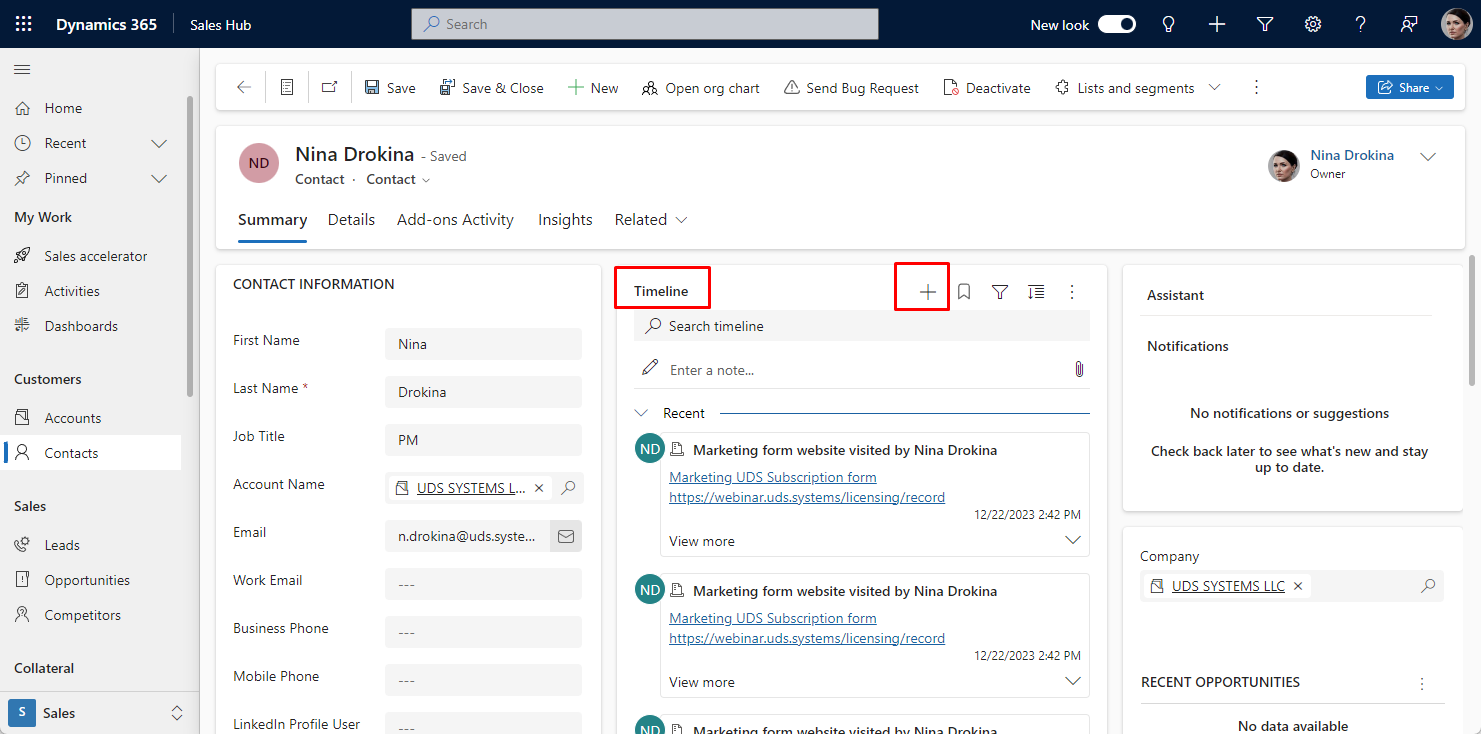
Step 4. Go to Email Timeline:
• Navigate to the email timeline or go to "Activities" to create a new email.
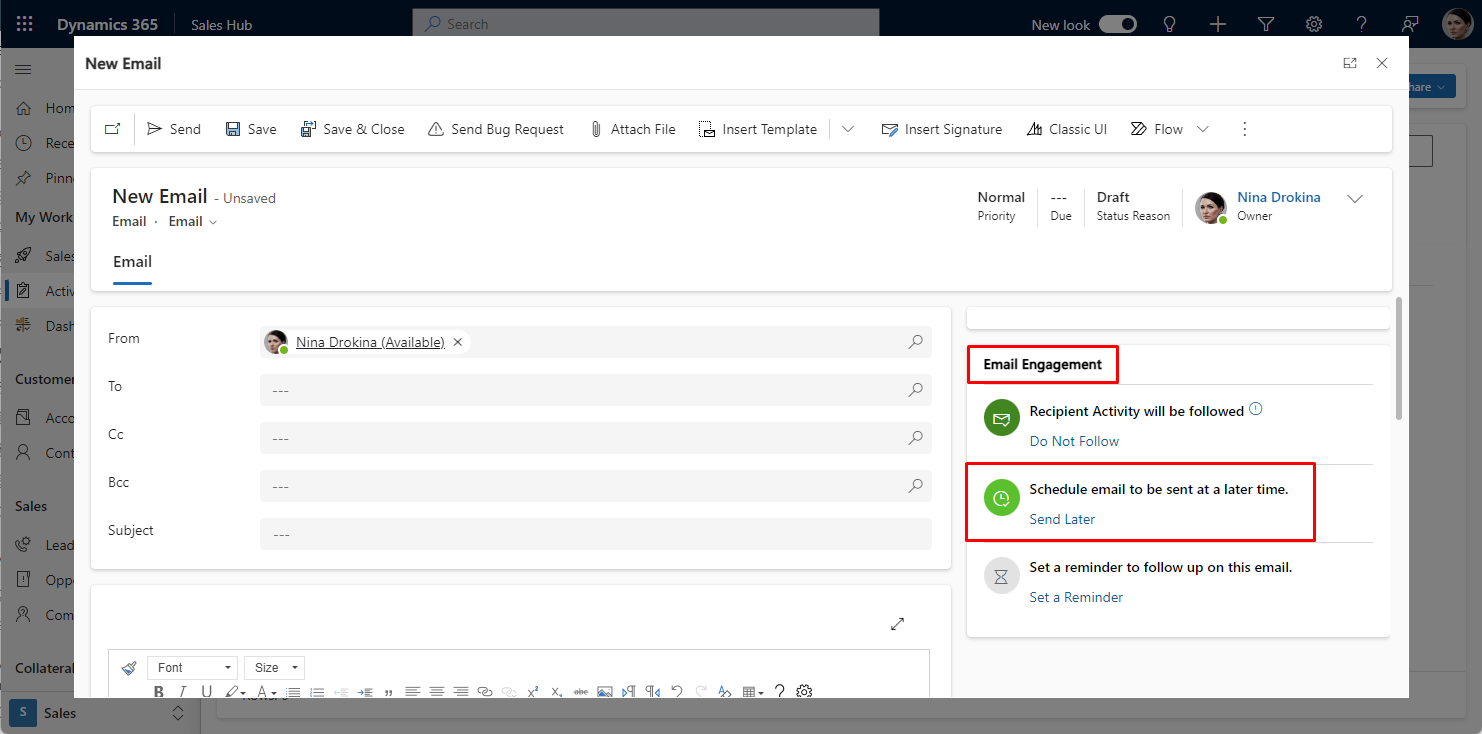
Step 5. Access Email Engagement Section:
• In the email creation interface or on the email timeline, look for the "Email Engagement" section on the right side.
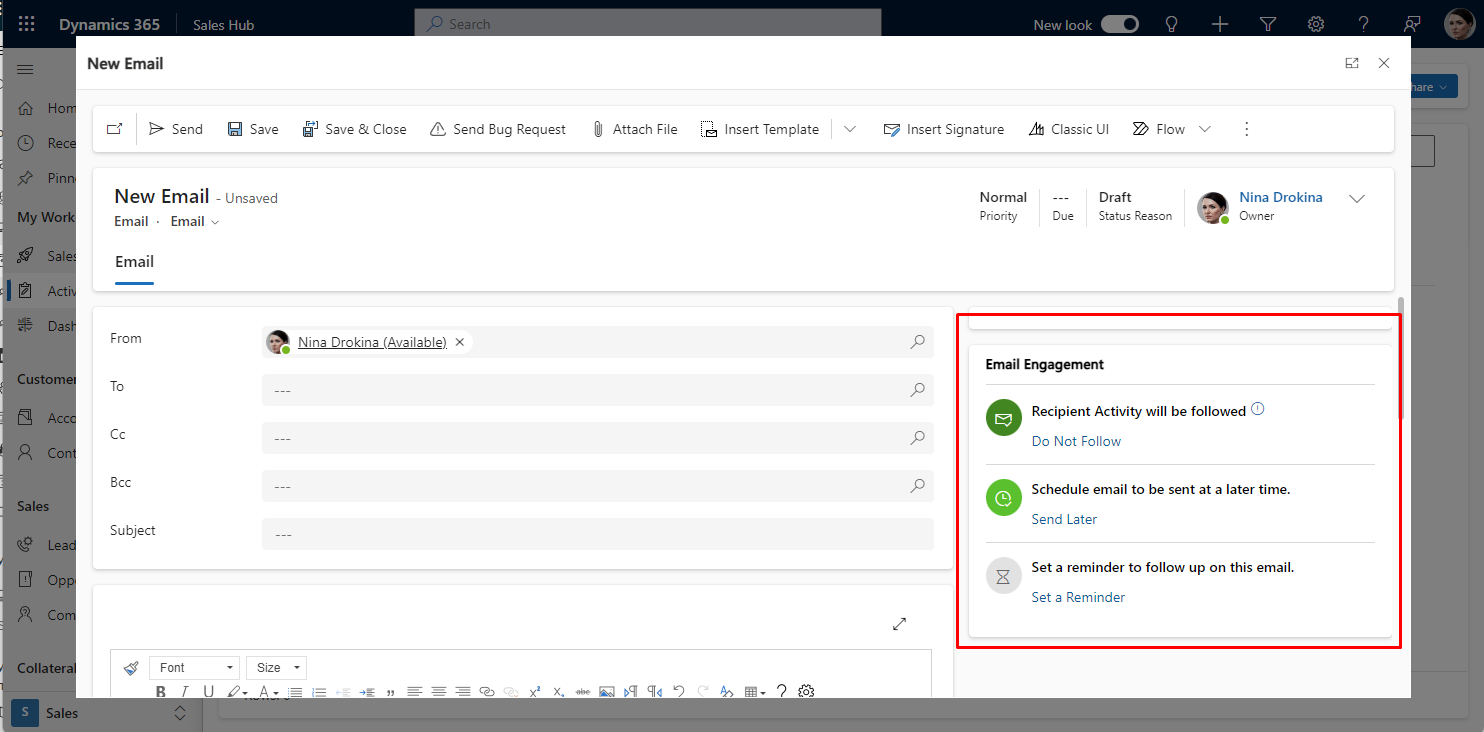
Step 6. Choose "Schedule email to be sent at a later time":
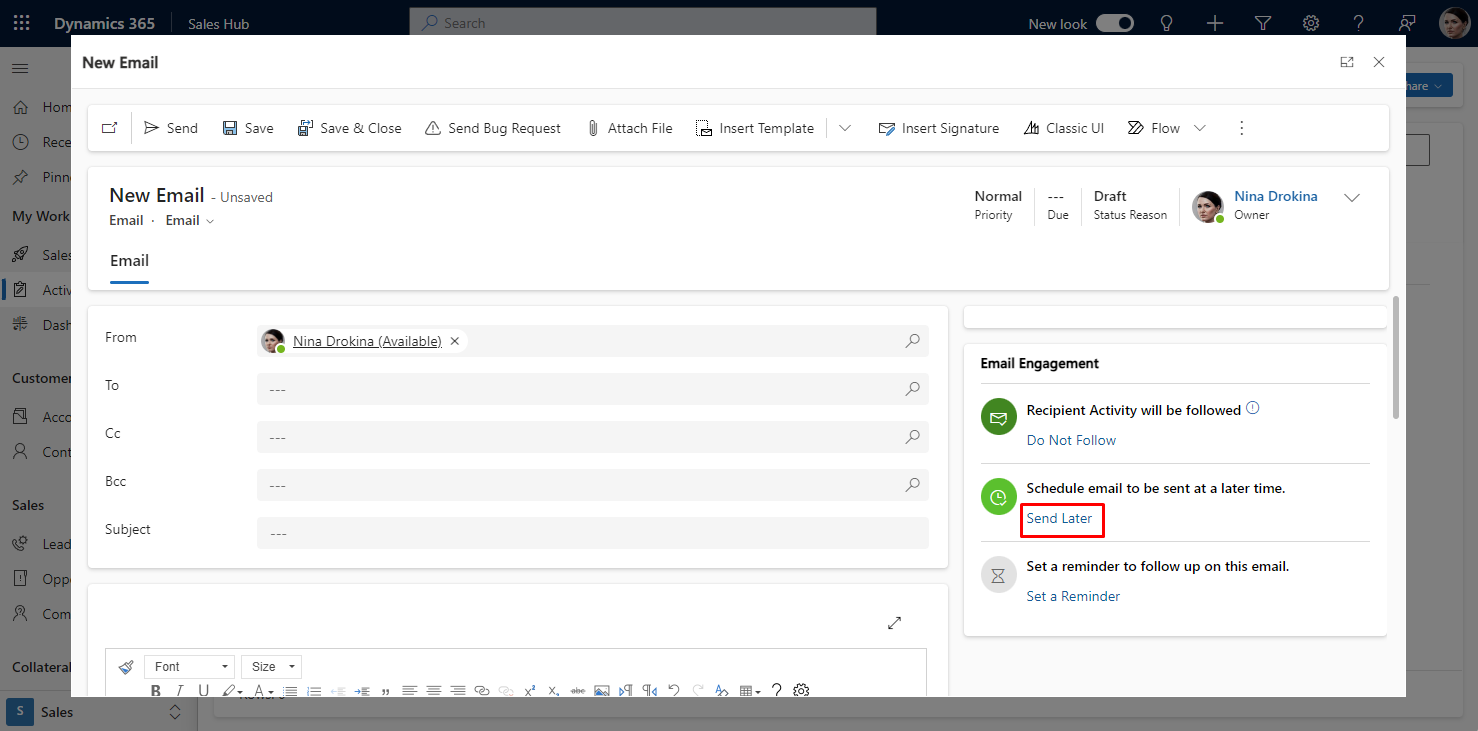
• In the Email Engagement section, find the option "Schedule email to be sent later."
Step 7. Click "Send Later URL":
• Click on the "Send Later URL" option. This will open a dialog window for scheduling the email.
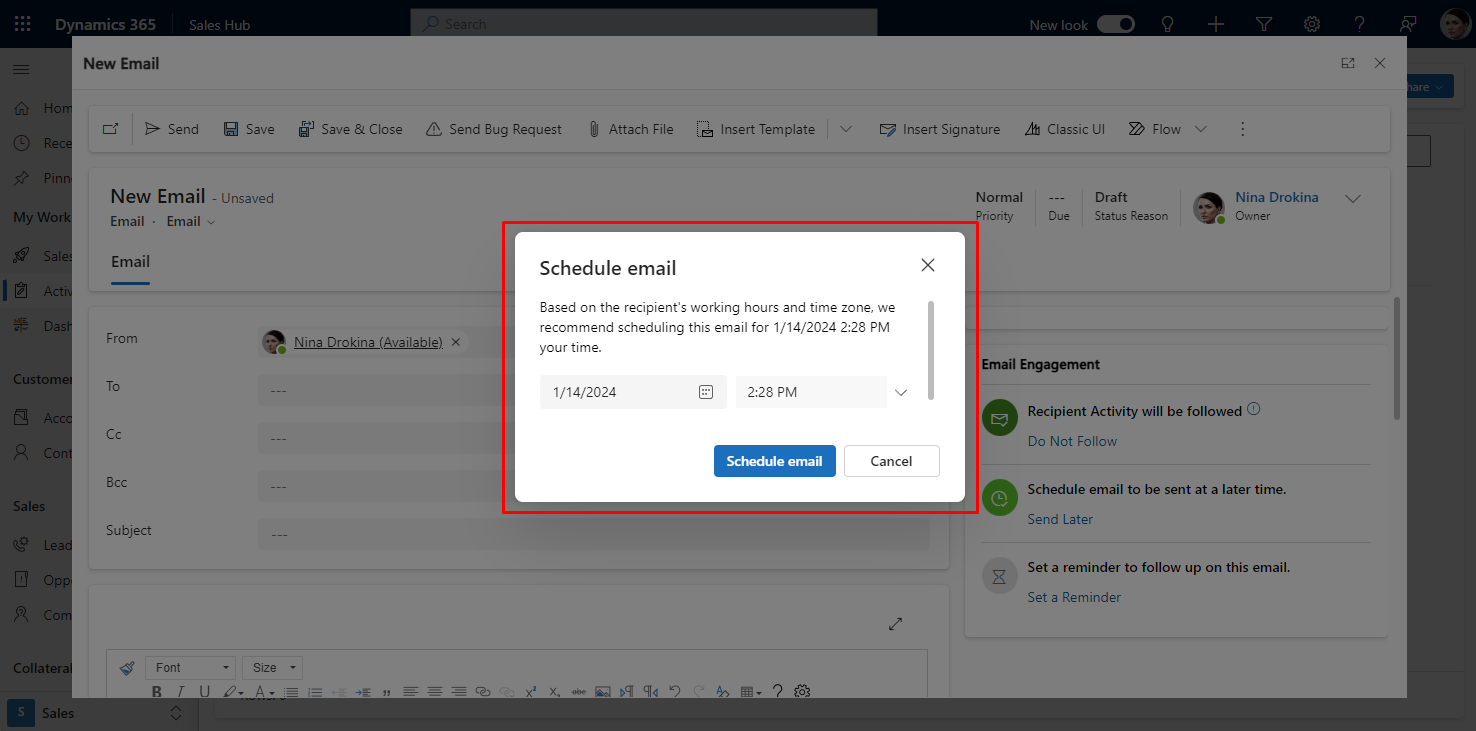
Step 8. Schedule Email:
• Within the dialog window, you'll find the option to schedule the email.
• Considering the recipient's working hours and time zone, the system will suggest a suitable scheduling time.
• Feel free to modify the proposed time or select a custom date and time for sending.
Step 9. Adjust or Cancel:
• If necessary, you can adjust the scheduled email before sending it.
• Some systems may also provide the option to cancel a scheduled email if needed.
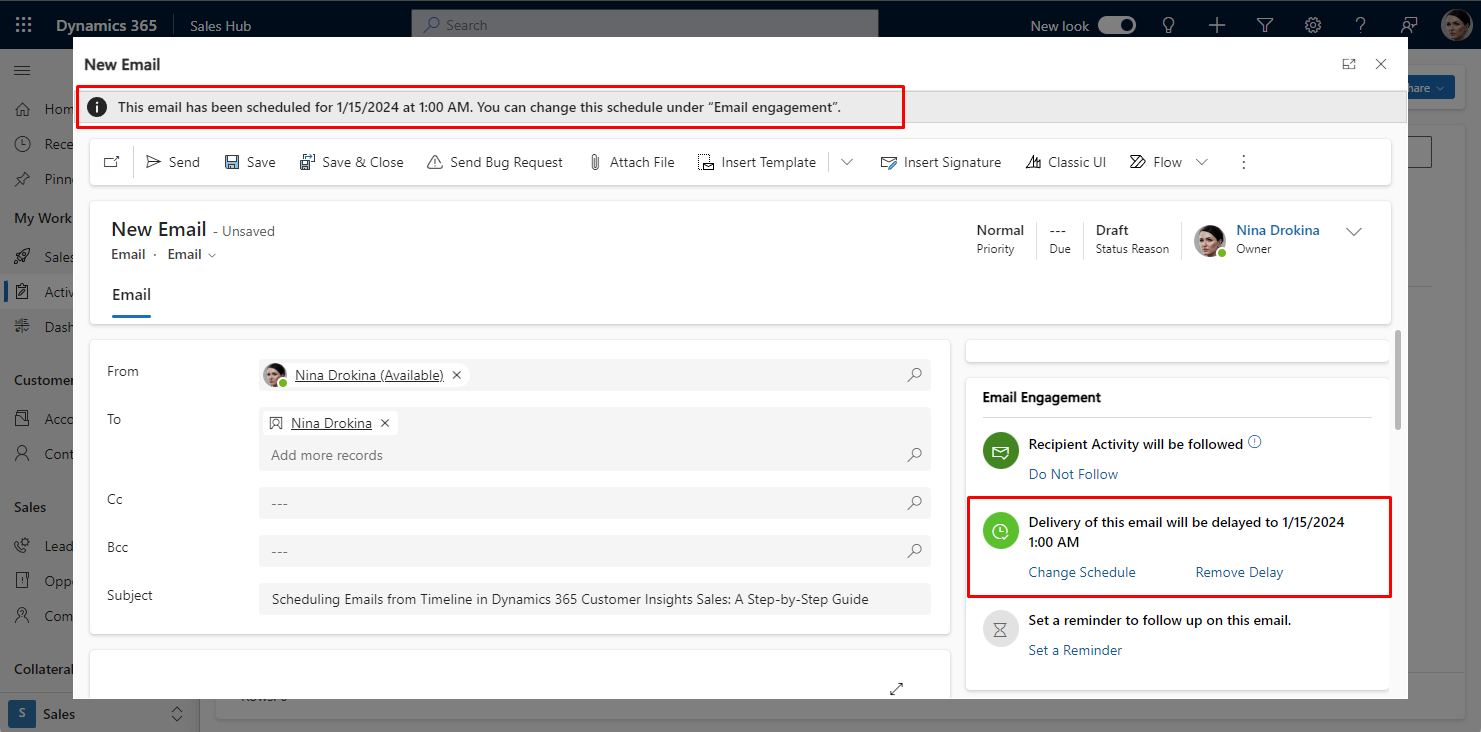
Step 10. Confirm and Send:
• After configuring the desired schedule, click the "Send" button to confirm.
• The email status will then change to "Pending Send," indicating that it is scheduled for delivery later.
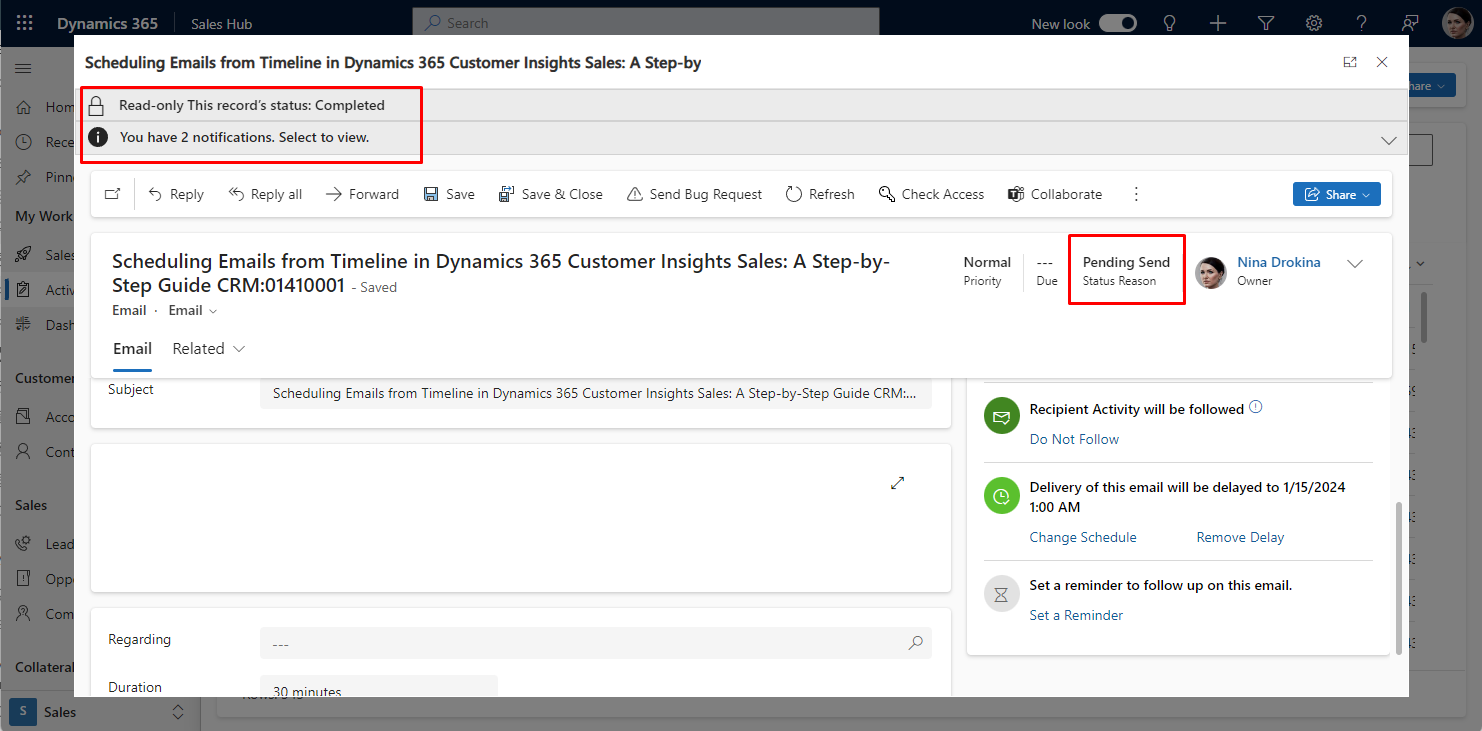
Step 11. Monitor Scheduled Emails:
• Monitor the status of your scheduled emails in Dynamics 365 Customer Insights. Typically, a status indicator is provided, indicating whether an email is pending, sent, or still in draft.
Step 12. Review Analytics:
• After sending the email, review the analytics to track the performance of your email campaigns. Dynamics 365 Customer Insights often provides features for email analytics and reporting.
Conclusion
Efficiently scheduling emails from the timeline in Dynamics 365 Customer Insights for Sales provides a valuable tool for optimizing your communication strategy. By considering recipients' working hours and time zones, you can ensure that your emails are delivered at the most reasonable times, increasing the likelihood of engagement. Regularly monitor and analyze your email campaigns, adjusting strategies for improved performance. This guide can streamline your email scheduling process and enhance overall organizational communication.
Check out our earlier article to learn how to send test emails in Dynamics 365 Customer Insights.
If you have any questions, do not hesitate to contact us.