
Introduction
When adjusting your view in Dynamics 365, whether for a personal tweak or a temporary change, you'll often rely on two tools: Edit columns (1) and Edit filters (2).

This concise and practical guide will focus solely on the "Edit columns" feature. We'll cover the "Edit filters" option in a separate tutorial. Note that creating a personal view has been detailed in one of our previous blog posts.
The Requirement
In our example, we will use the All Contact view.
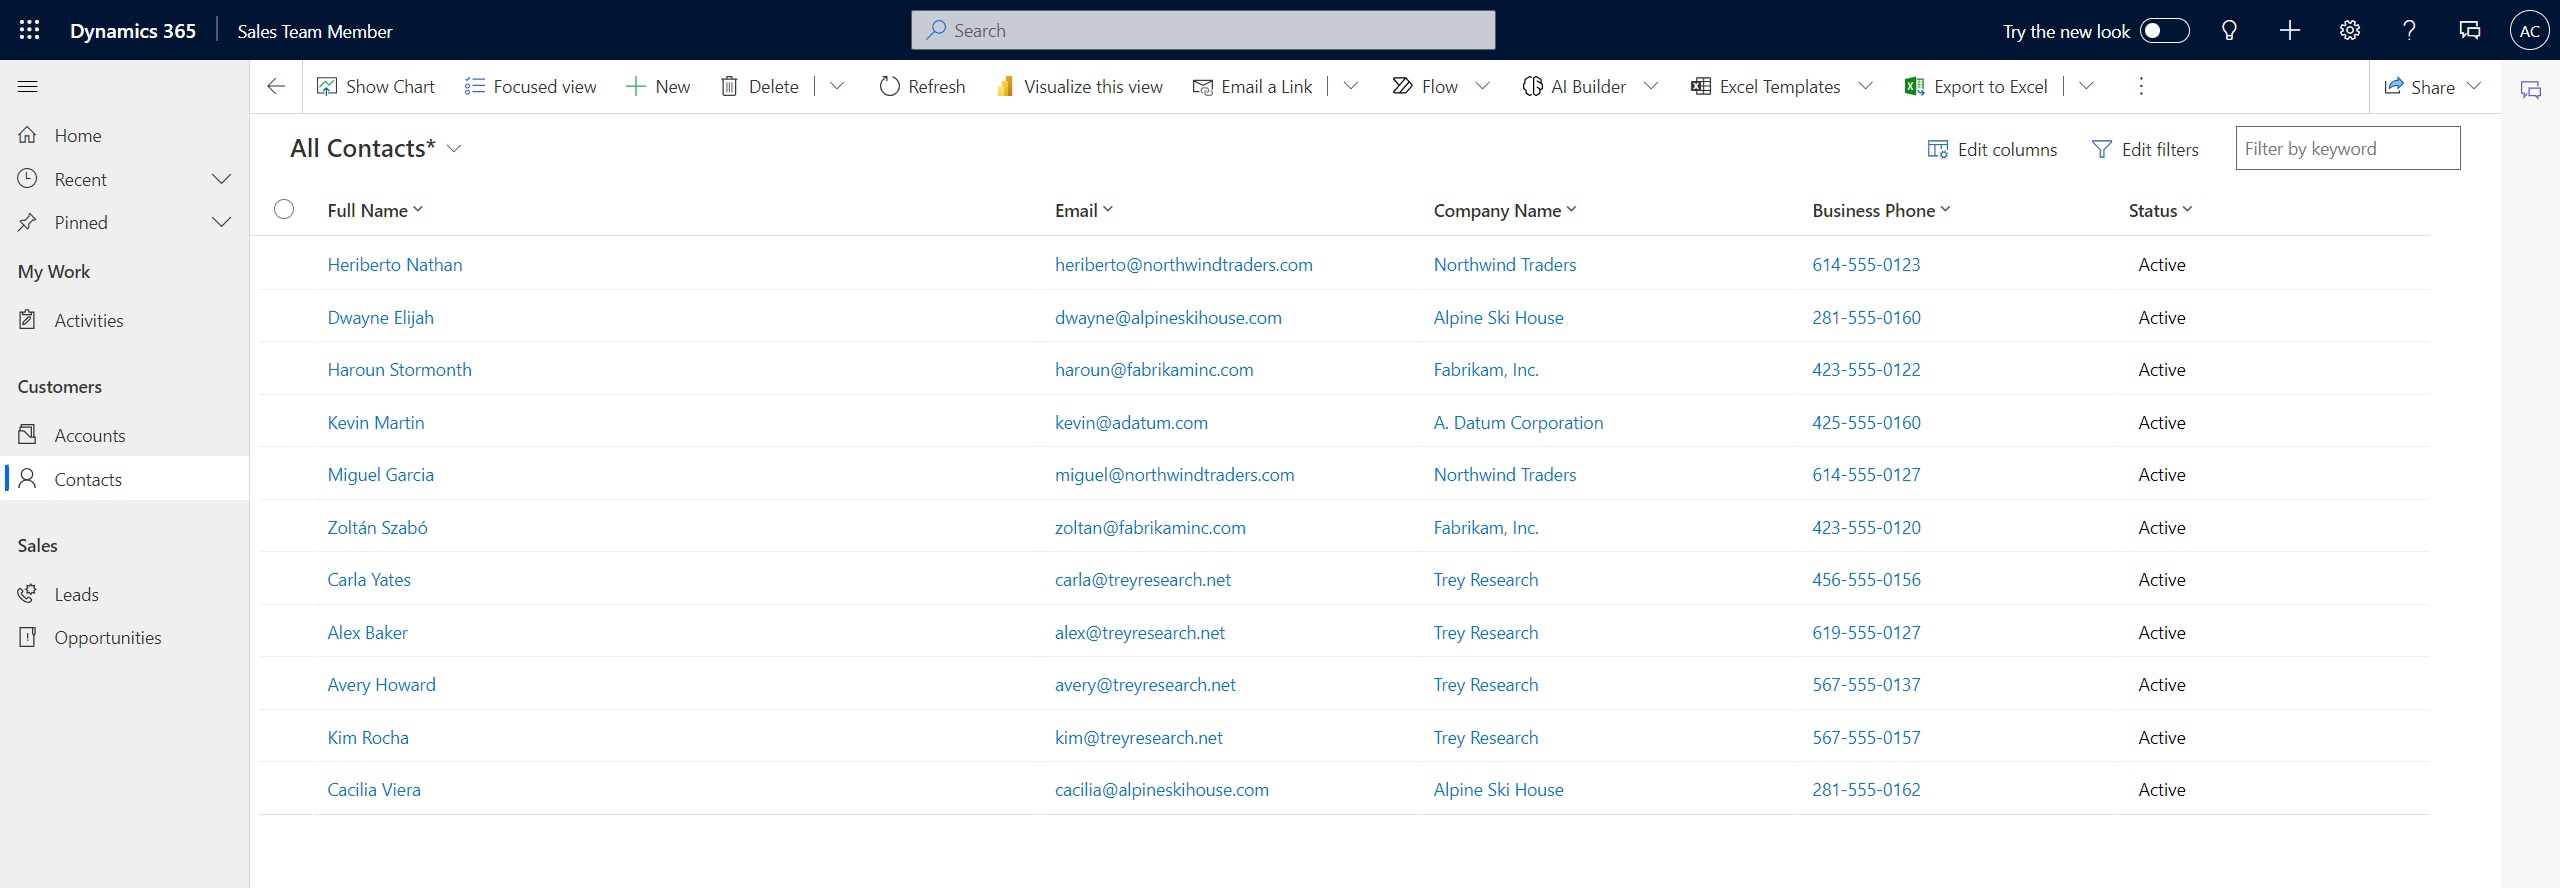
Let's suppose we don't need the Business Phone column right now, but we need a Mobile Phone and an Address 1: State/Province field from the related Account entity.
How to Add/Delete/Rearrange Columns
The first step is to click the "Edit columns" button (option 1 on the first image in this tutorial).

A right sidebar will be automatically opened, and a list of currently present columns will be displayed there.
Since we previously decided to exclude the Business Phone column, position the cursor over the Business Phone row in the sidebar on the right, then click on the three dots icon, and choose the Remove option.
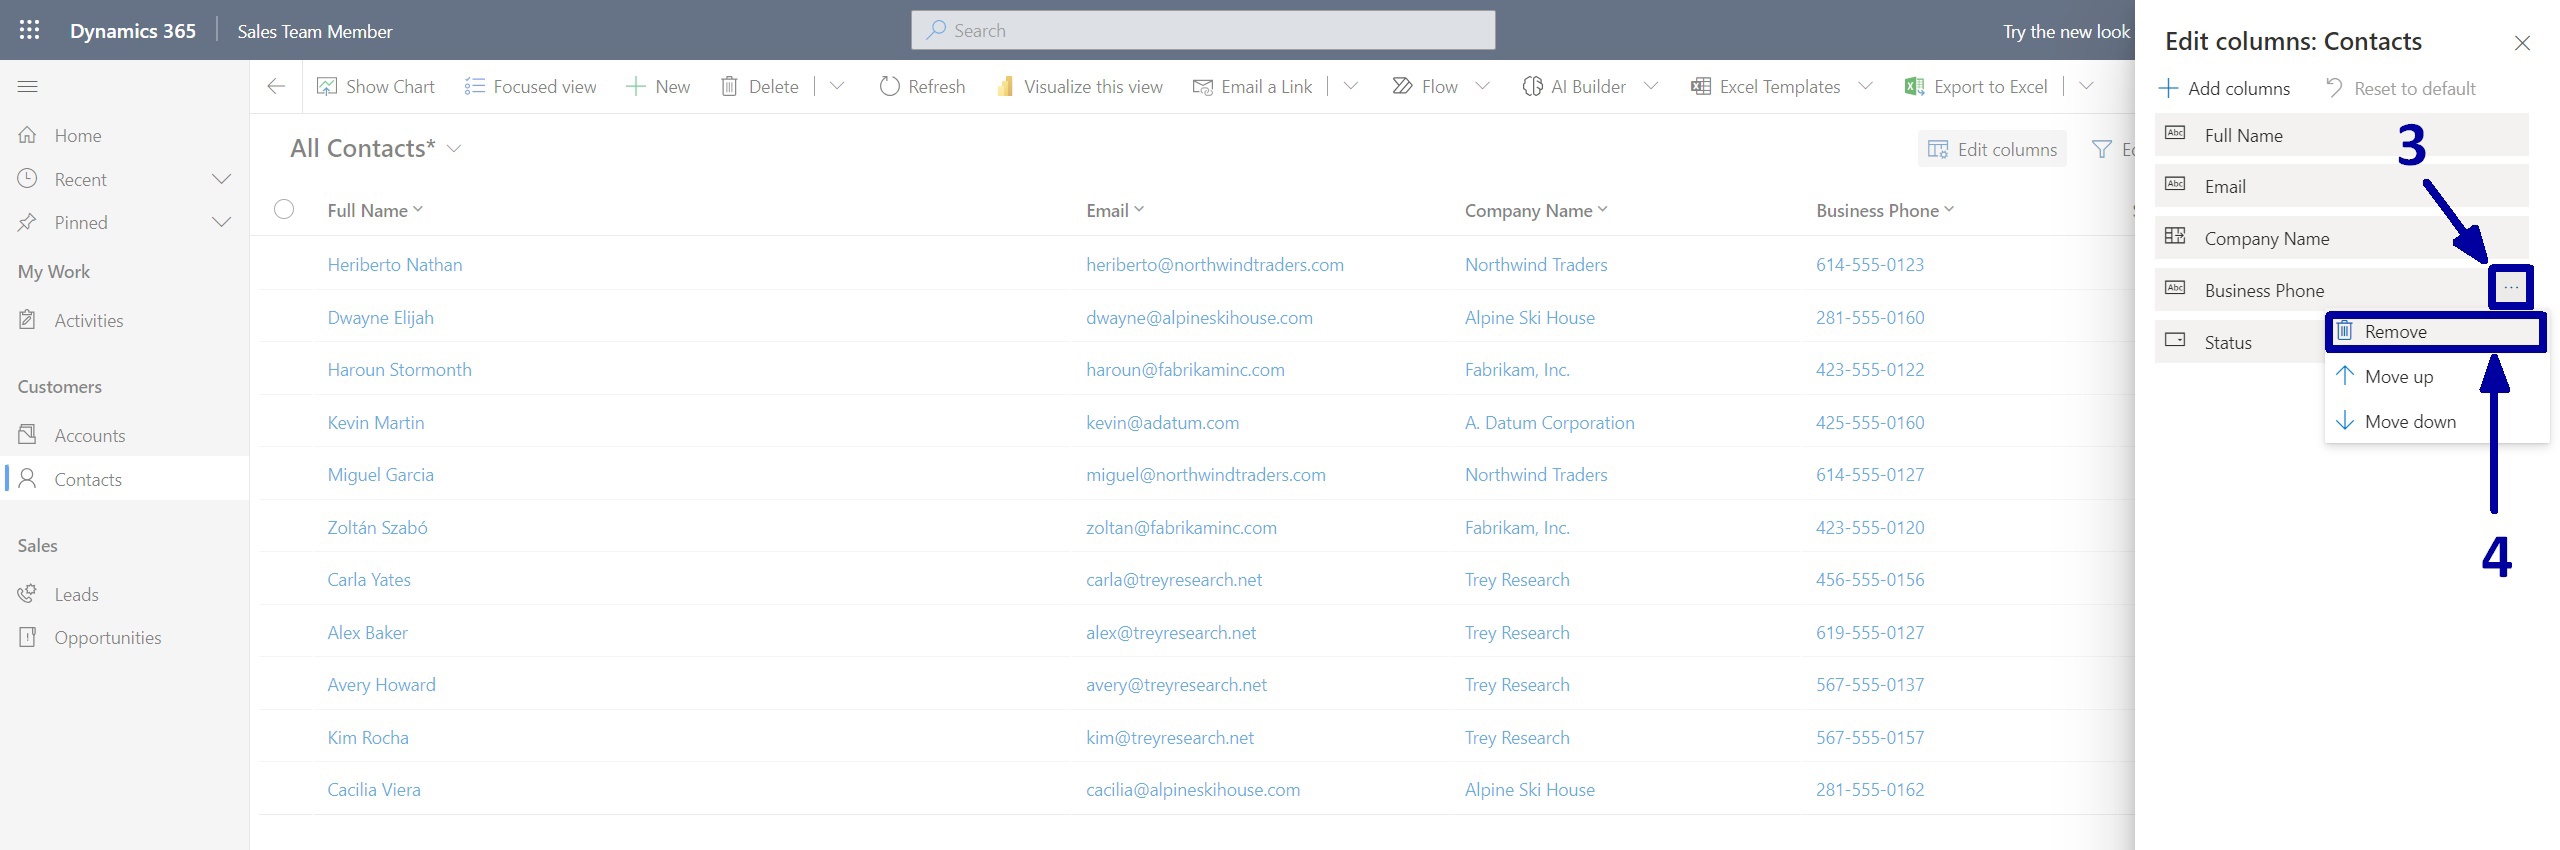
As a result, this option will automatically disappear from the column list.

Now, let's add a Mobile Phone column to the view.
We must click the "+Add columns" button (5) just above the column list to do this.
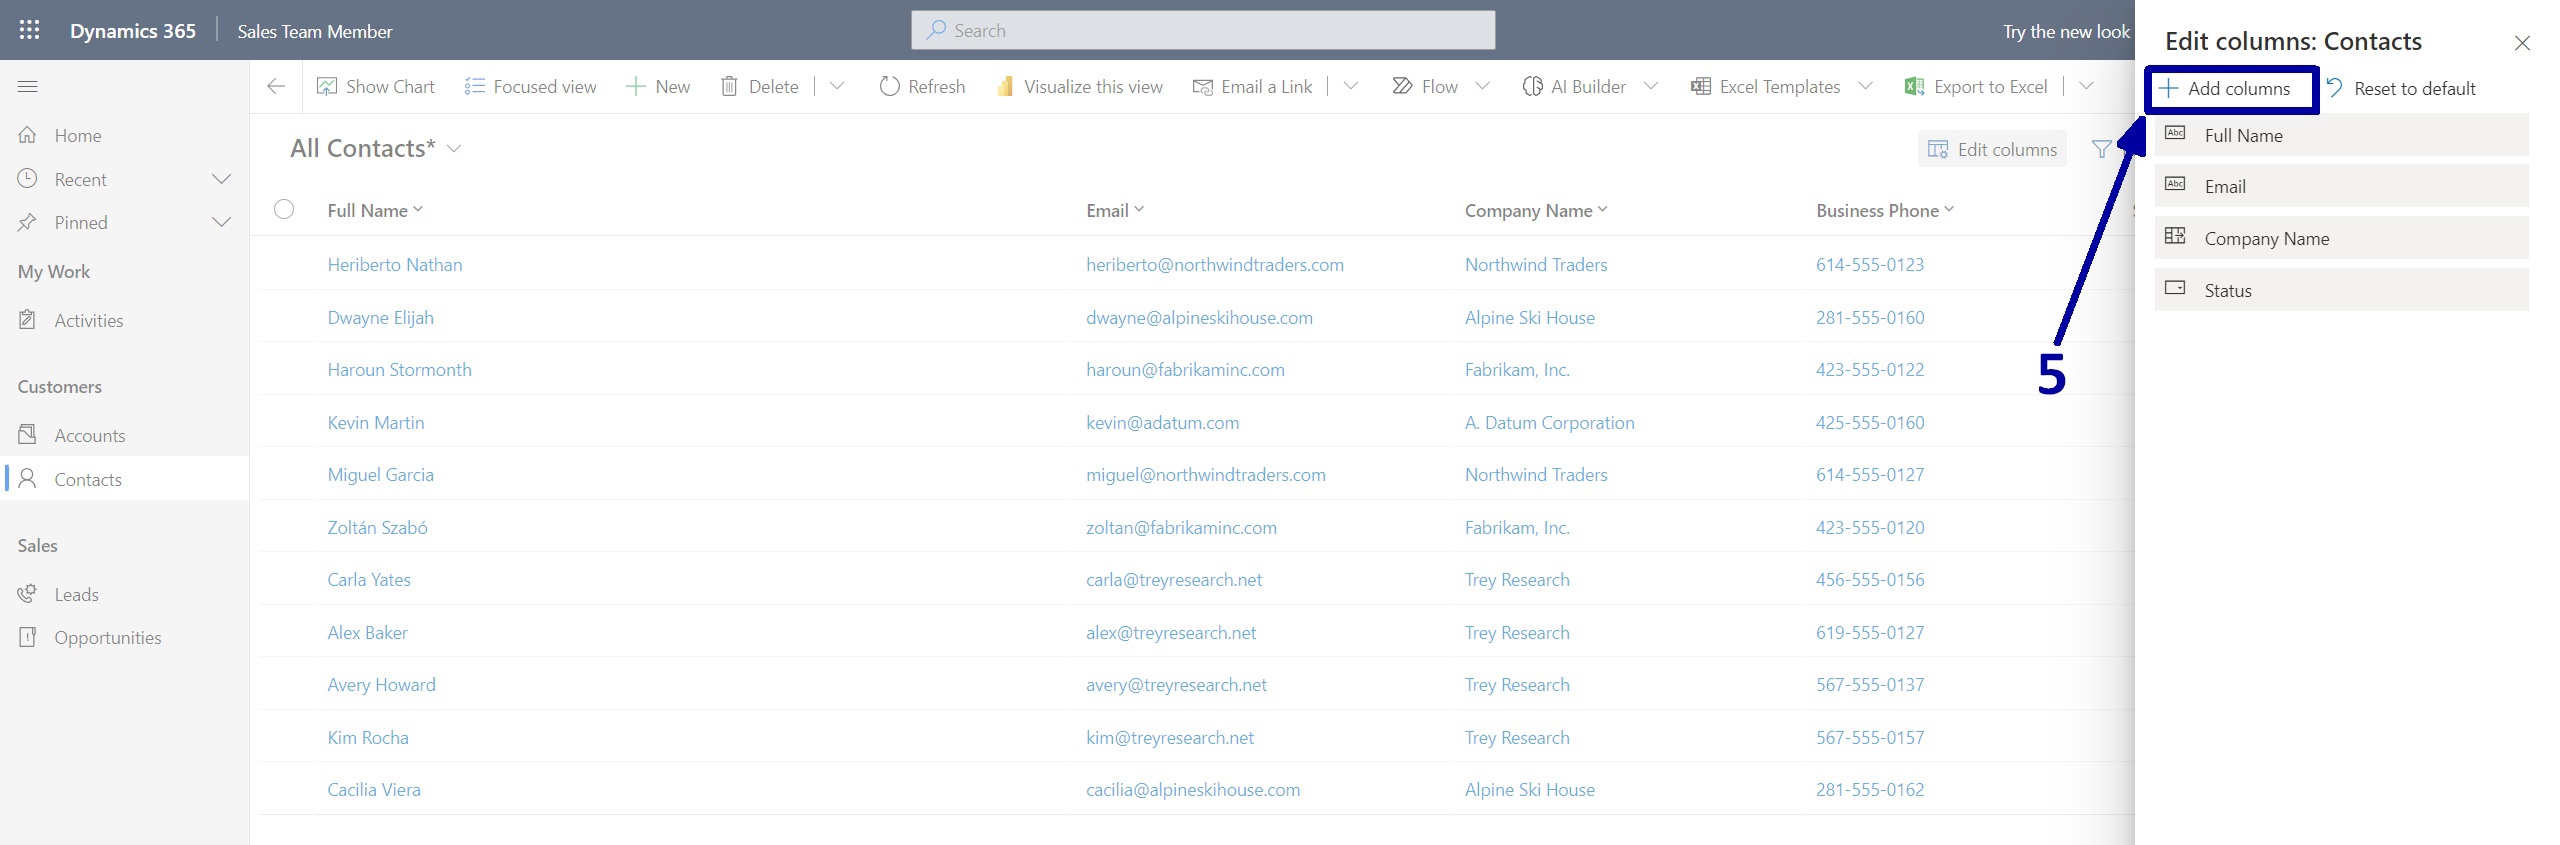
After that, a list with all the available fields from the Contact entity will be displayed in the right sidebar (except those already added to the view).
Please note that a Contact tab (6) is selected by default because it is the entity we currently work with.
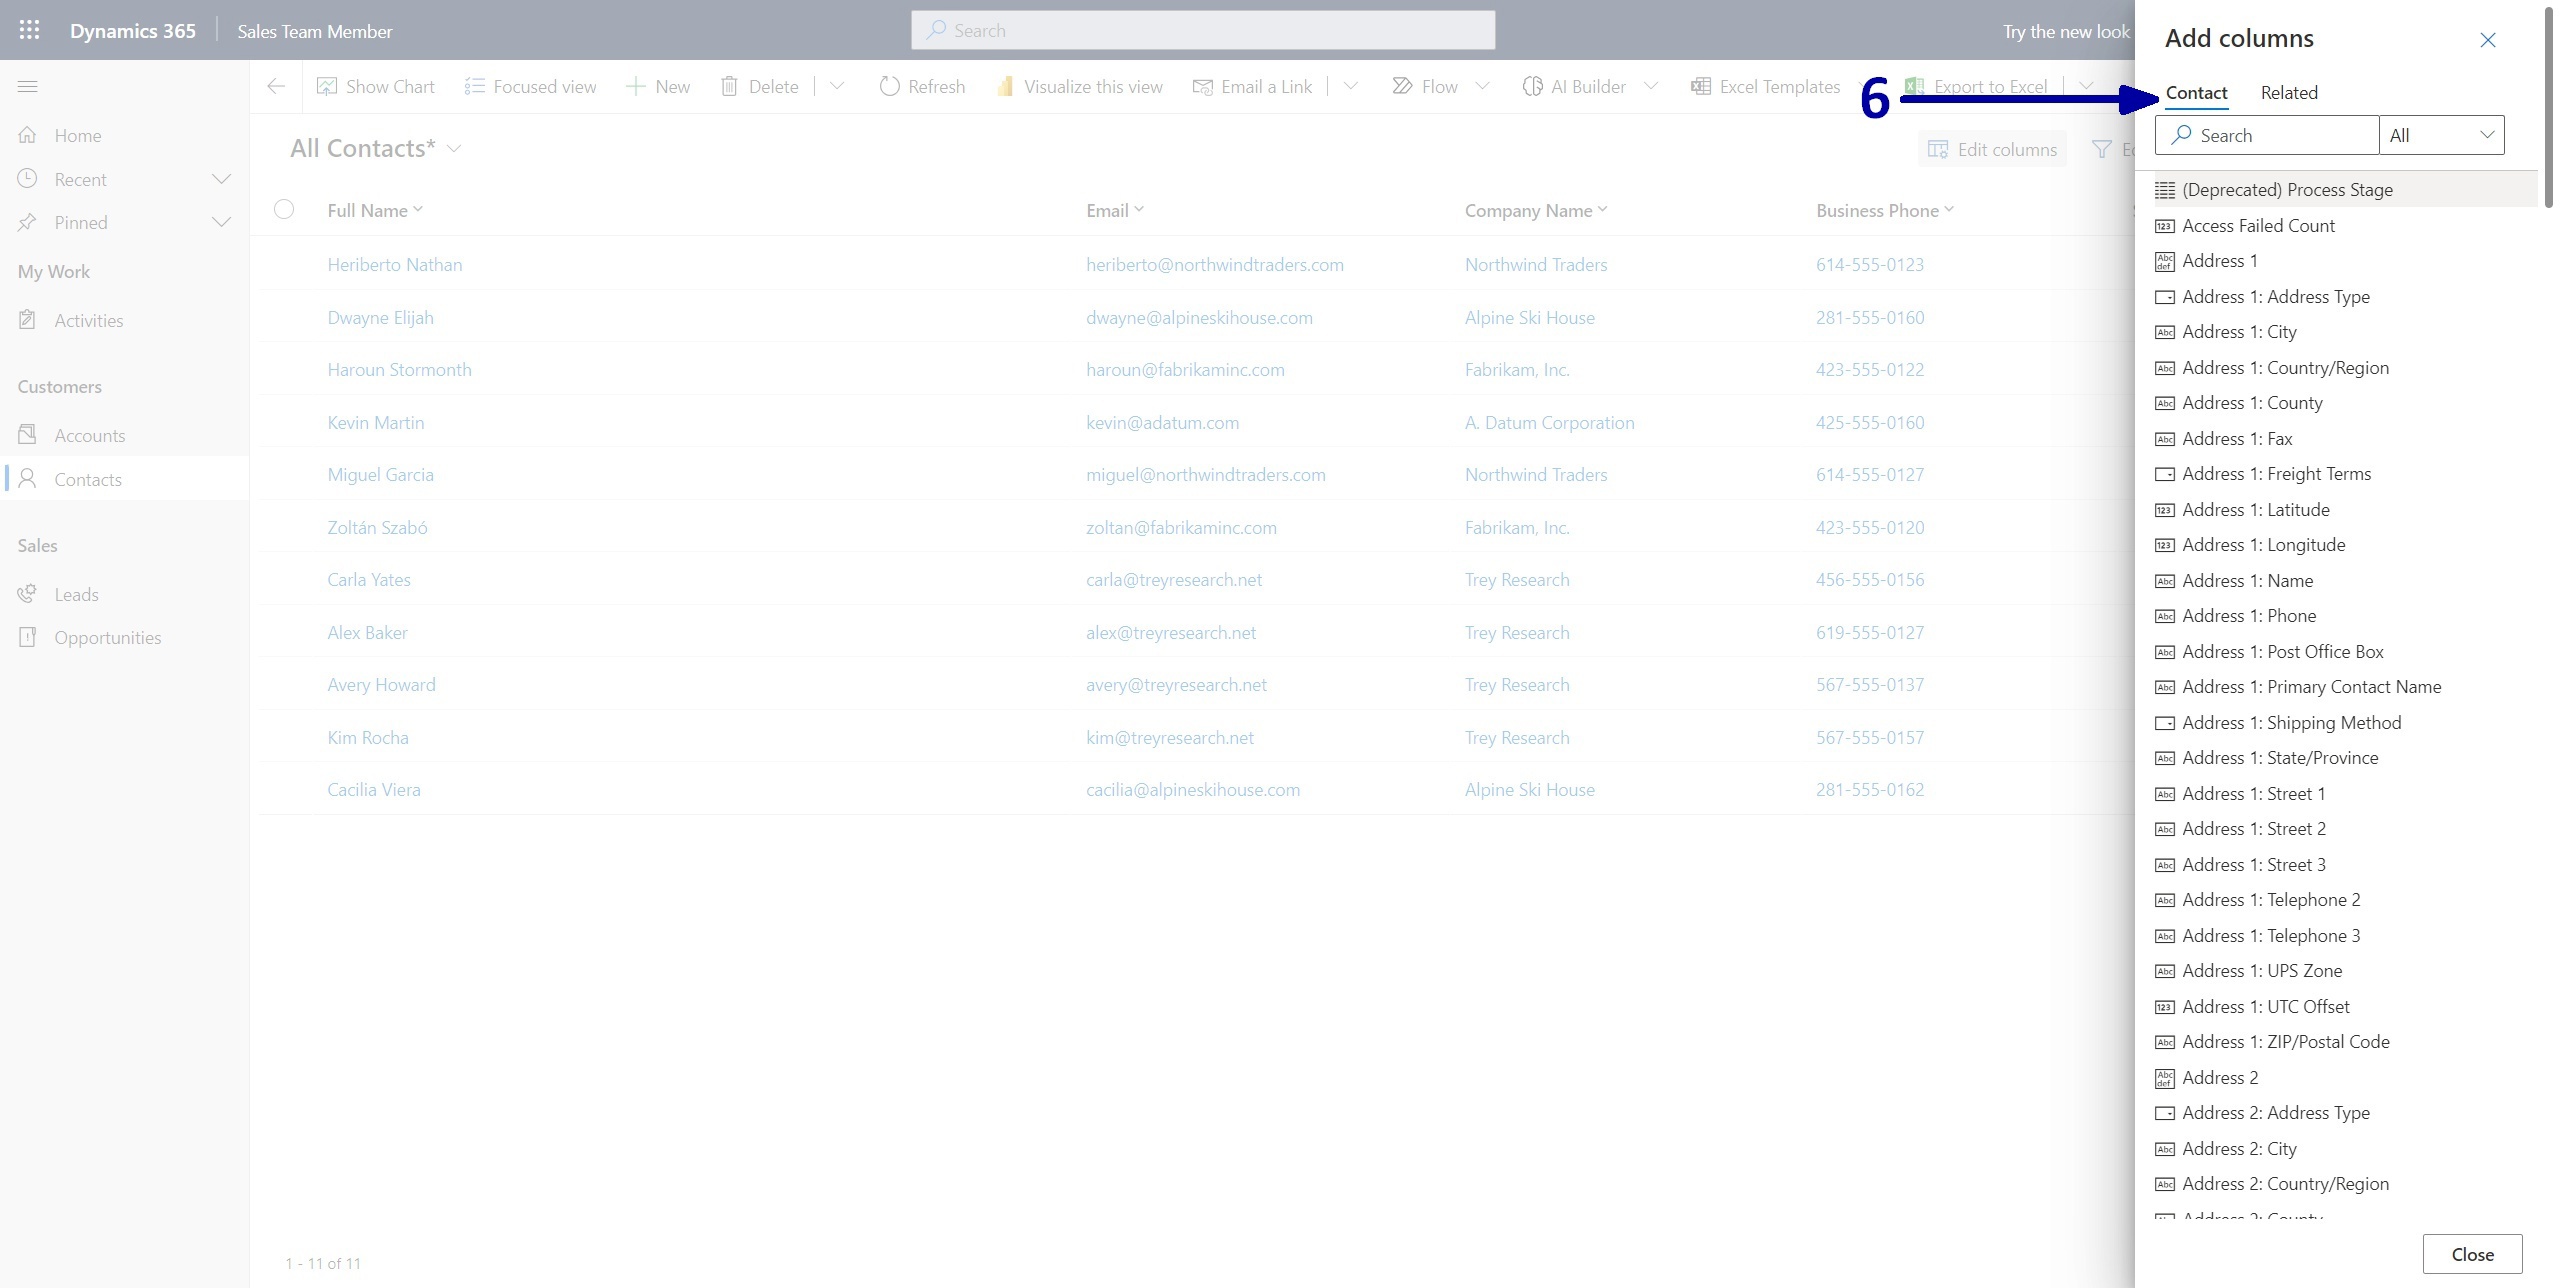
If you want to avoid scrolling through all the fields looking for the necessary one, use the search bar at the top (7) and enter part of the required field name to limit the available results.
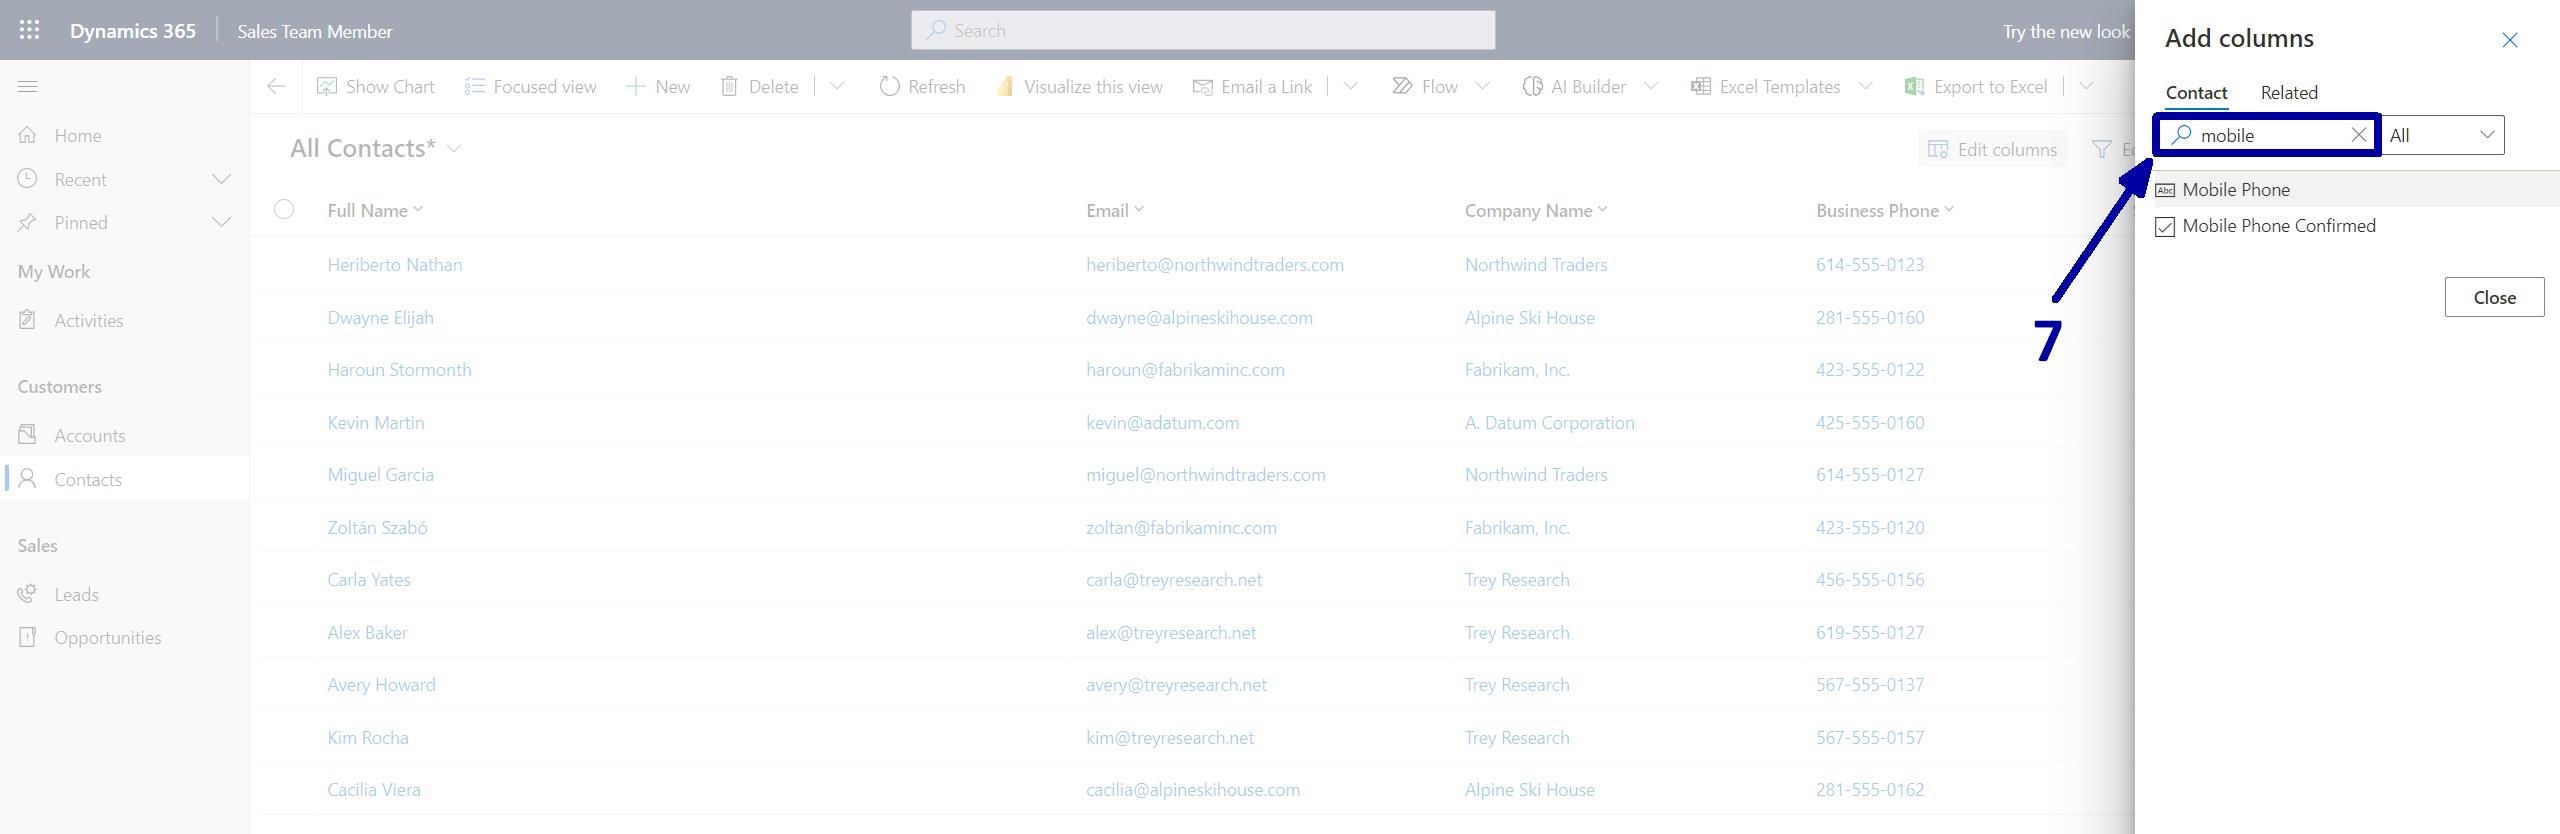
Select the Mobile phone field and prepare for it to disappear automatically. This isn't an error; it indicates that the field has been effectively included in the current view's column list.
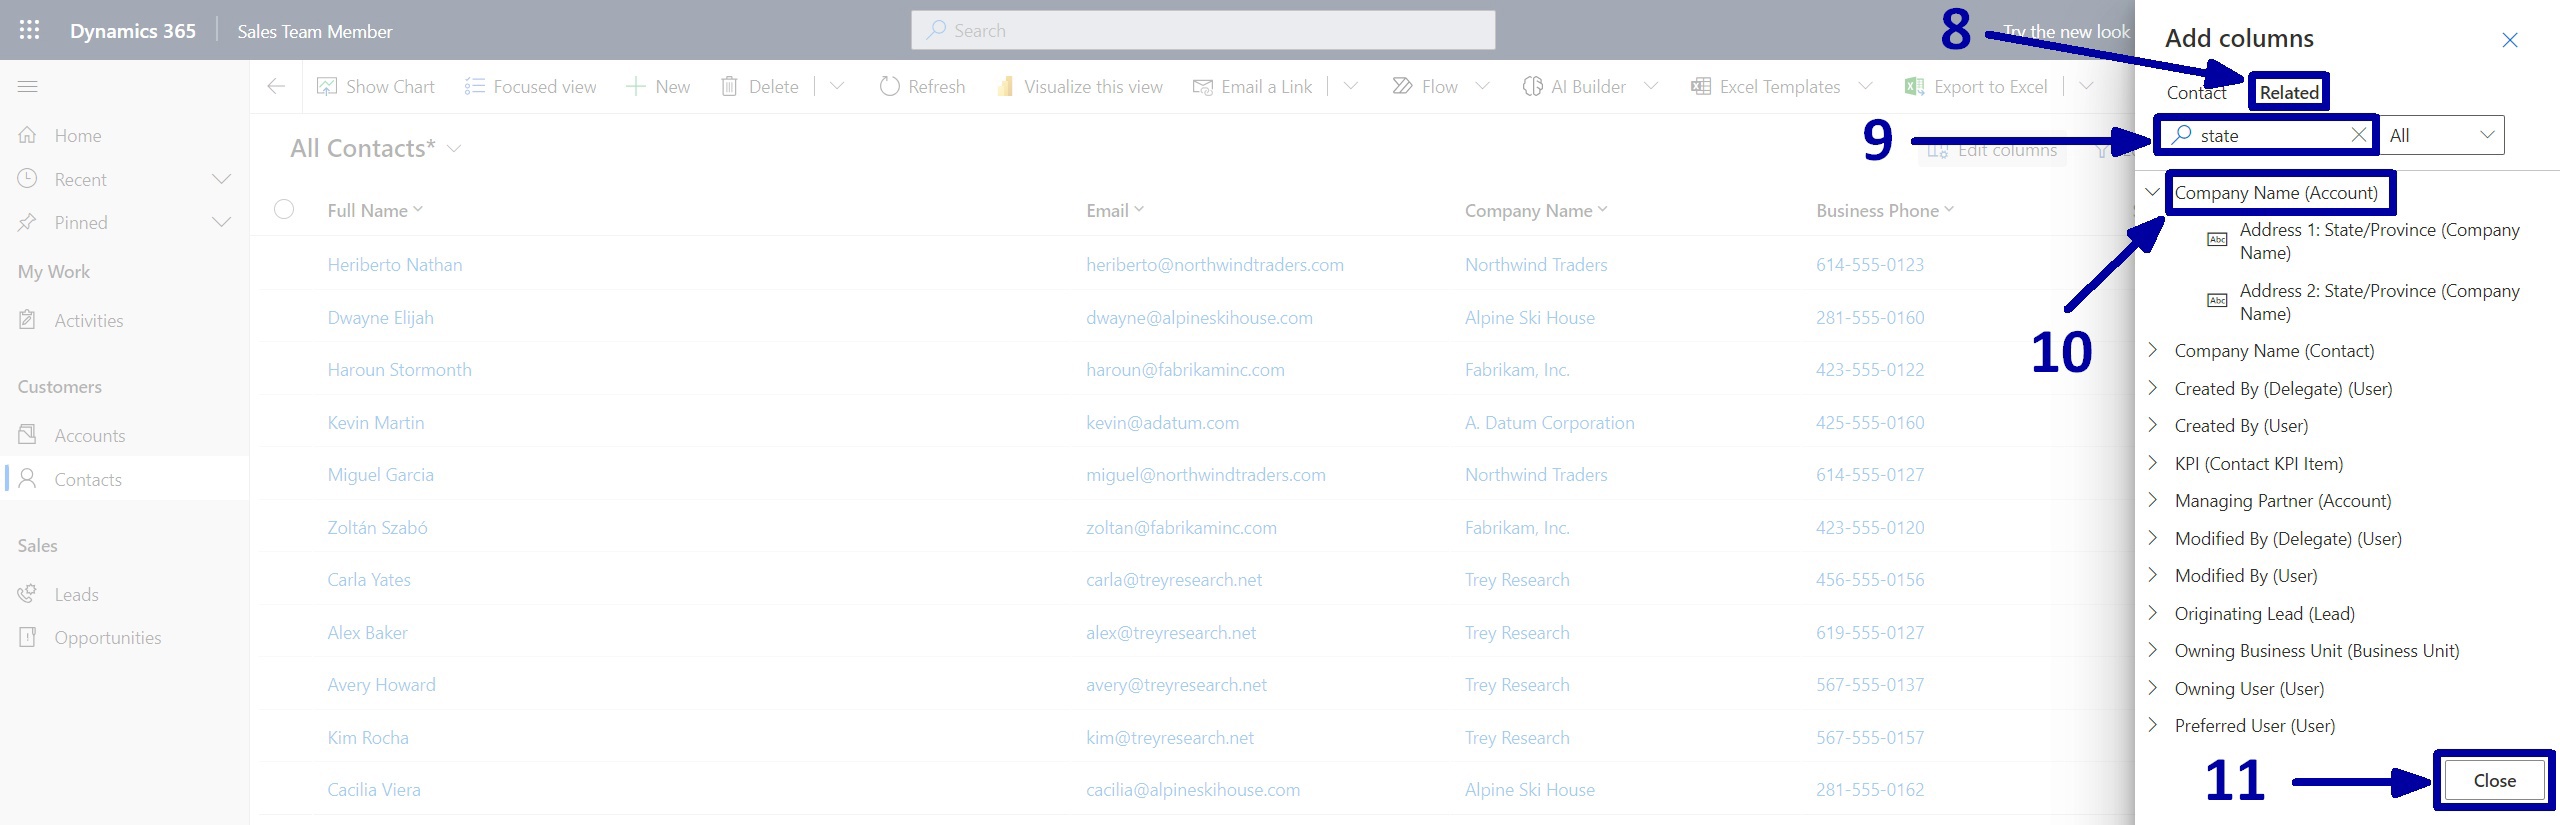
Now it's time to add an "Address 1: State/Province" field from the related Account entity.
To do that:
1. Switch to the Related tab (8).
2. Enter a part of the required field name in the search bar (9).
3. Expand the related Account entity (10).
4. Click on the "Address 1: State/Province" field.
5. Click on the Close button (11).
You will be automatically redirected to the initial sidebar, but this time, two new columns are added at the bottom of the list.
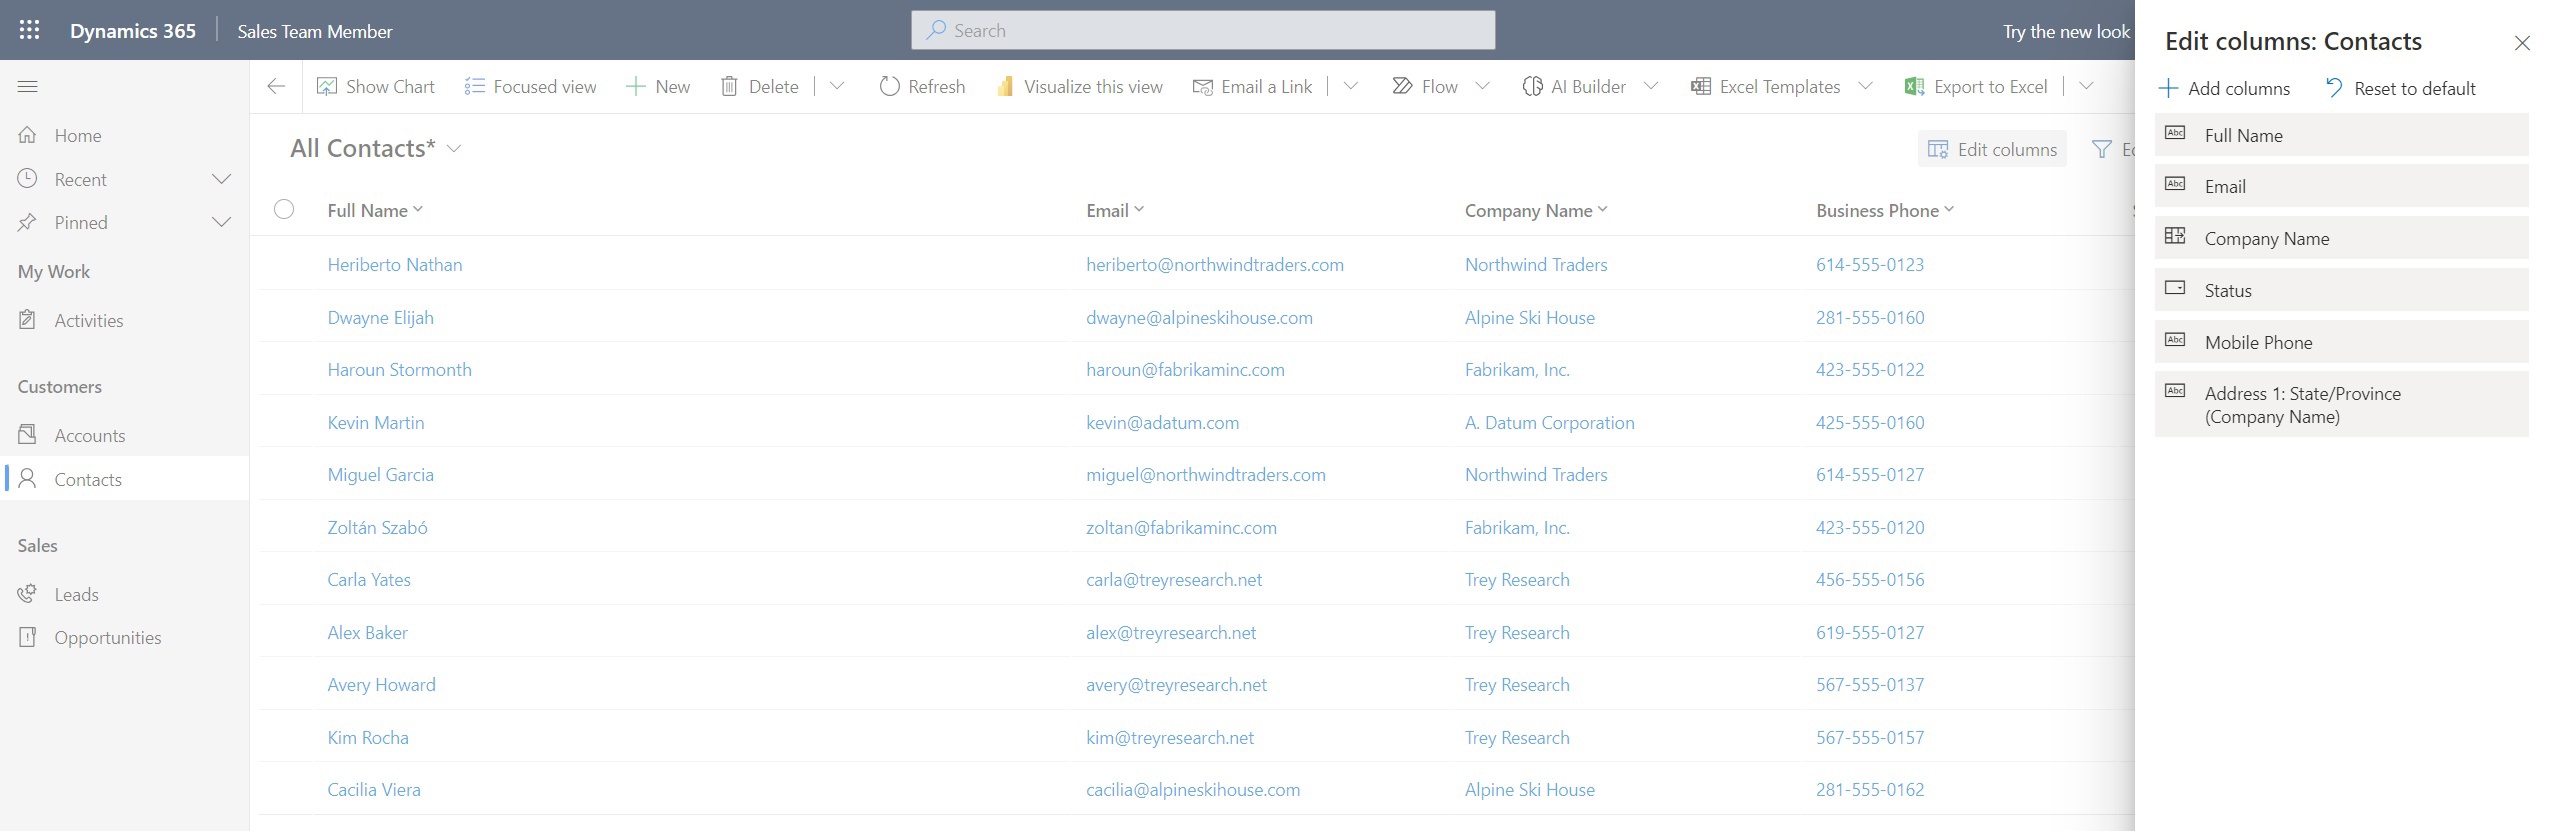
You can rearrange these columns by dragging and dropping them to make this view look more logical. After rearranging, click the Apply button (12) in the bottom right corner.

This action will close the right sidebar and refresh the view to reflect all the applied changes.

That's it. You did it.
Conclusion
Temporary modifications to views can be highly convenient when you require quick adjustments without the need to create a permanent personal view. However, it's important to note that any changes made to the view are not saved permanently and will be lost upon a simple webpage refresh. To retain these modifications, it's advisable to create a personal view.