
Introduction
We previously guided you through creating a personal view step by step in the Microsoft Dynamics 365 Classic Interface (How to Create a Personal View in Microsoft Dynamics 365).
Today, we'll show you how to achieve the same in the Modern Interface.
Step-by-step guide
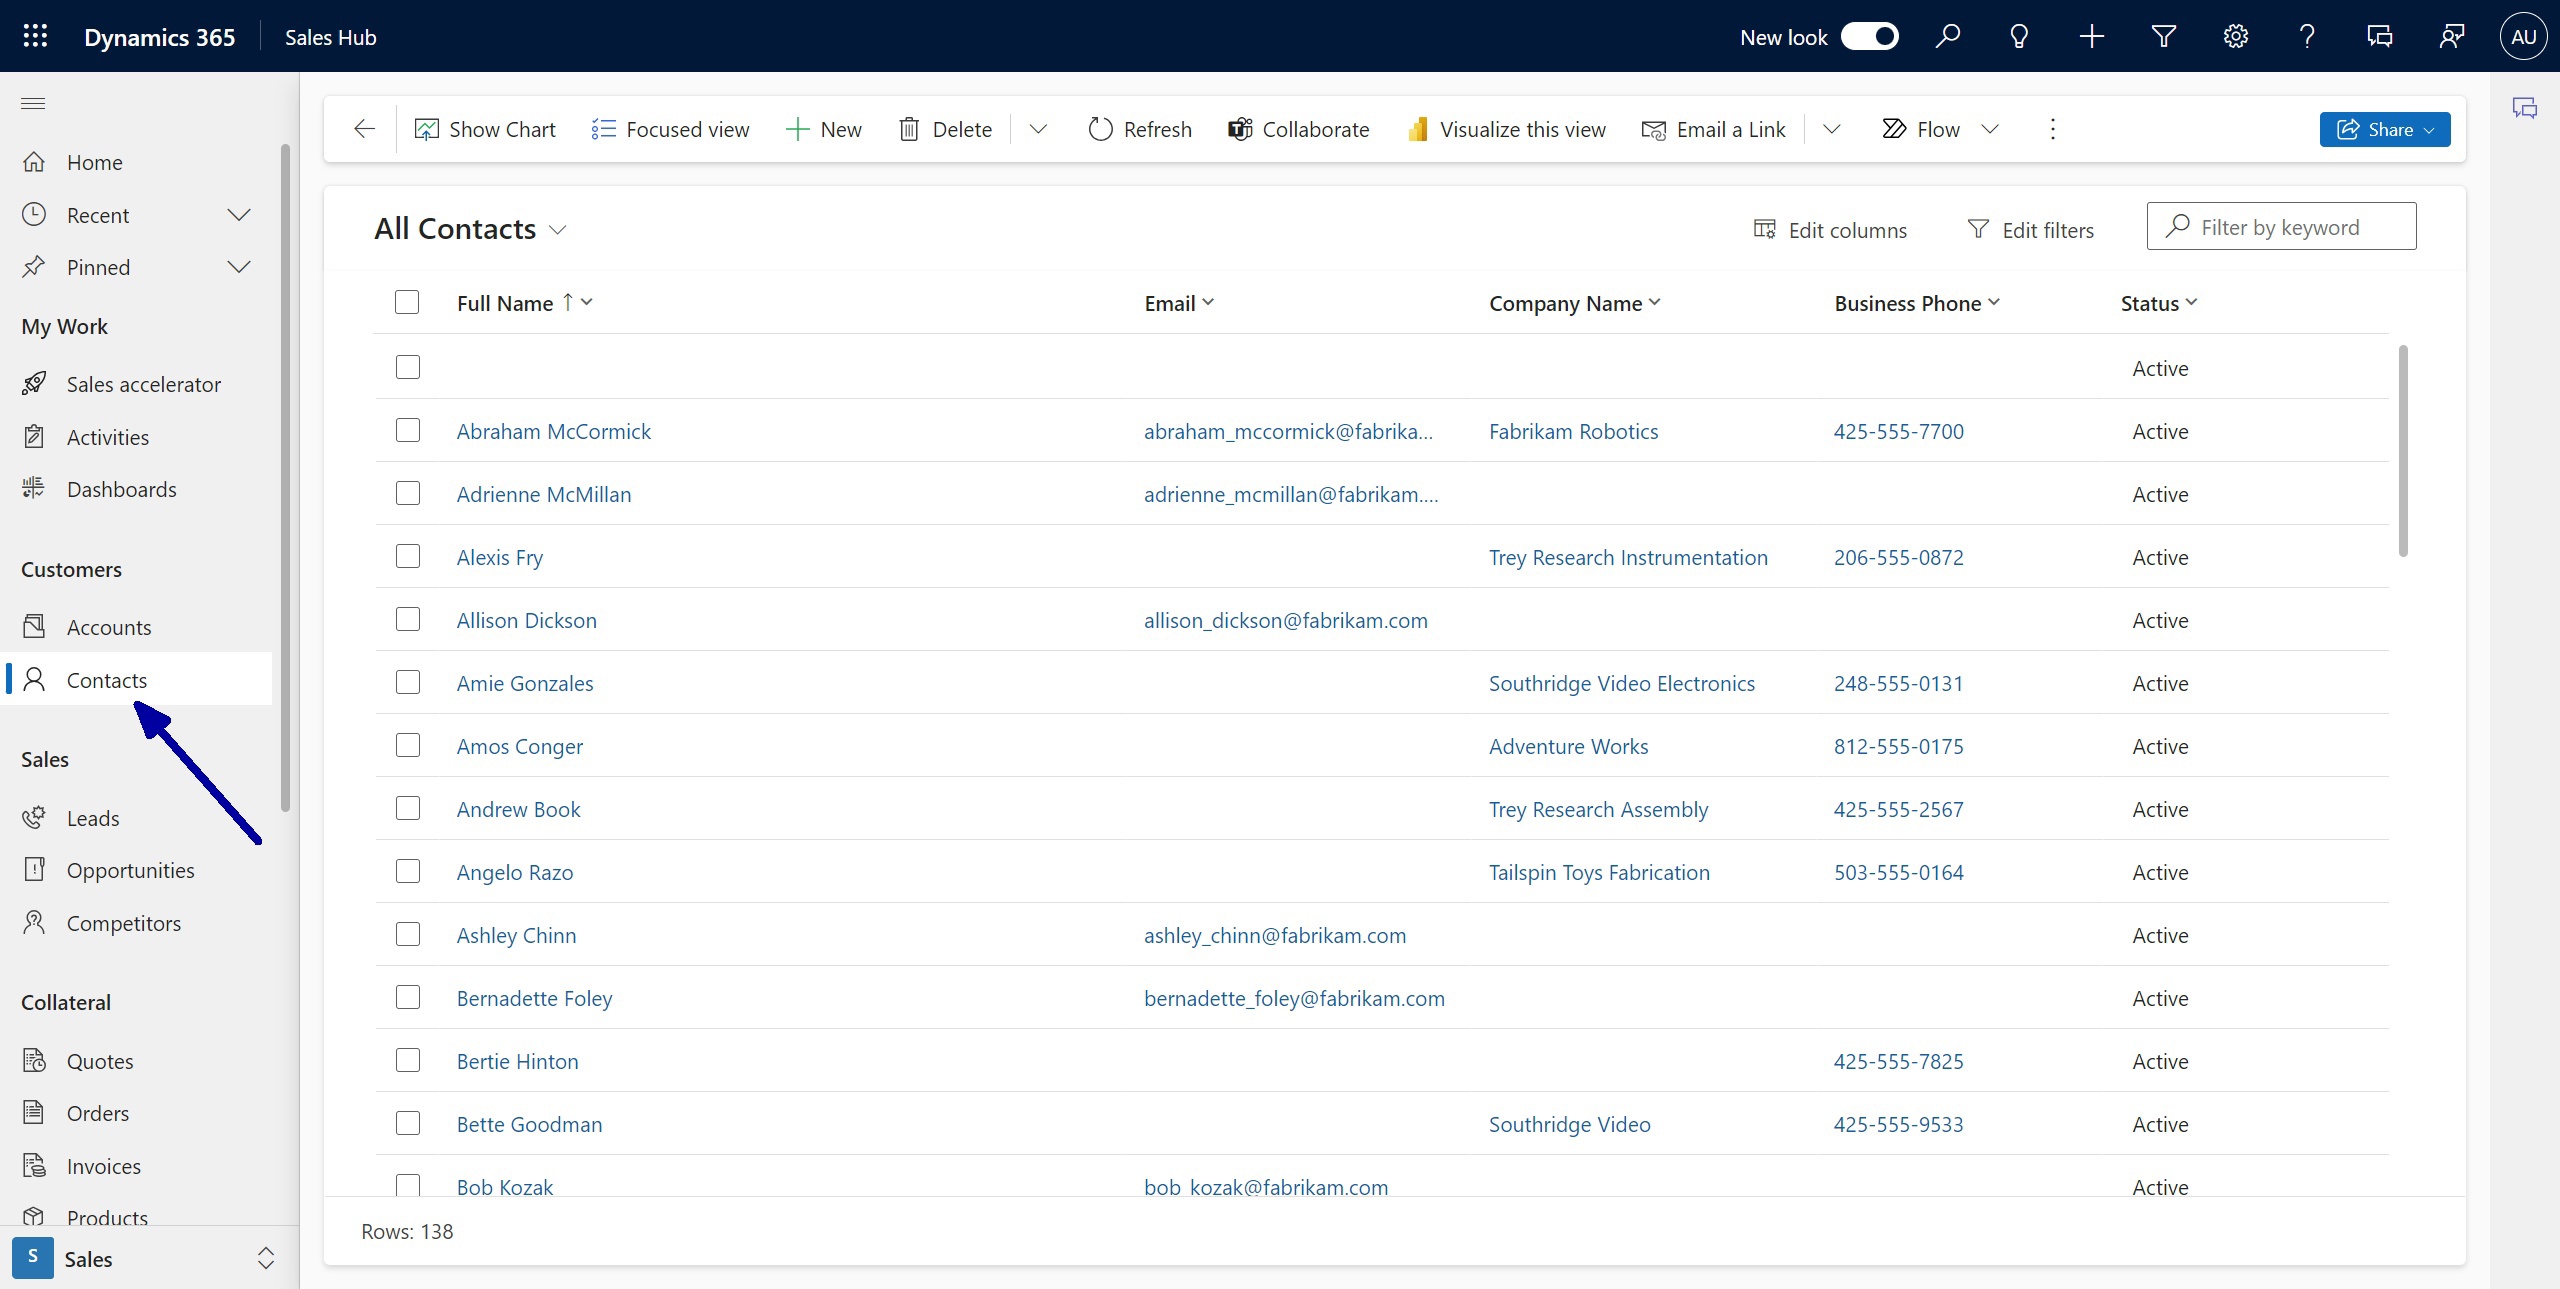
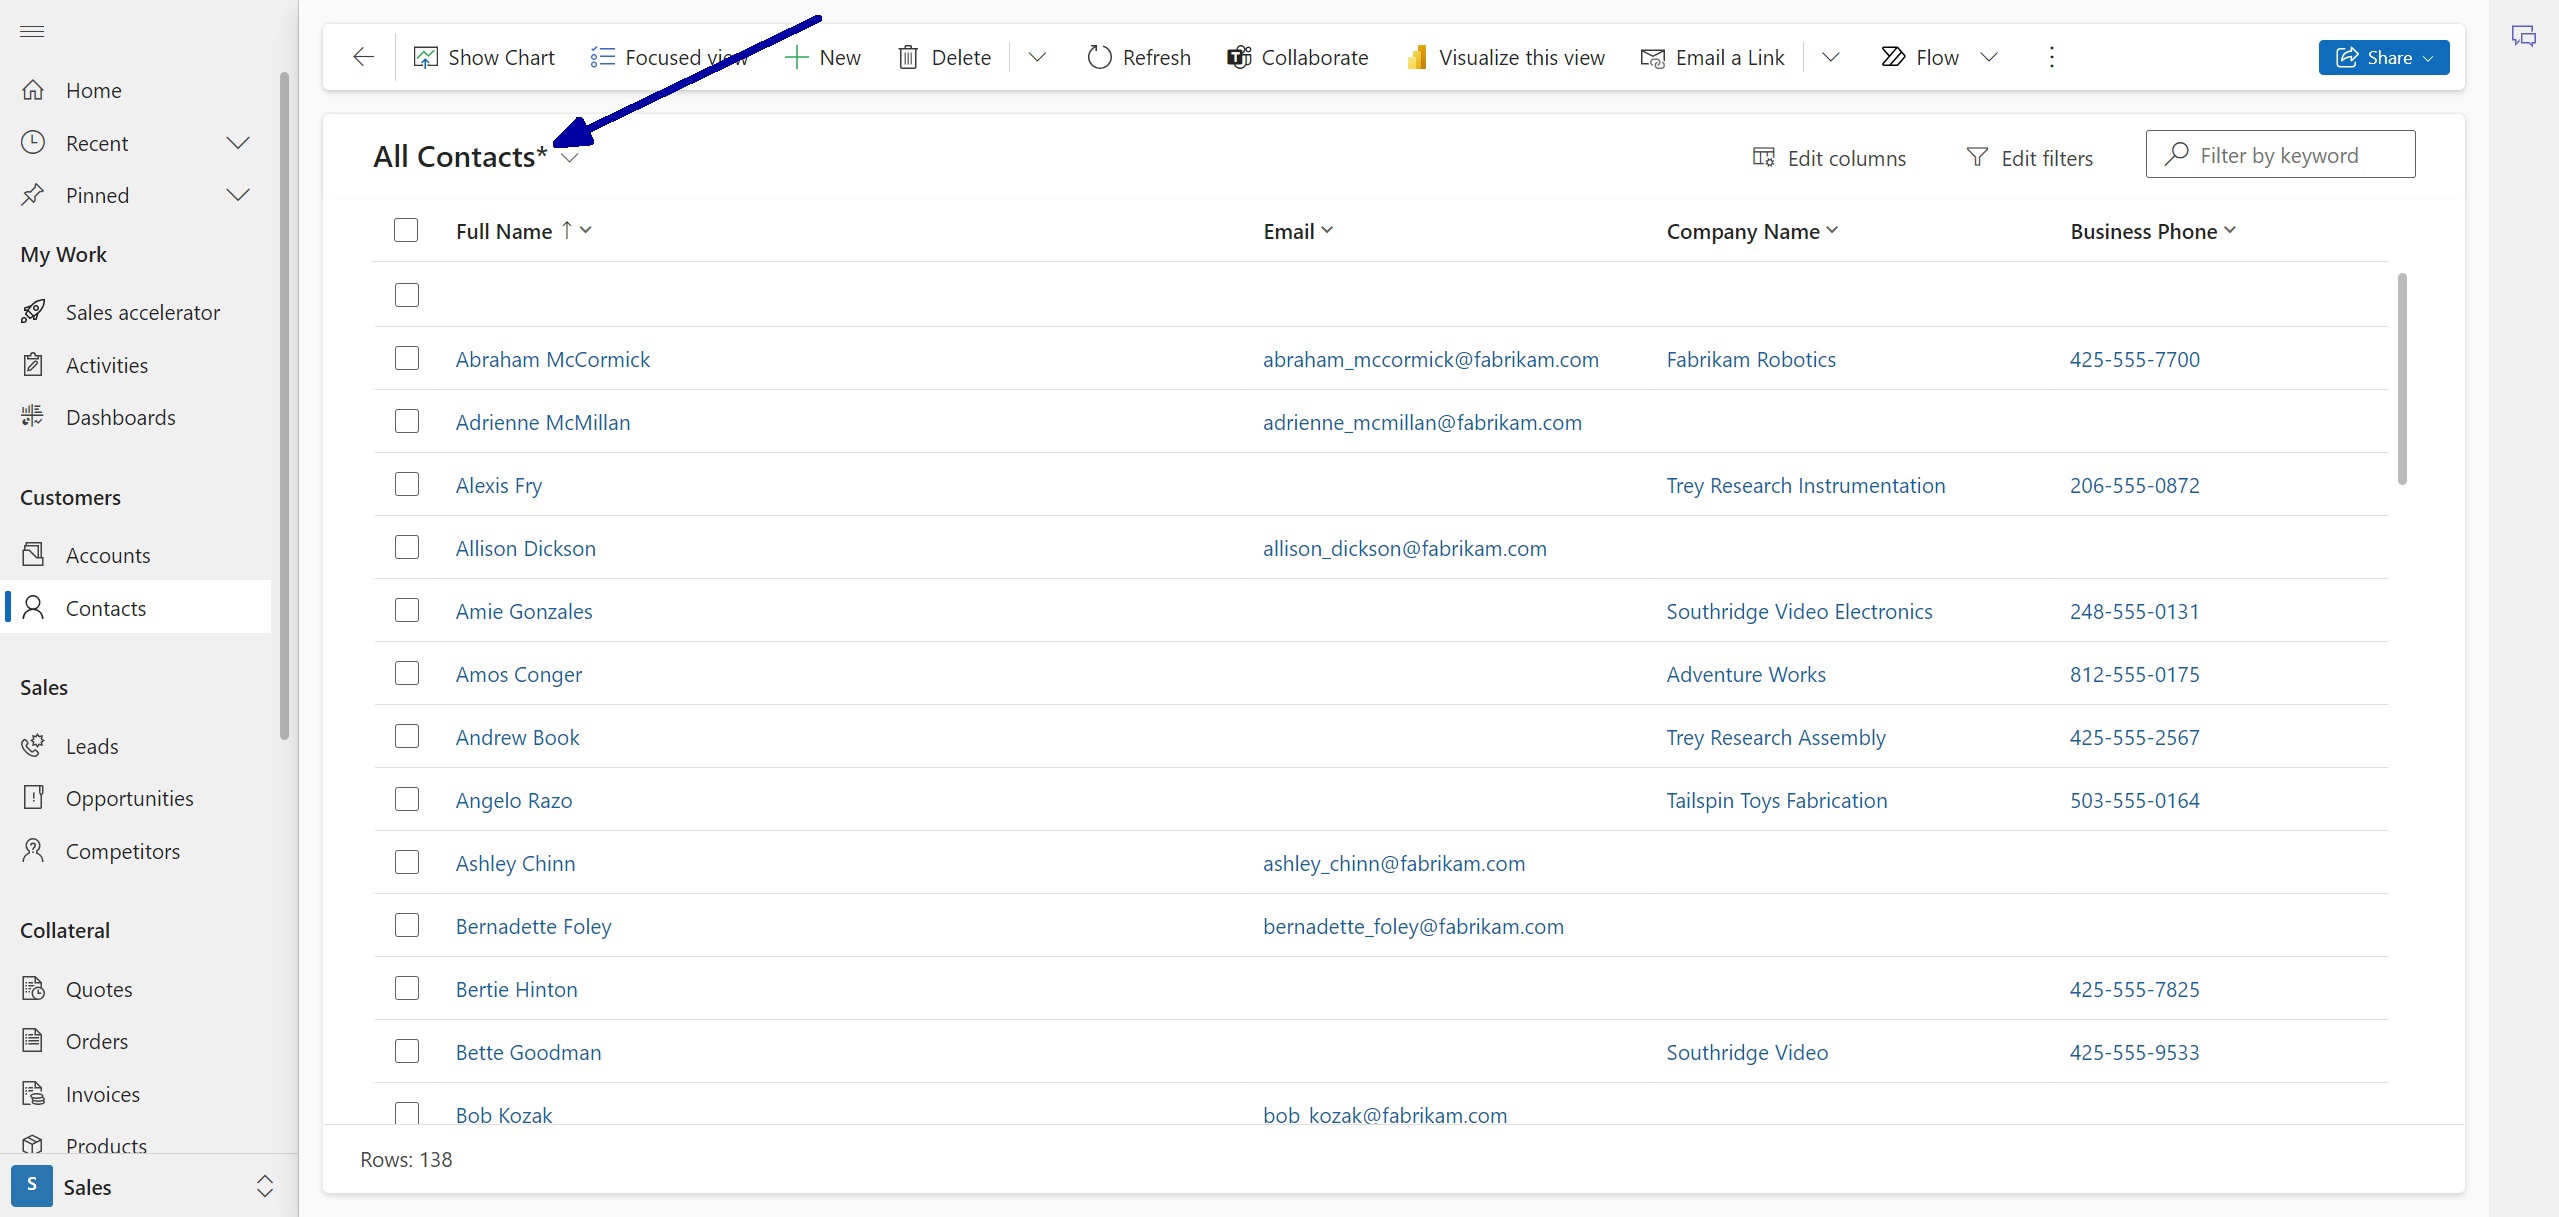
1. Open the entity for which you want to create a personal view (using the Contacts entity as an example in this case).
2. Let’s modify this view using the “Edit columns” and “Edit filters” options.
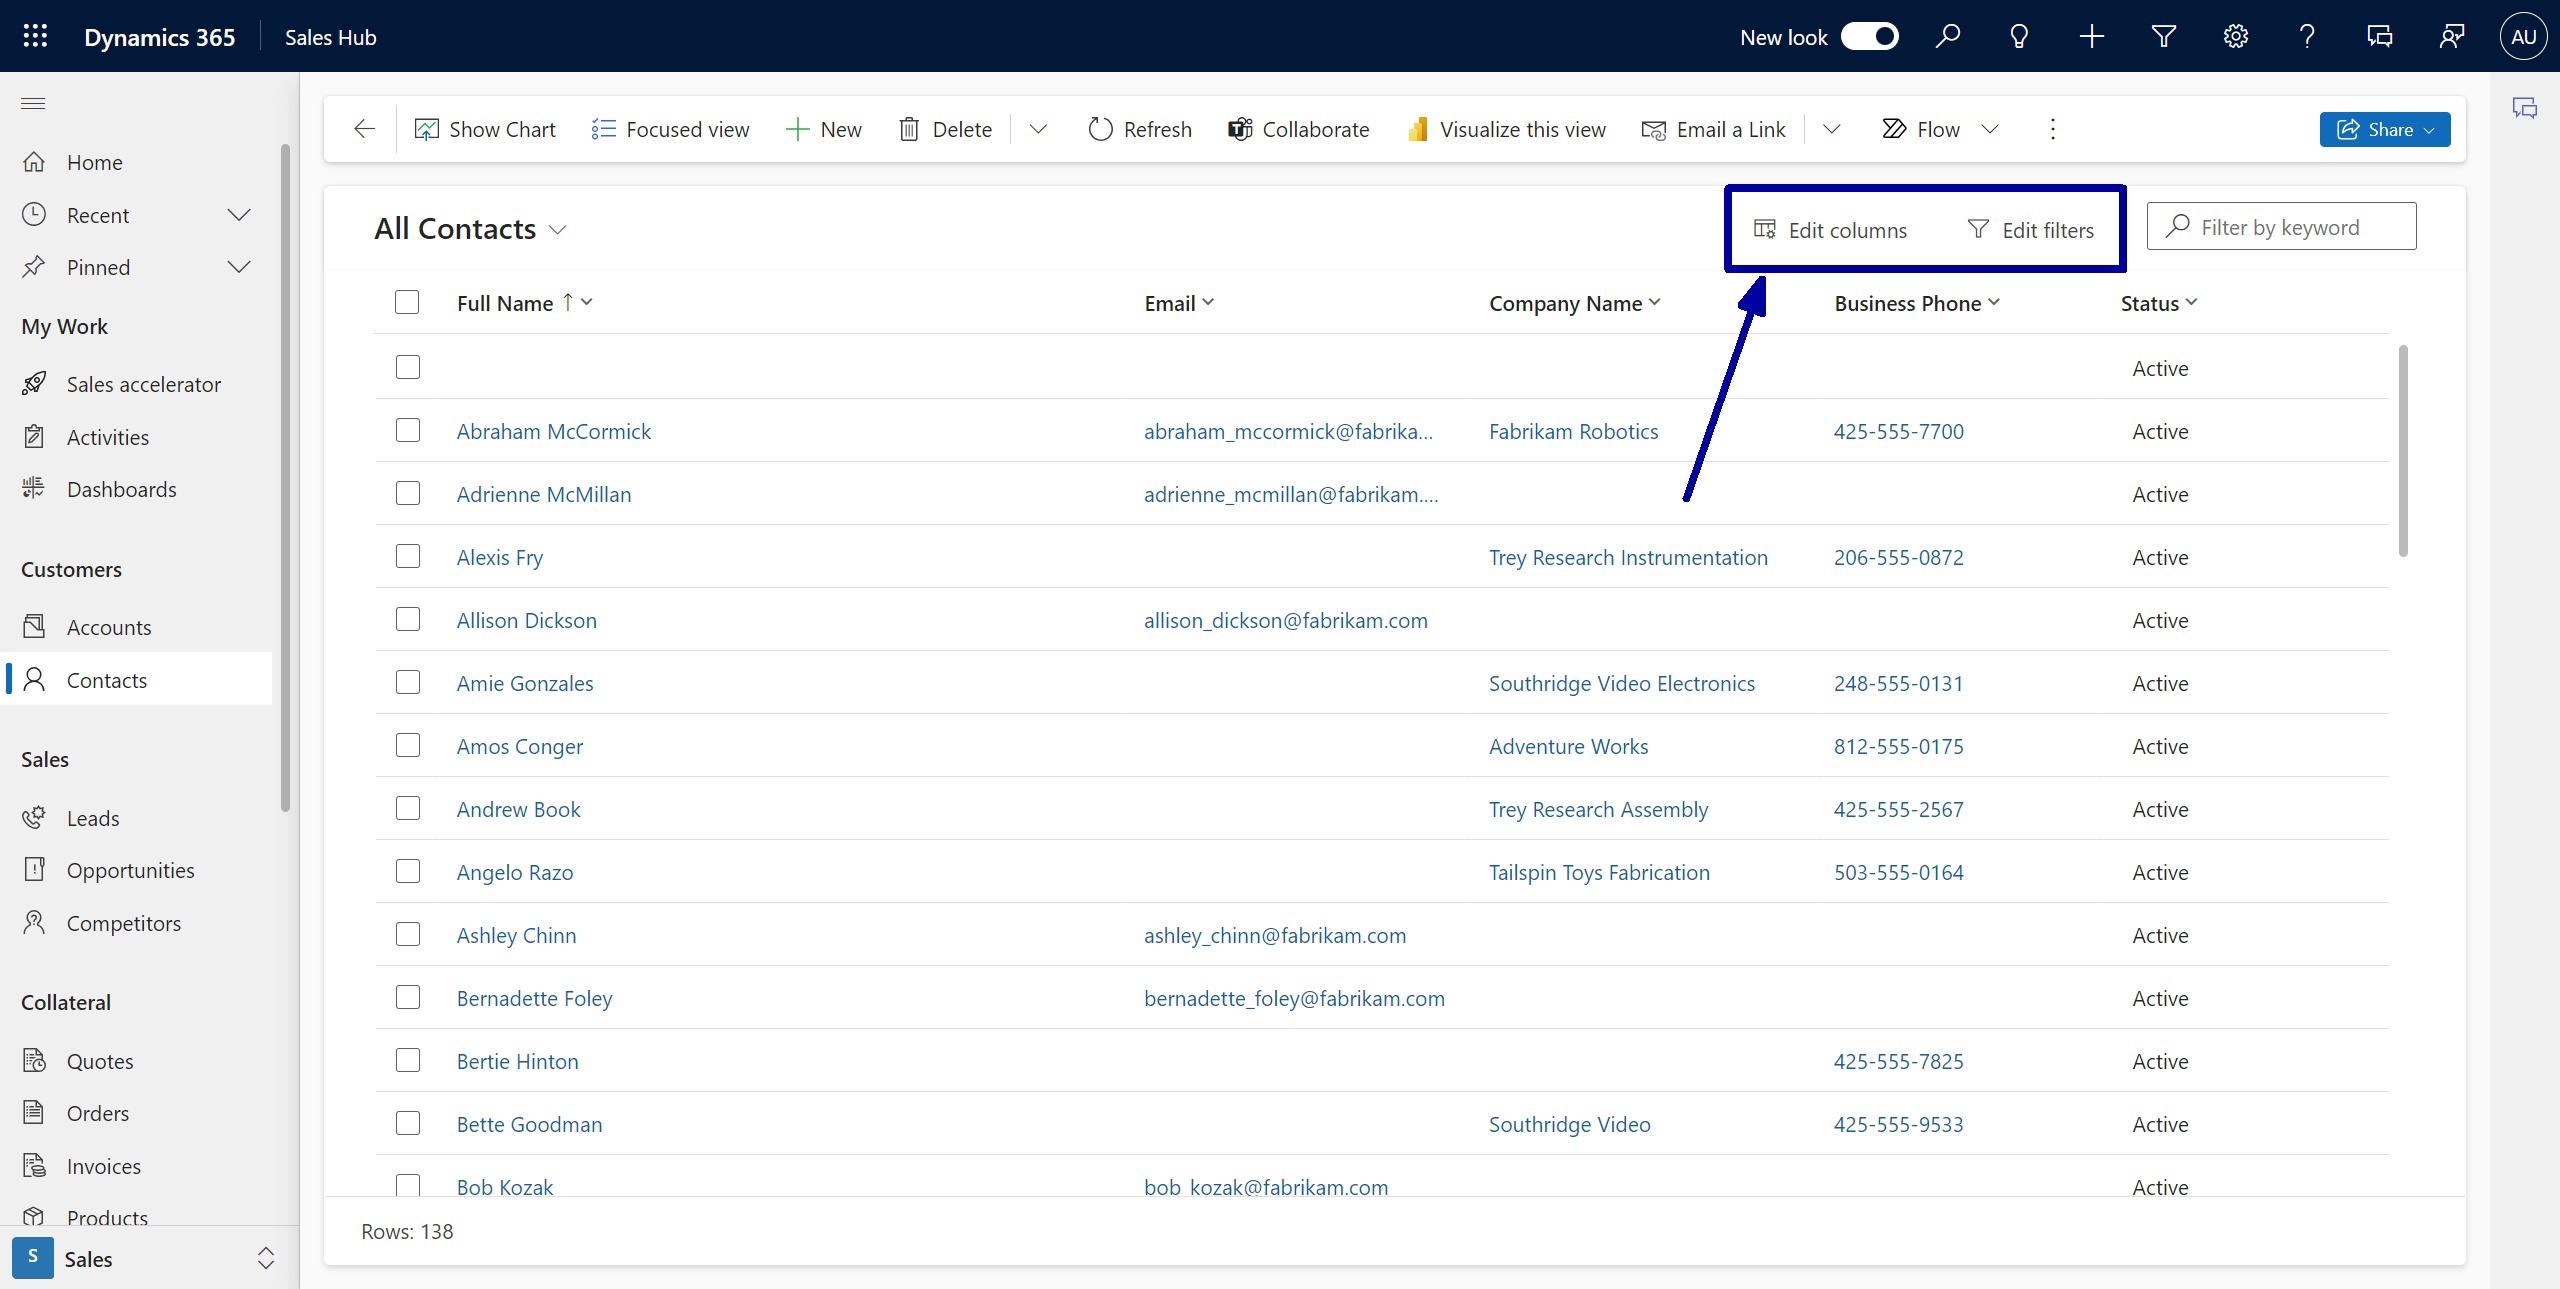
Assuming we need to modify the All Contacts view by removing the Status column, excluding Contacts records without Email field data, and sorting contacts alphabetically by email address.
a) Edit Columns:
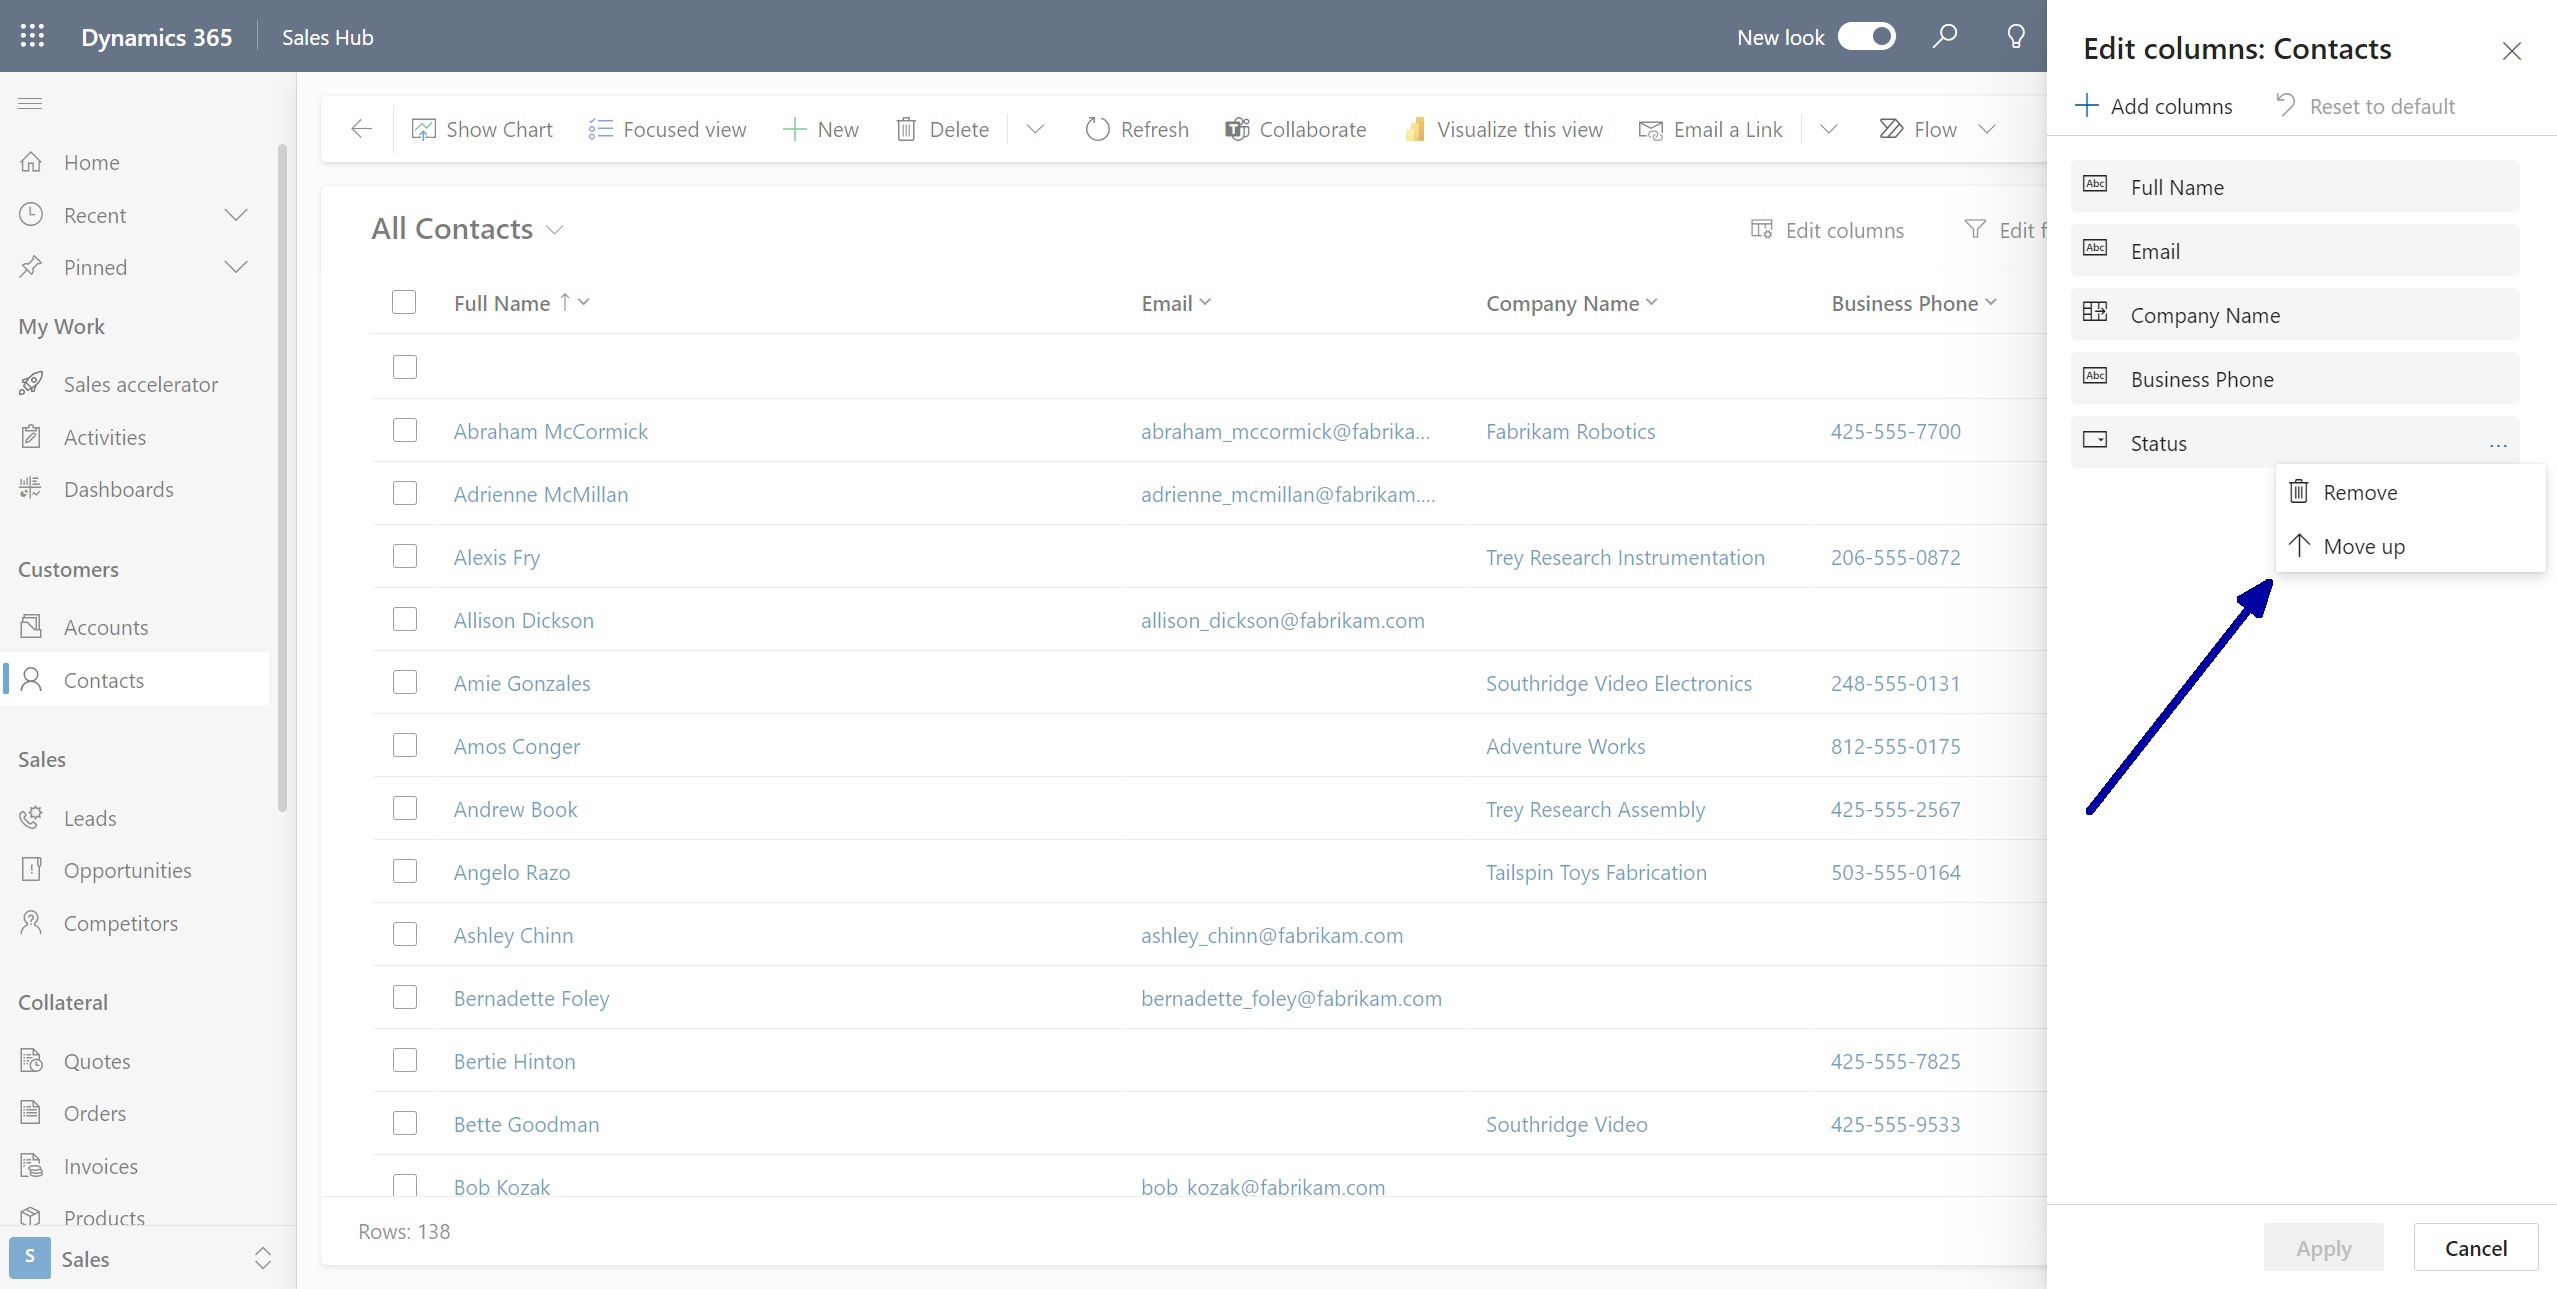
• Click on “Edit columns.”
• A sidebar will open. Hover over the Status column you want to remove, click on the three dots at the end of the column name, and select the Remove option.
• Click the Apply button at the bottom right.
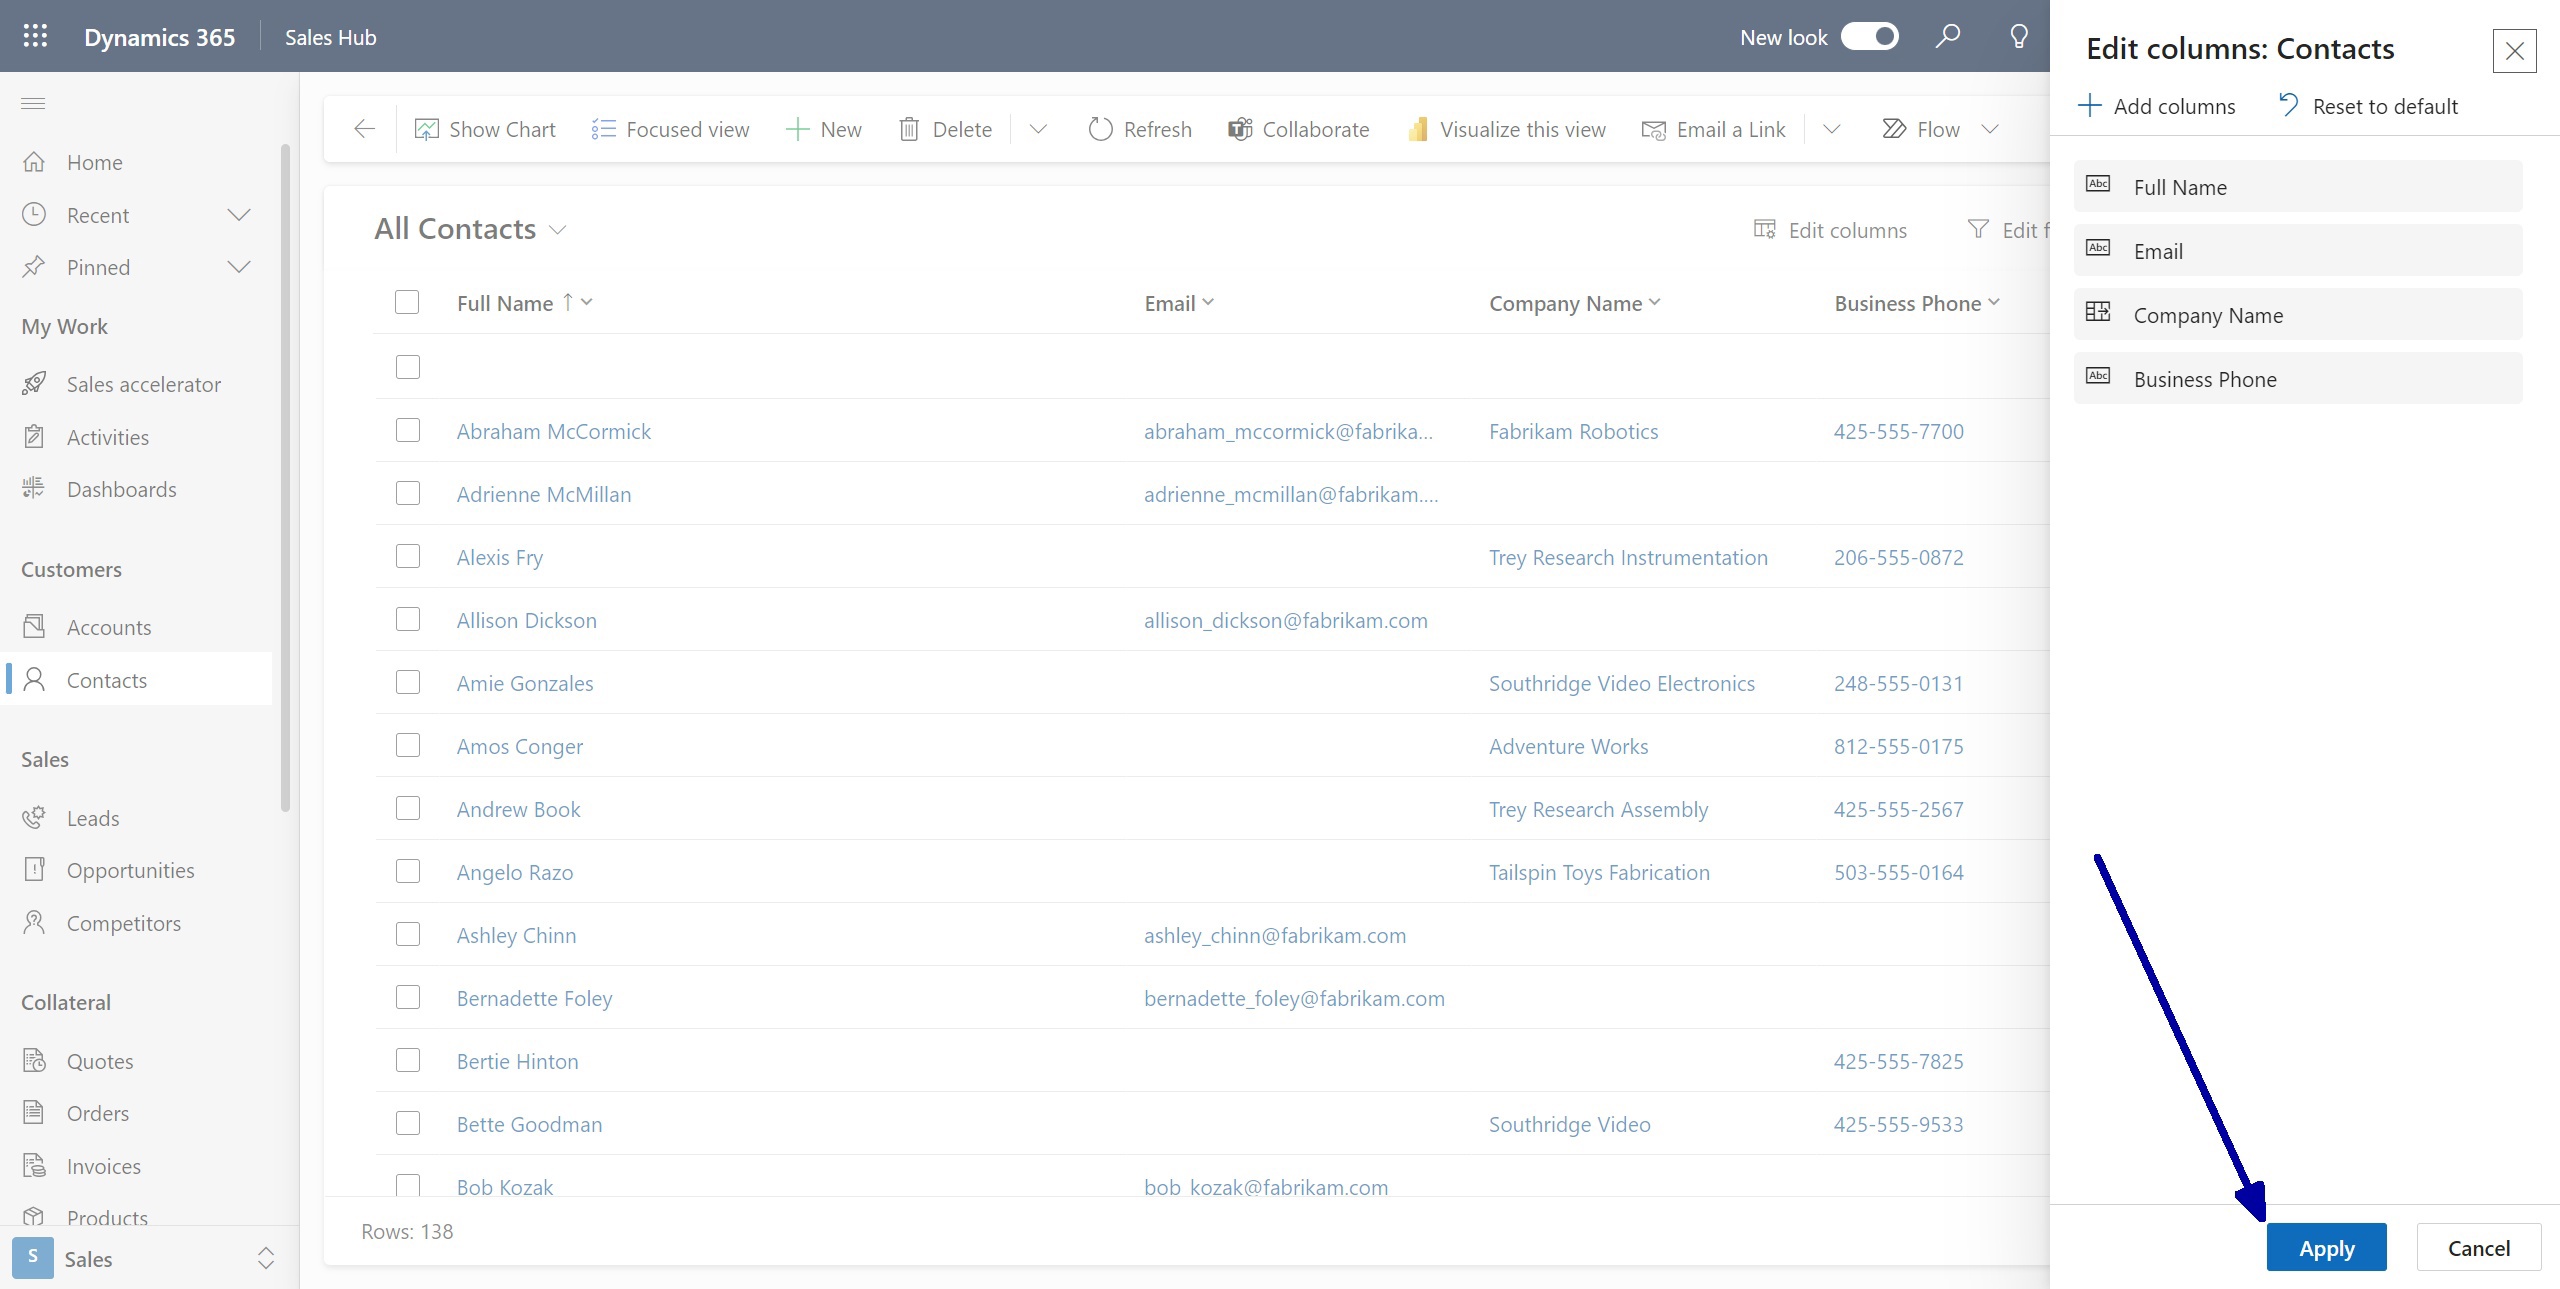
As a result, you will have a view without the Status column. Note the asterisk sign after the view name, indicating that the view has been modified, and all progress will be lost without saving in case of an accidental page refresh.
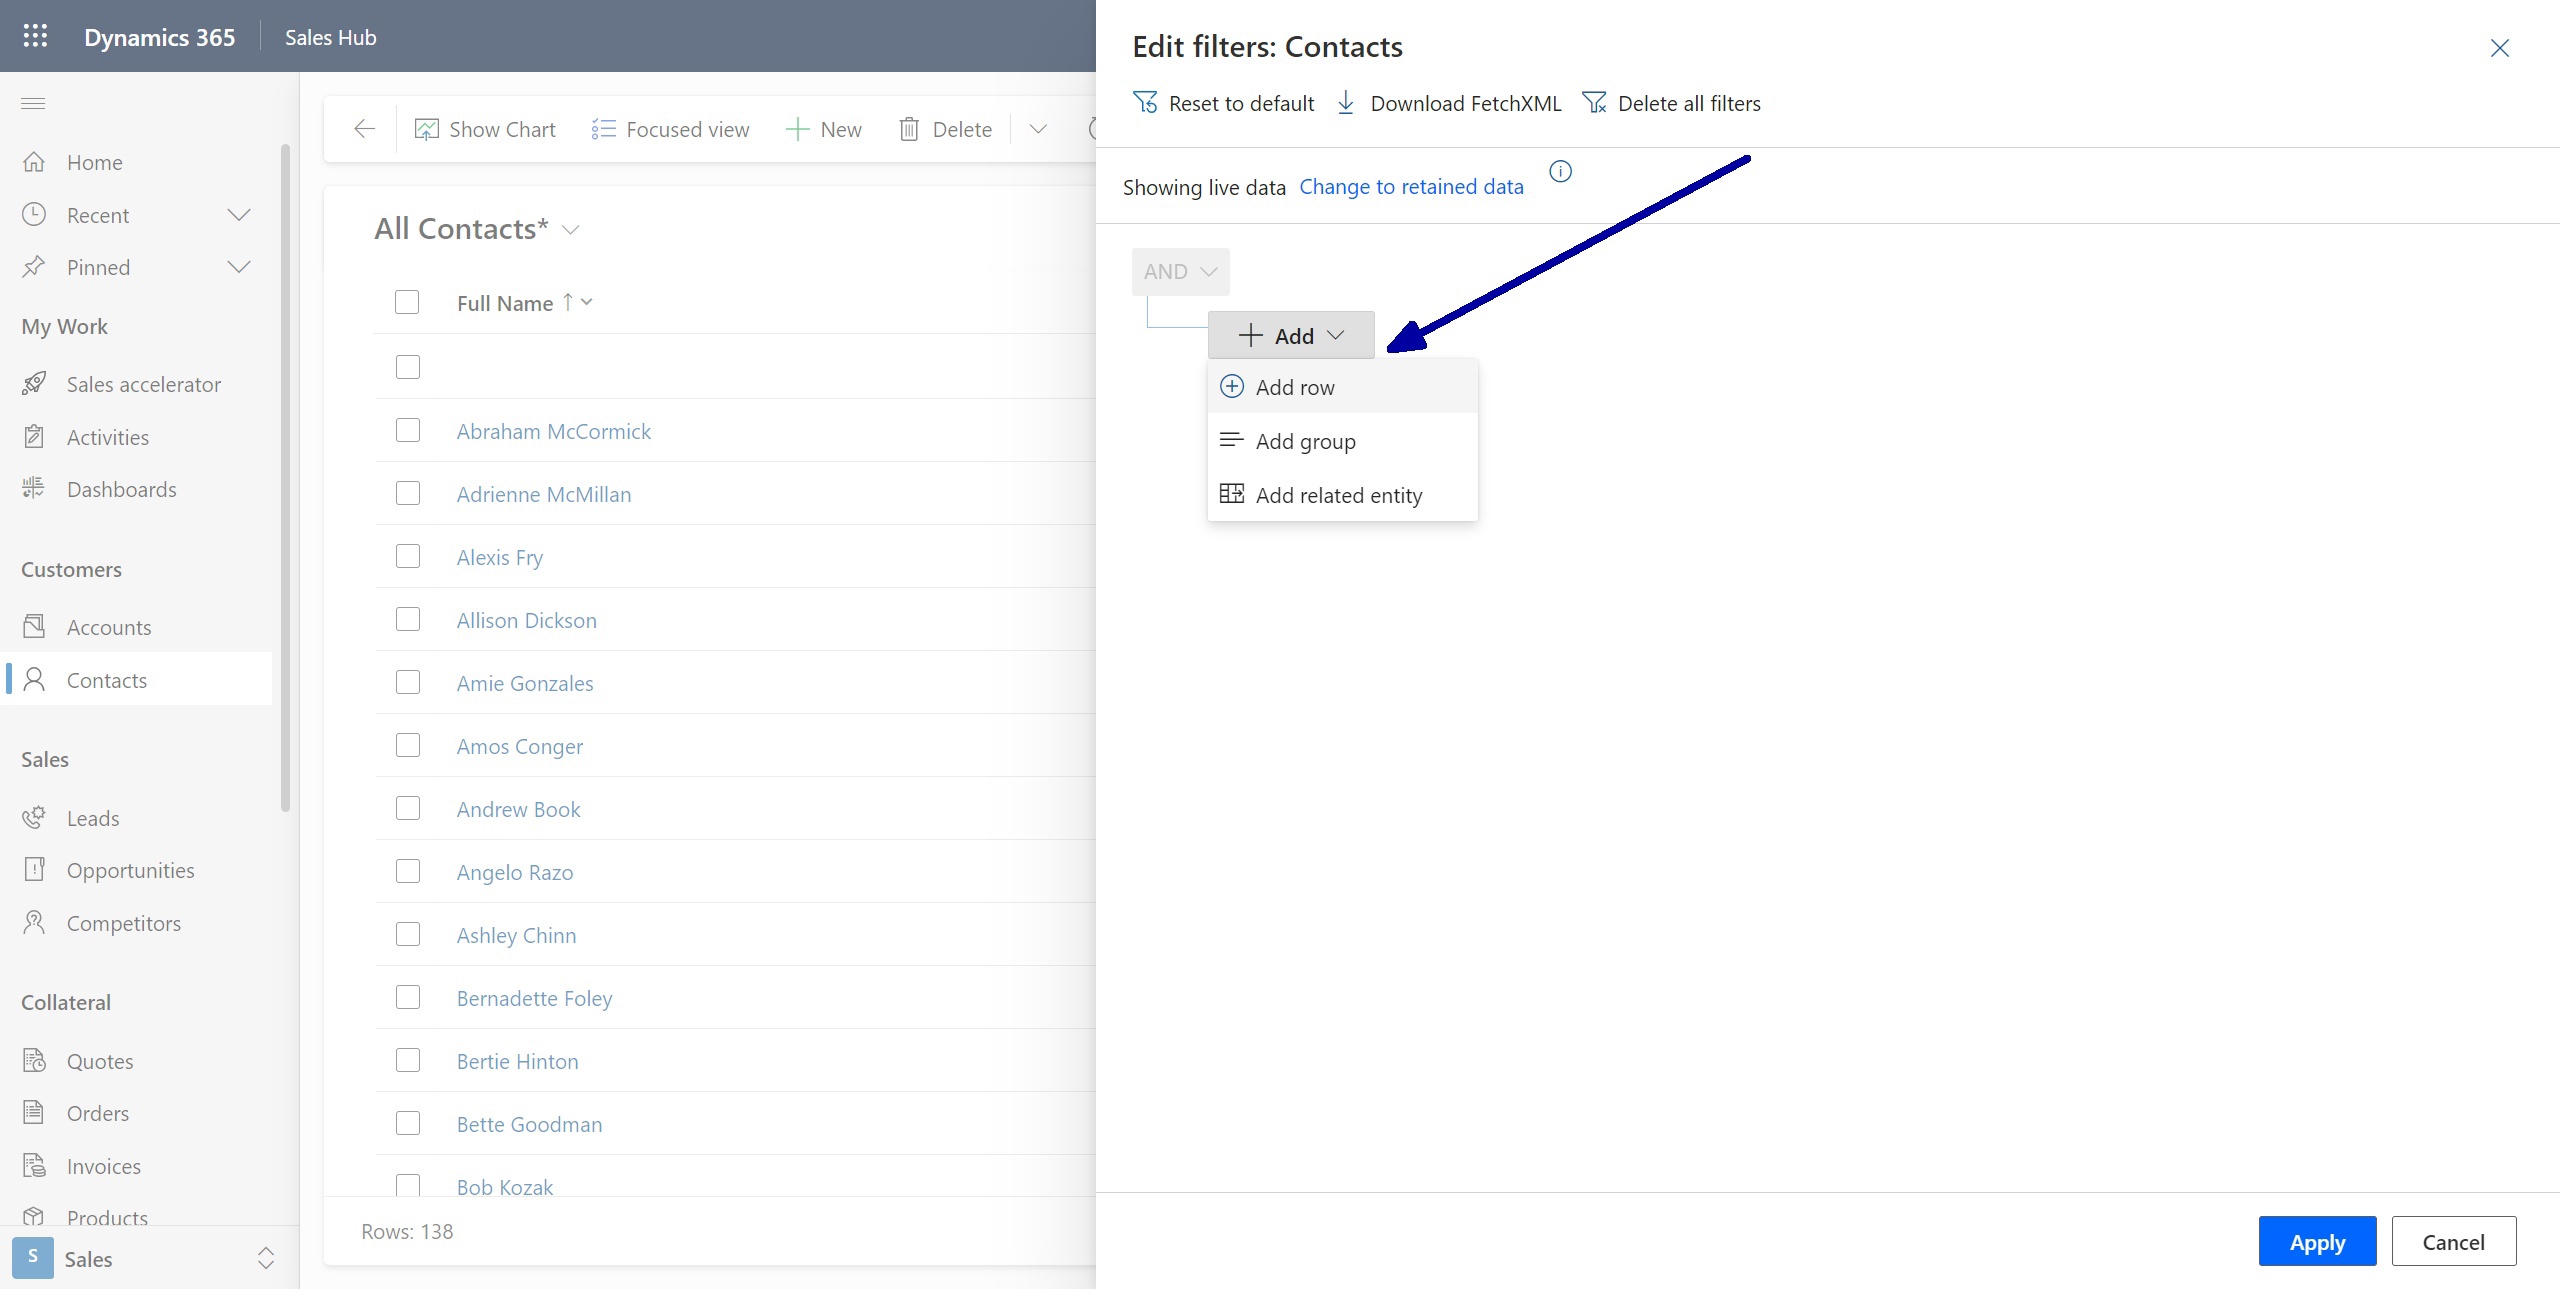
b) Edit Filters:
• Click on “Edit filters.”
• Another sidebar will open. Open the +Add dropdown and click on the “Add row” option.
• To include only records with email addresses, select Email as the field to filter and “Contain data” as the filter option. Click Apply at the bottom right.
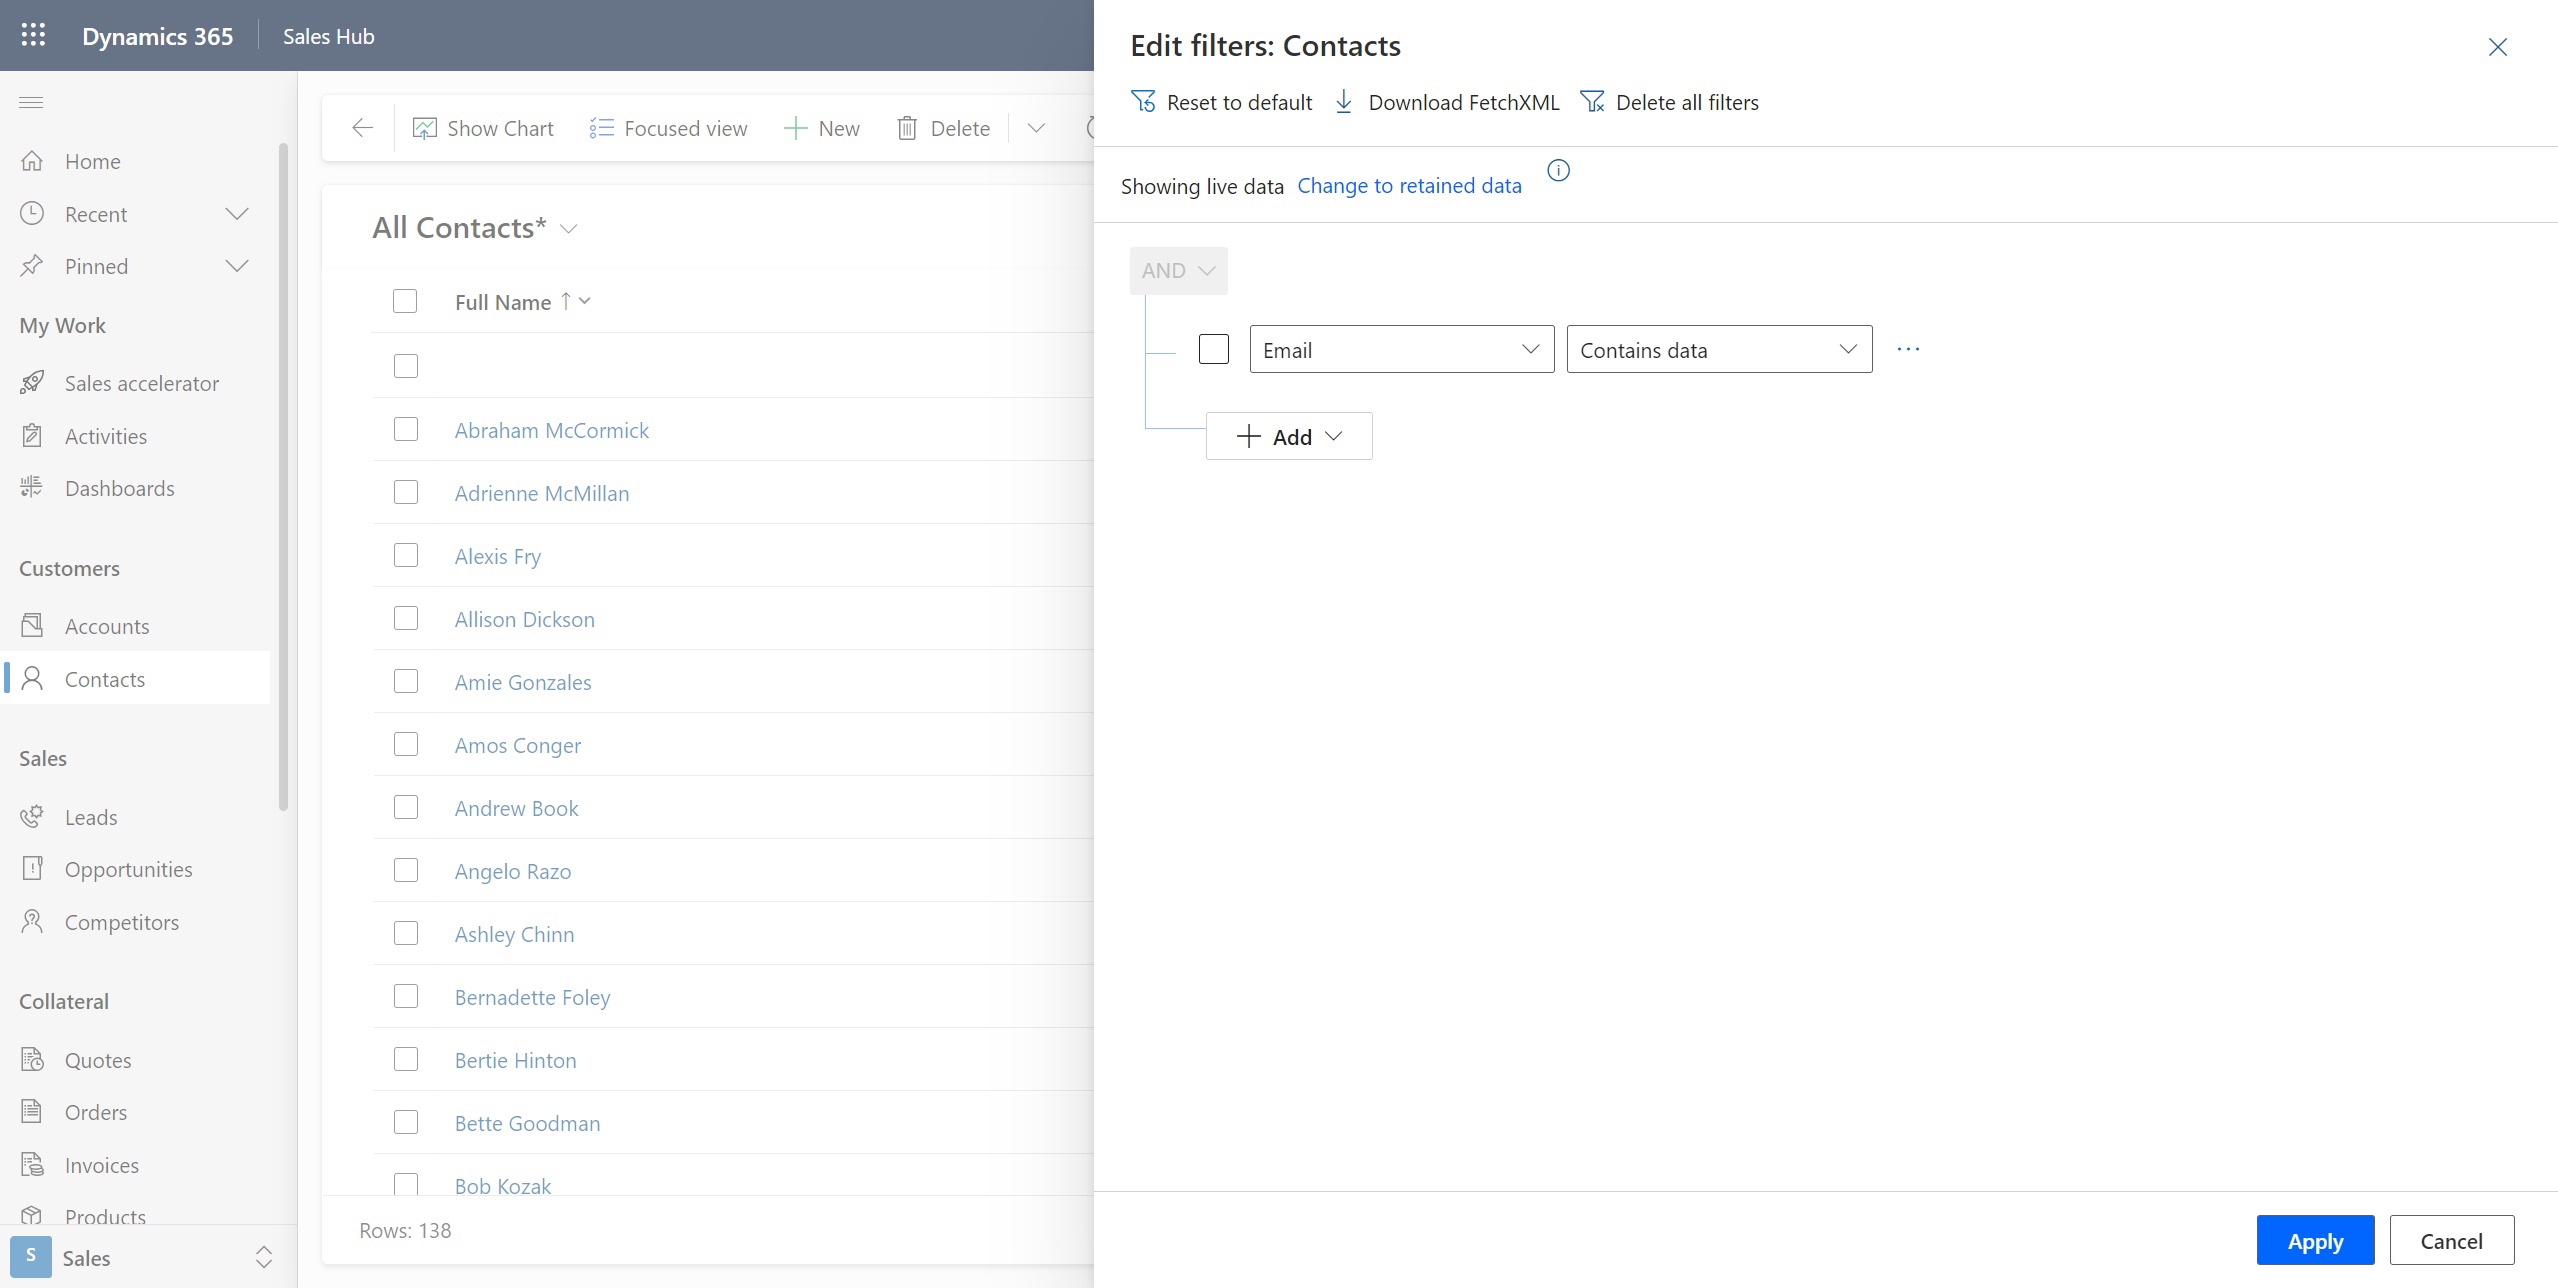
This will give you a view of Contacts records without the Status column and without empty Email fields.
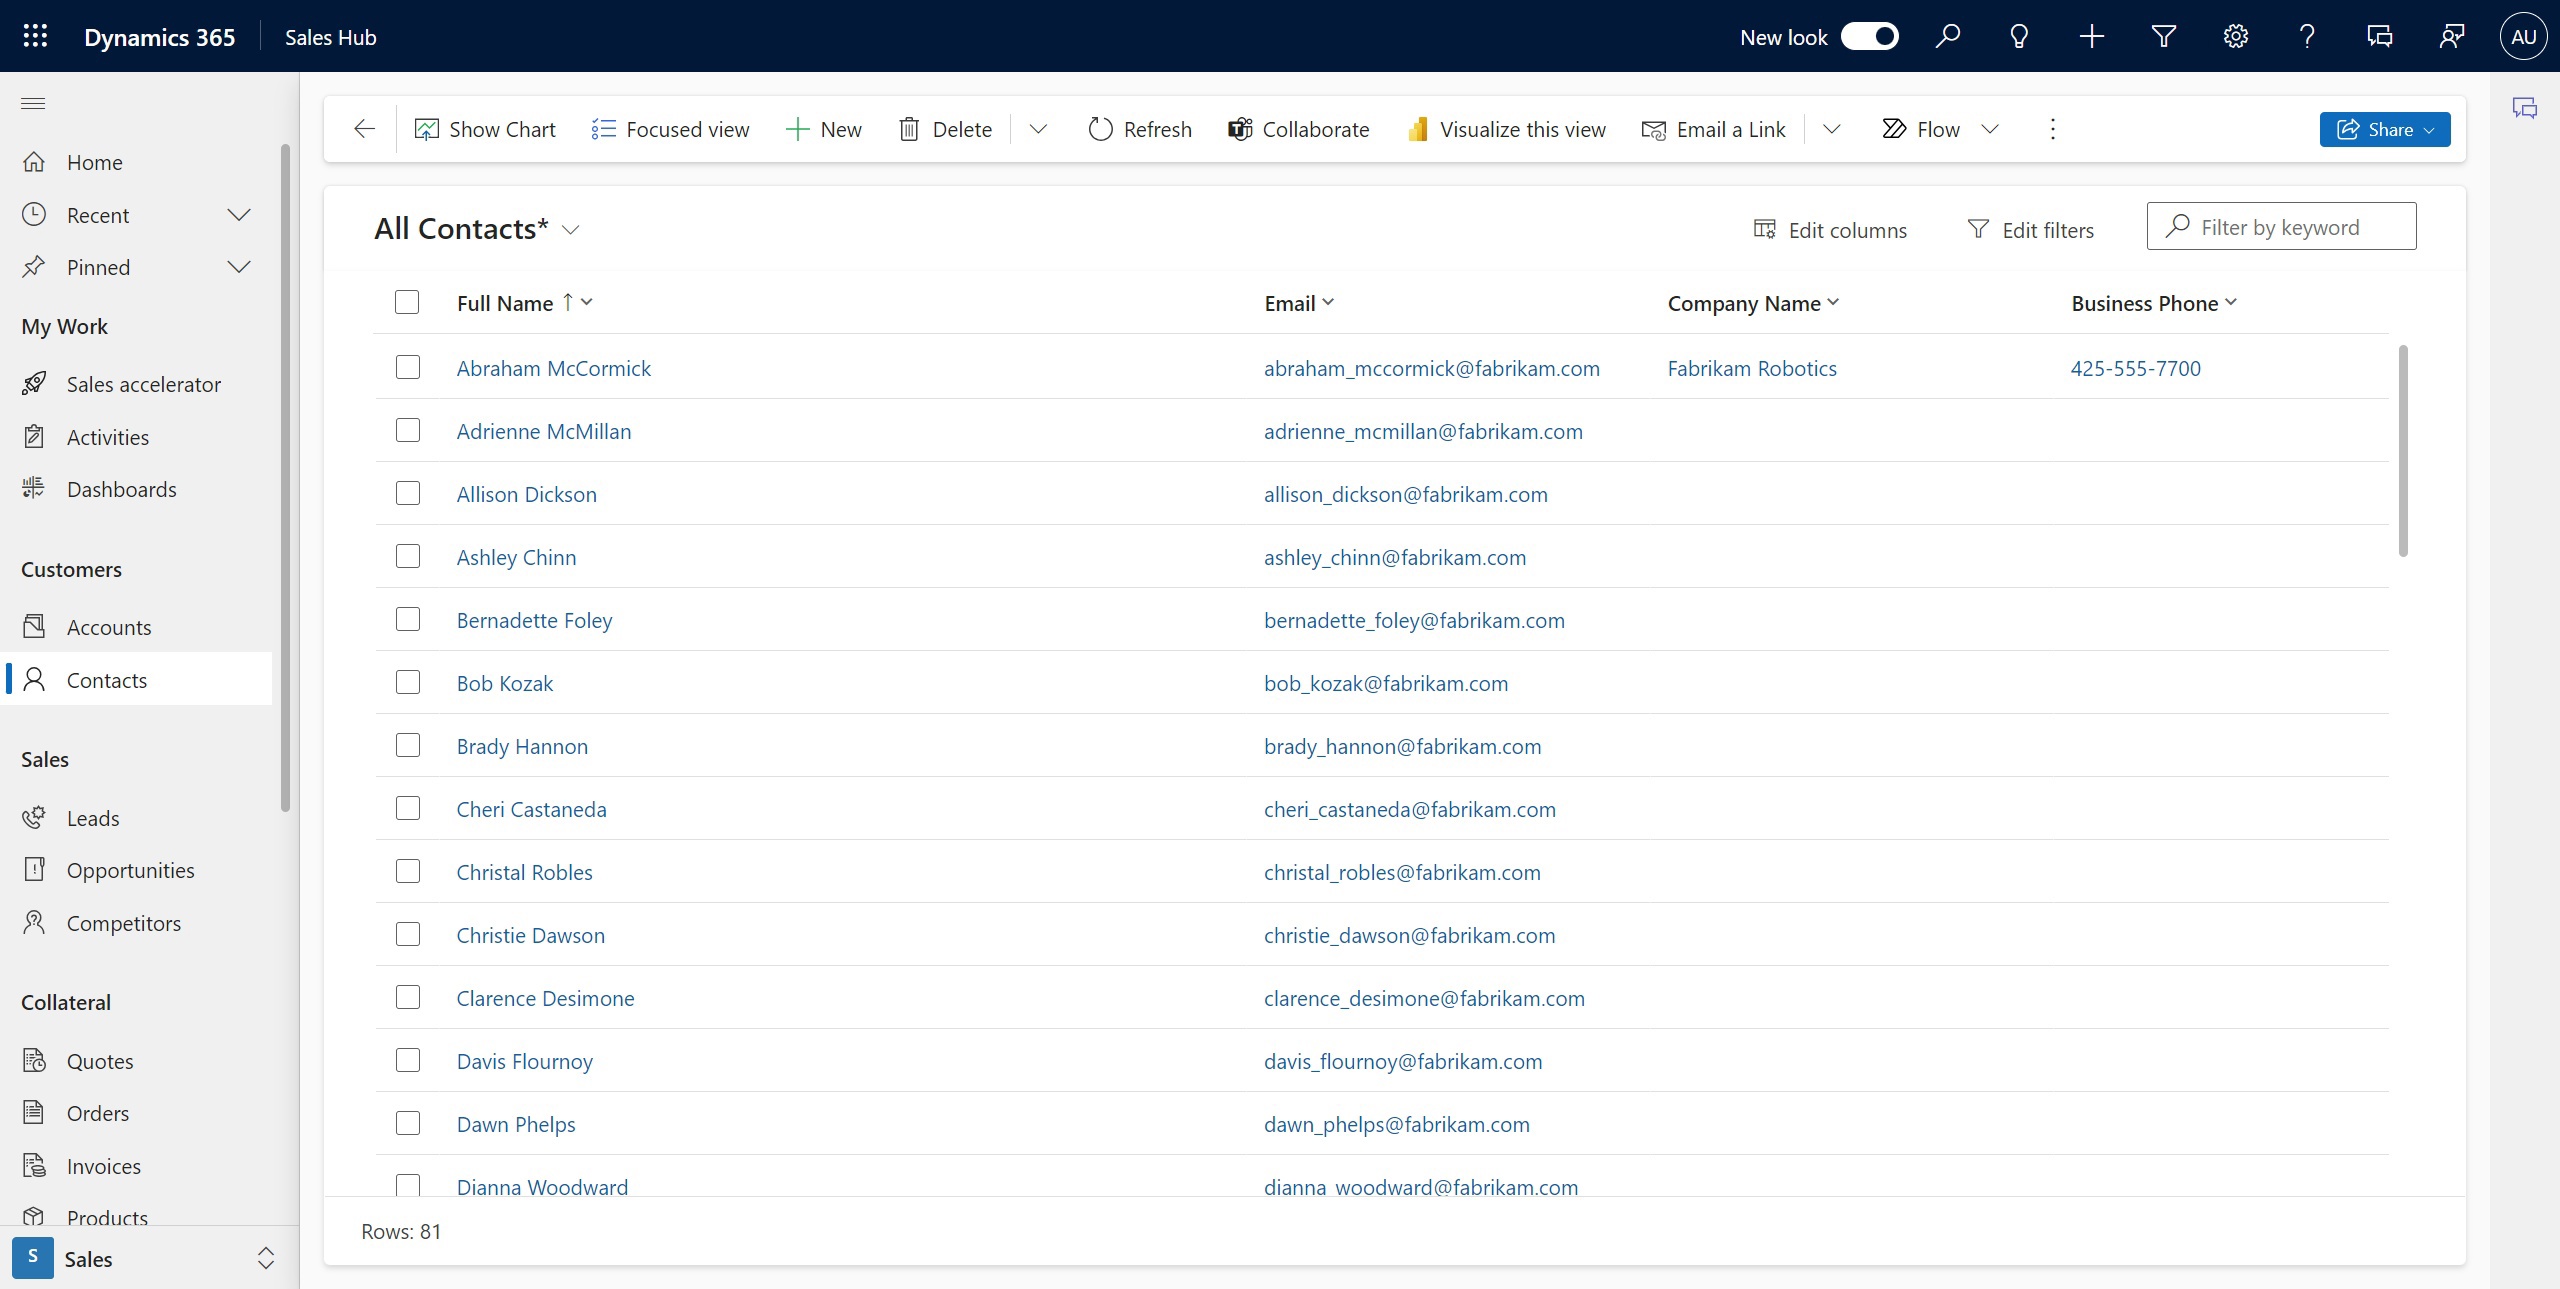
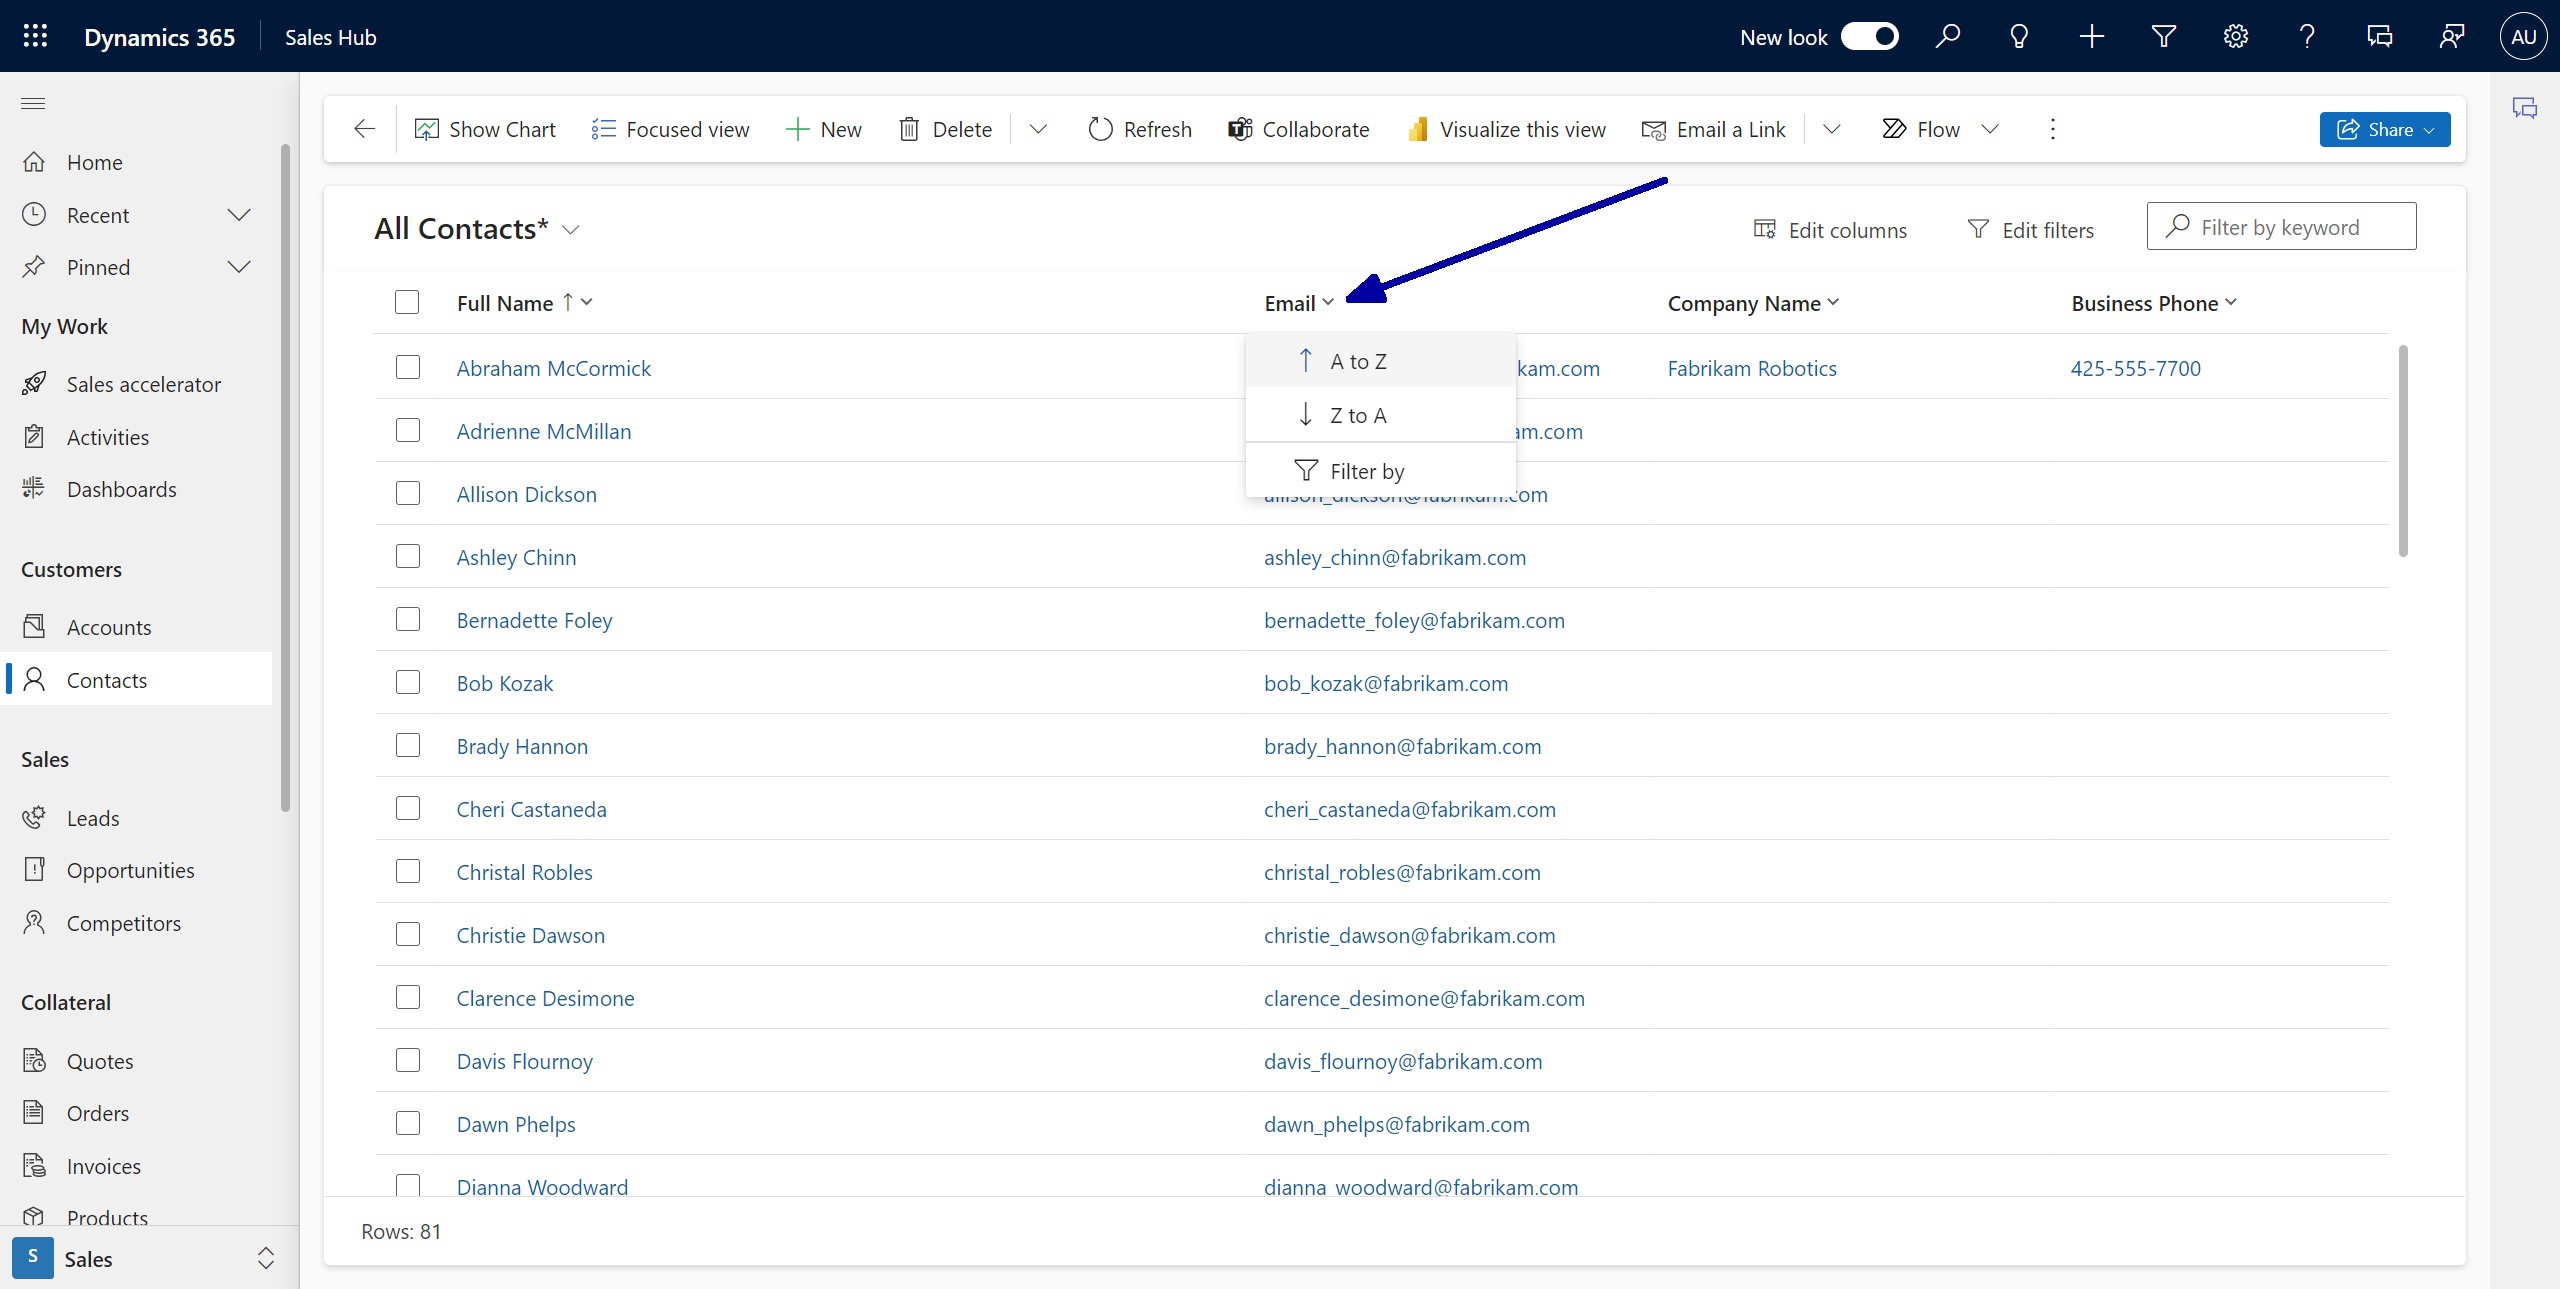
c) Alphabetical Sorting:
To alphabetically sort records by email address:
• Click on the chevron after the column name and select the “A to Z” option.
That’s it. The view is now ready to be saved.

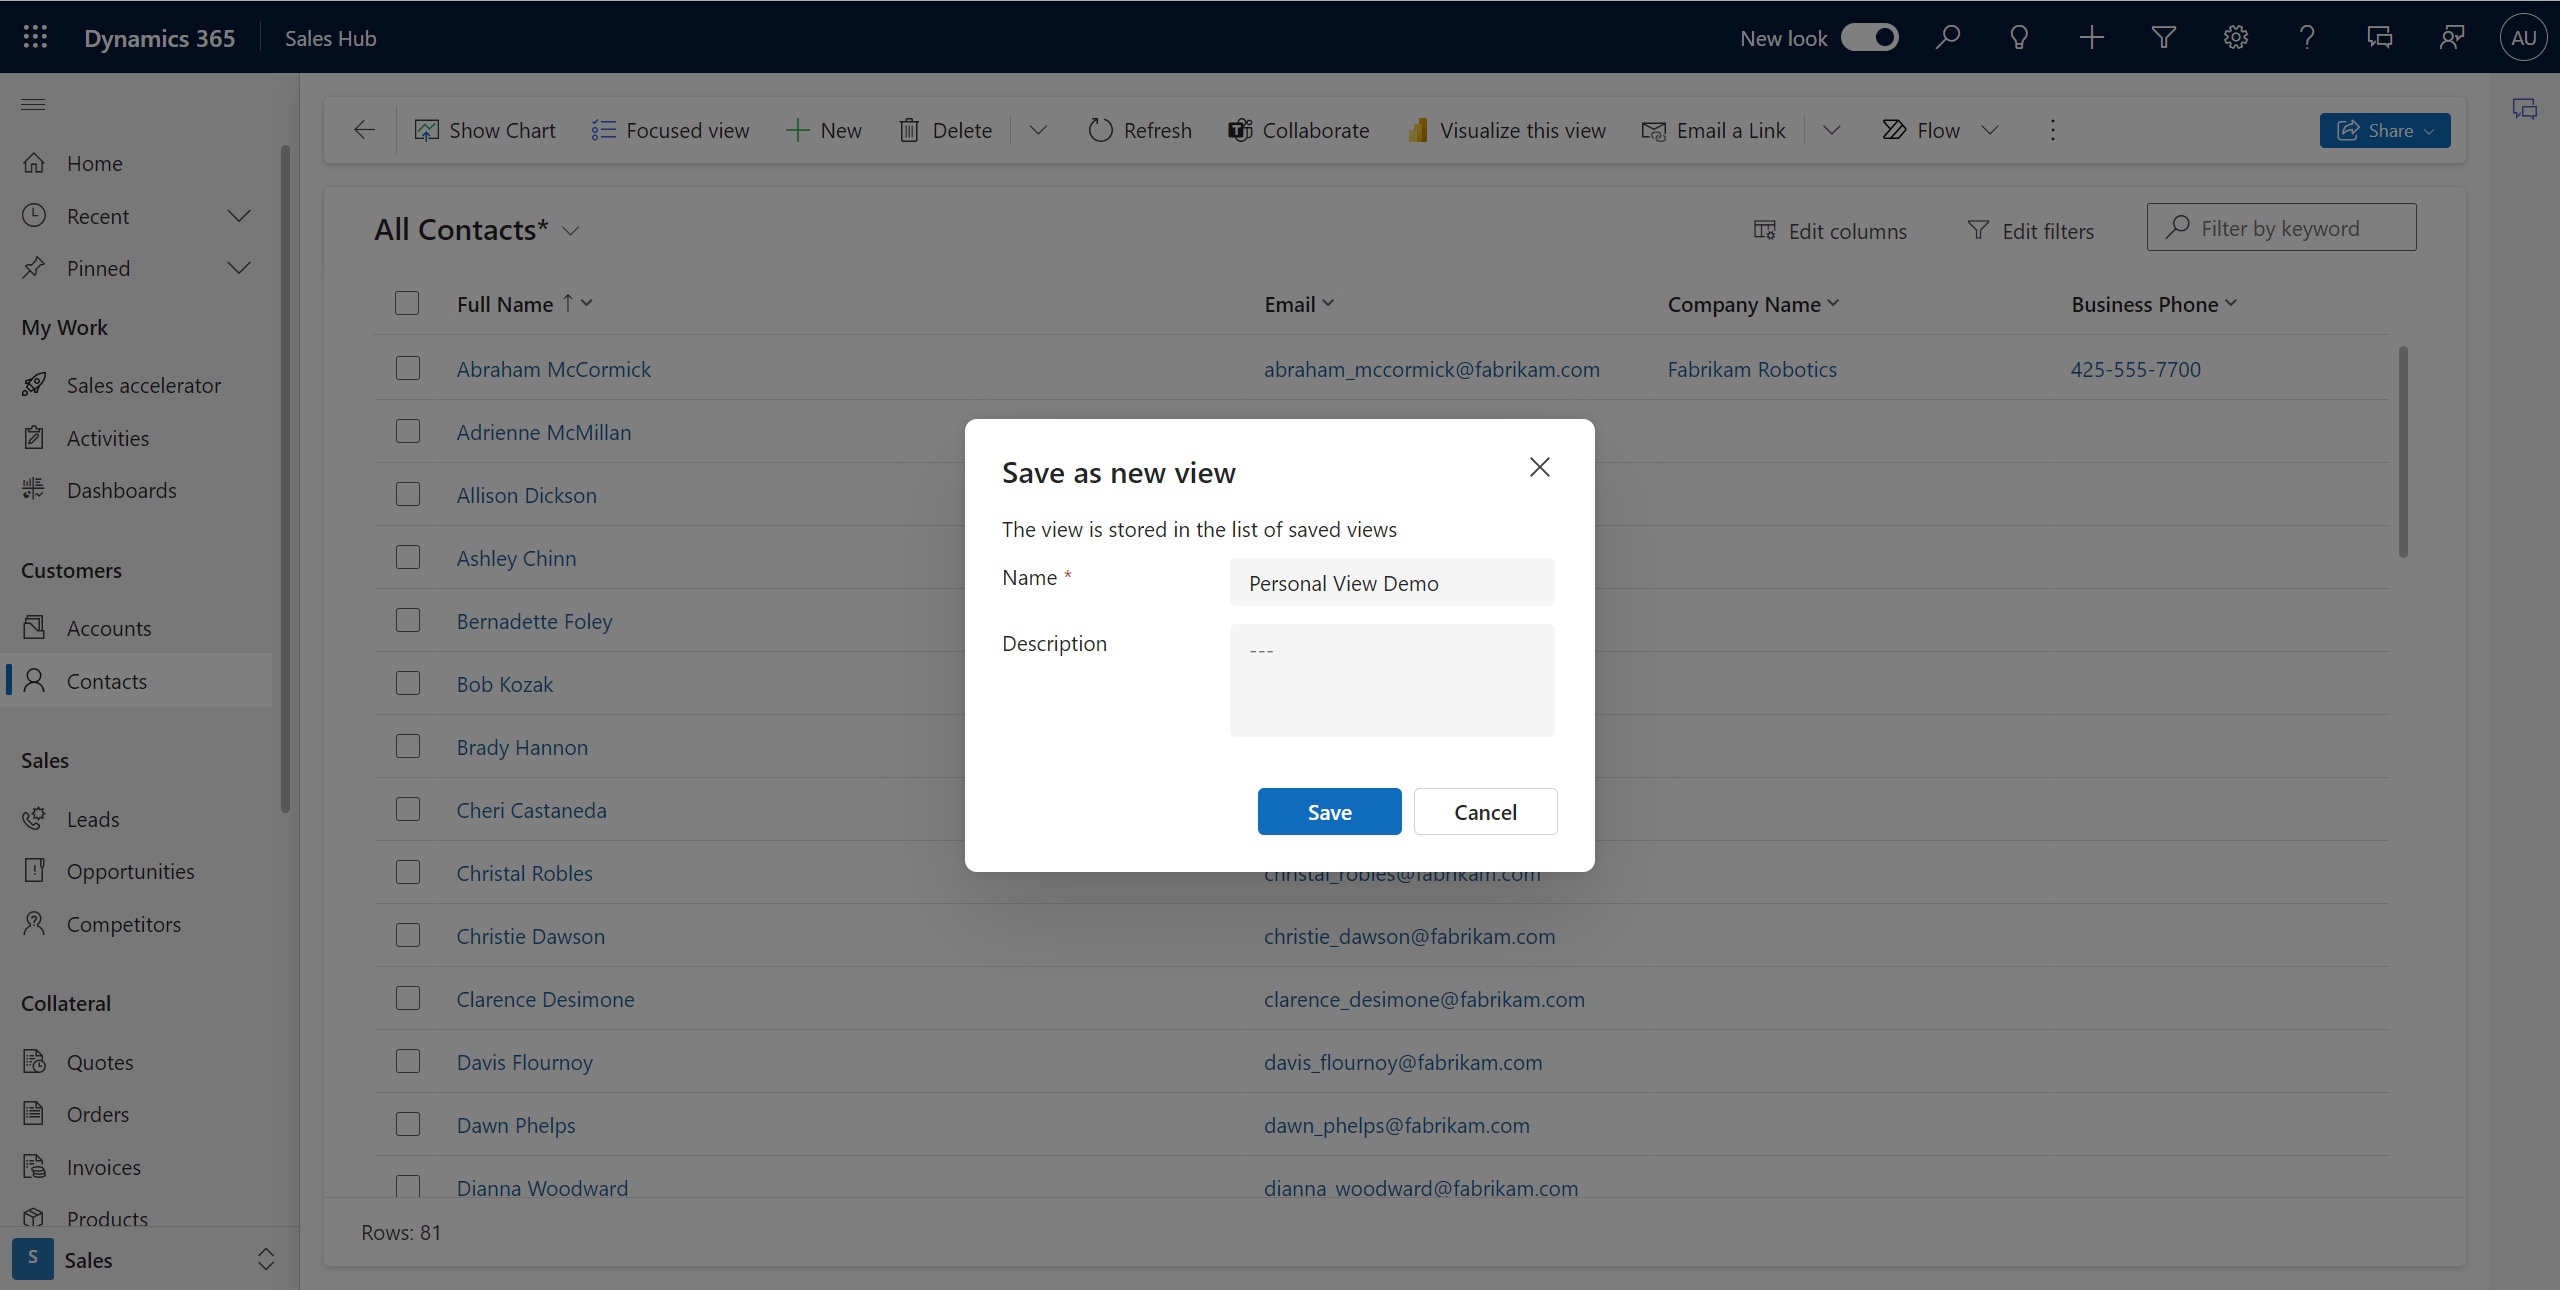
3. To save the changes:
• Open the available views dropdown and select the “Save as new view” option.

• Provide a name and an optional description for your view.
• Click the Save button.
As a result, your view will be saved, and you will be automatically redirected to it. This view will always be available to you via the general views list. The person icon after the view name indicates that this is a personal view.

If you want to make your newly created personal view your default view:
- Select the “Set as default view” option at the bottom of the view list.
If you later need to modify this view and do not want to create another personal view:
- Select the "Save changes to current view" option in the views dropdown list.

Conclusion
Now, you are armed with another step-by-step guide to creating a personal view in Dynamics 365 and being able to use it for specific needs.
If you have any questions, feel free to let us know.