
Word Templates for Dynamics 365
As a Dynamics 365 user, you might need to create Word or Excel files from existing Dynamics 365 entries. It can be either a Contract from Opportunity entry that you need to physically sign or an Invoice with data from Invoice entry that you need to send to your customer.
You can easily do that with the built-in functionality. In this article, we will review how to do that.
When you want to create a Word file from Dynamics, you need to create Word Template for a needed entity.

Go to Settings – Templates – Document Templates - create new Template.

On the popup, select the type of document - Word or Excel.
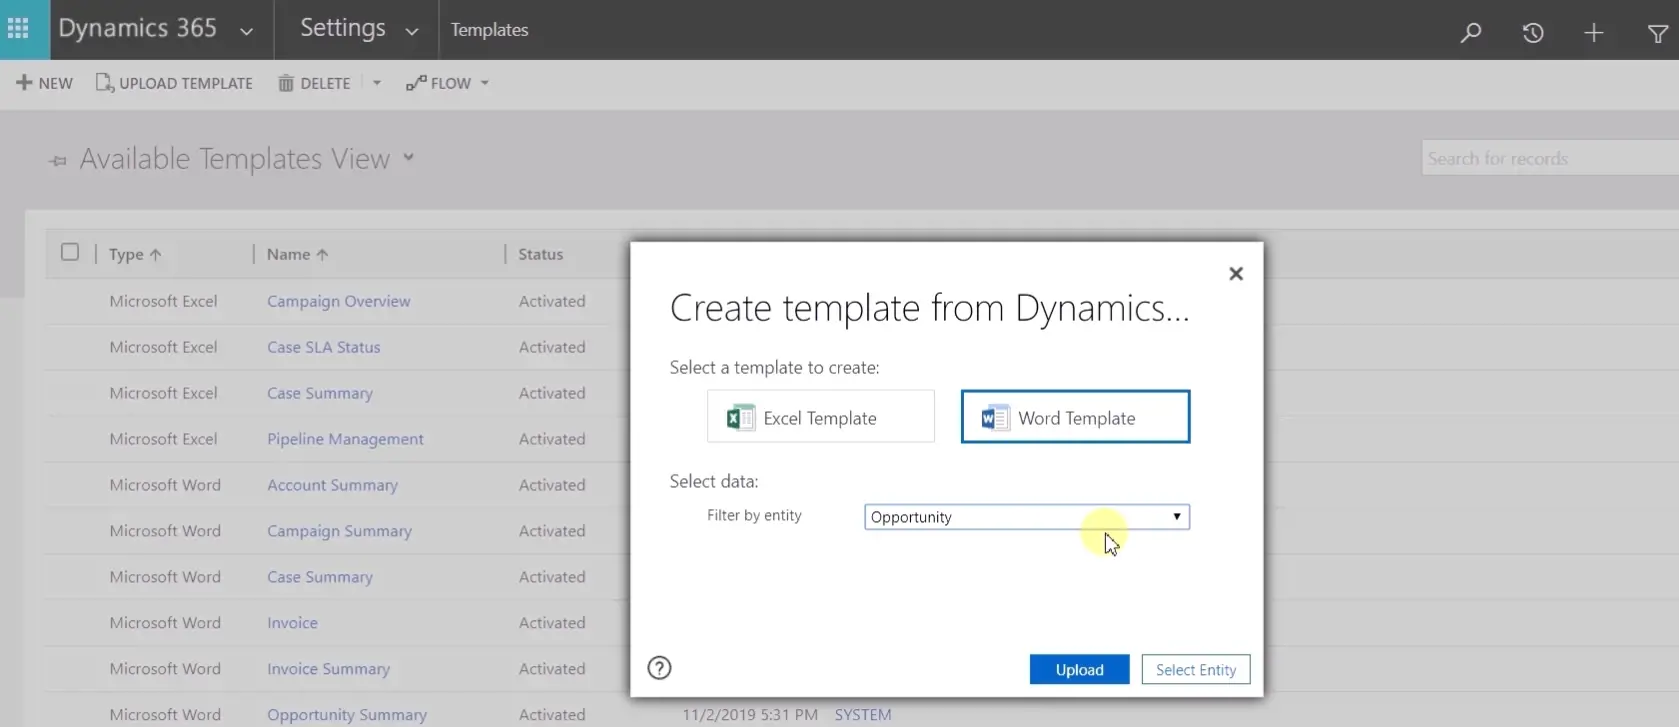
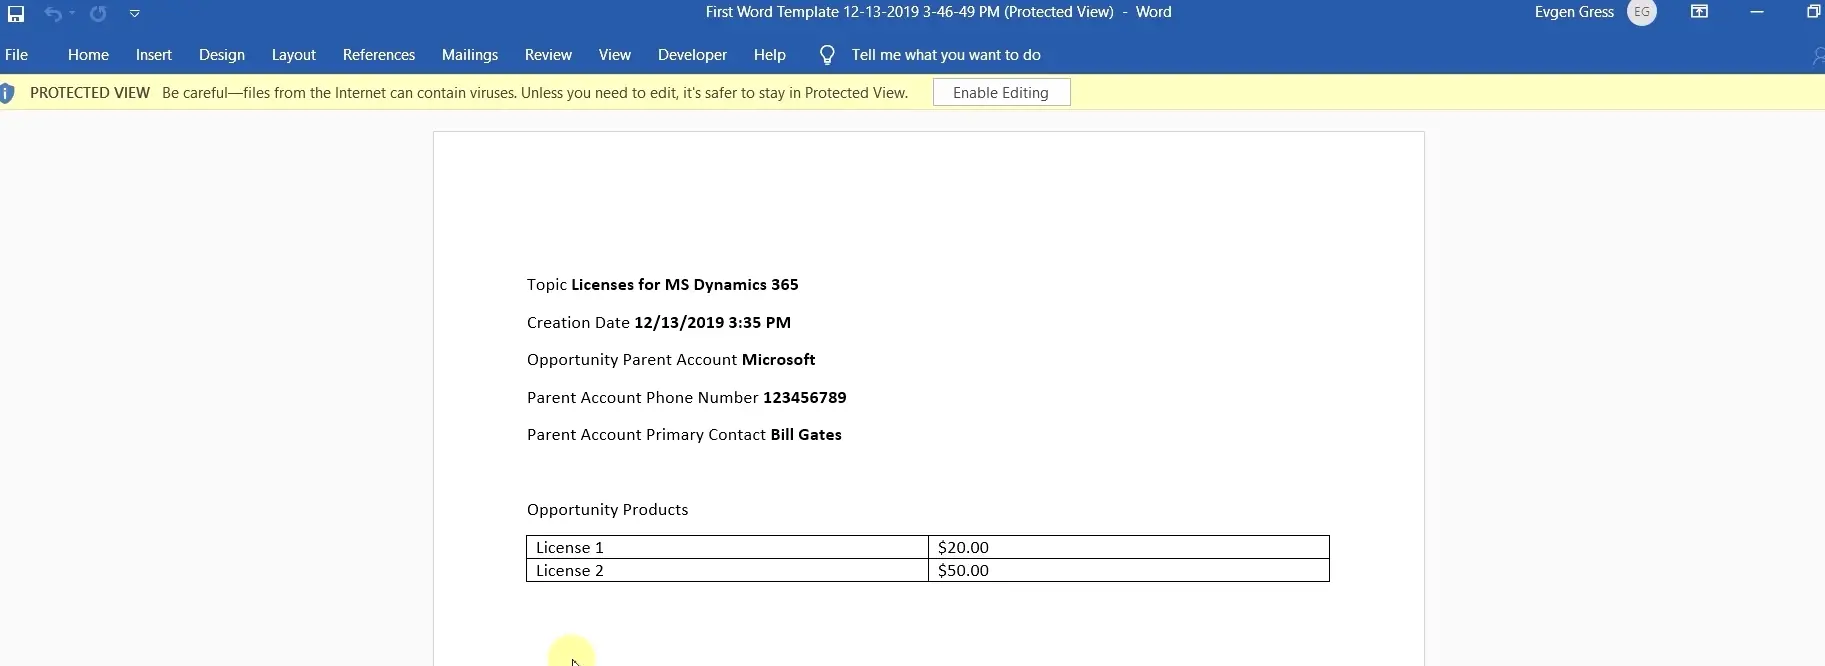
As an example, we will proceed with Word Template. Select an entity. We will create one for Opportunity. If you want to move data to your Template from the related entities, you can select them on the next window. Here we select Account and Opportunity Products and click Download Template. Get a Word file downloaded to your PC.
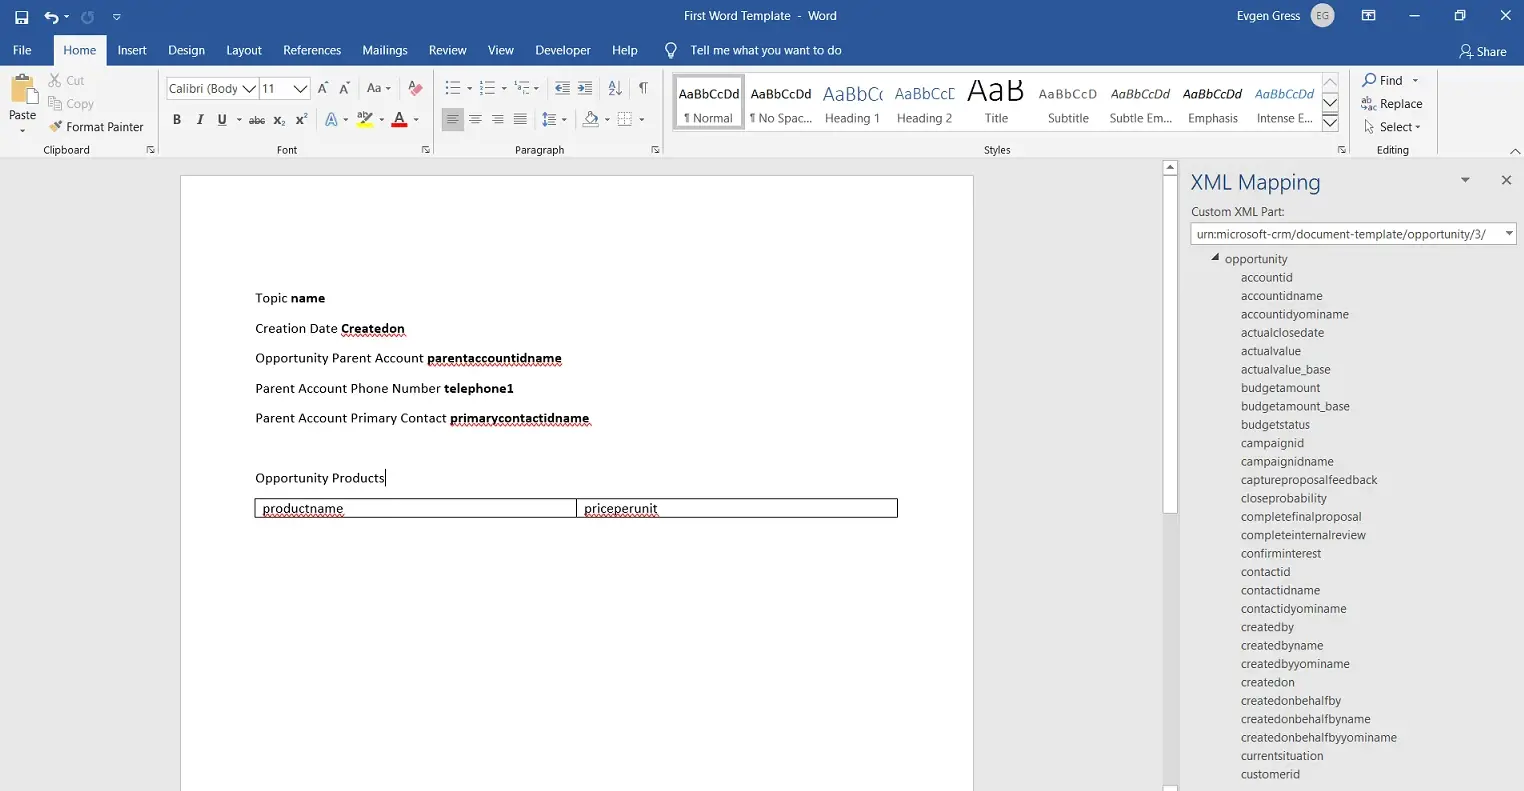
When you open the file, enable Word extensions for developers. Click File - Options - Customize Ribbon – enable Developer, and click the OK button. The developer tab will appear on Word Ribbon. Open it – click on XML Mapping Pane – Custom XML Part – select Microsoft CRM XML.
After you expand it, you will see all the needed attributes. To insert an attribute - right-click and select a needed format. We will select Plan_Text, and click Insert Control. We have added the first variable to the Template. This works for all needed variables. Also, you can combine these variables with the static text. If you have selected relationships while exporting Template from CRM, you will see the attributes from the related entities. You can also add them if required. We will choose Opportunity Parent Account and Opportunity Products.
Also, you can insert a Table with multiple entries. For example, Products from Opportunity. To do that – add Table – select a row - go to Opportunity Product in XML Mapping - insert Content Control - Repeating. Select a cell and insert the attribute. The product name goes first. The same for price per unit.
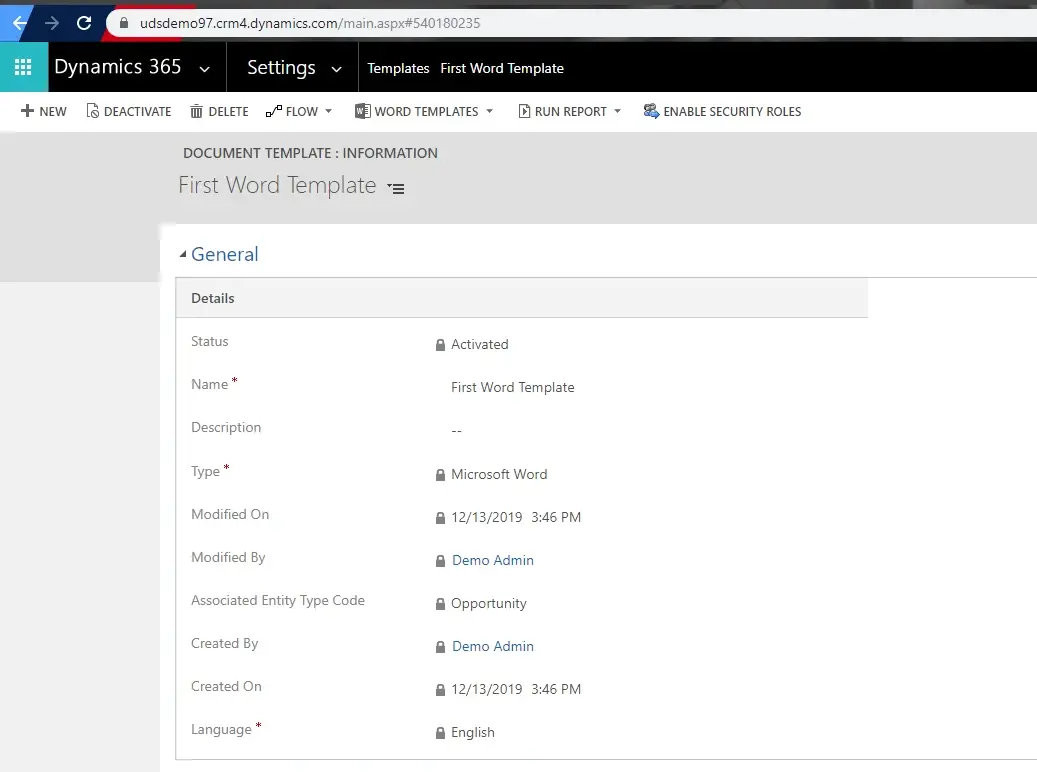
After you have finished with the Template configurations – Save it and navigate back to Dynamics. Click Upload Template on the Template page – select already created Word File and Upload it.
You can also set up Security roles for your Template. By default, it will be enabled for all Security roles.
Now we can check how it works. Open any Opportunity – select Word Templates – click on the already created Template.
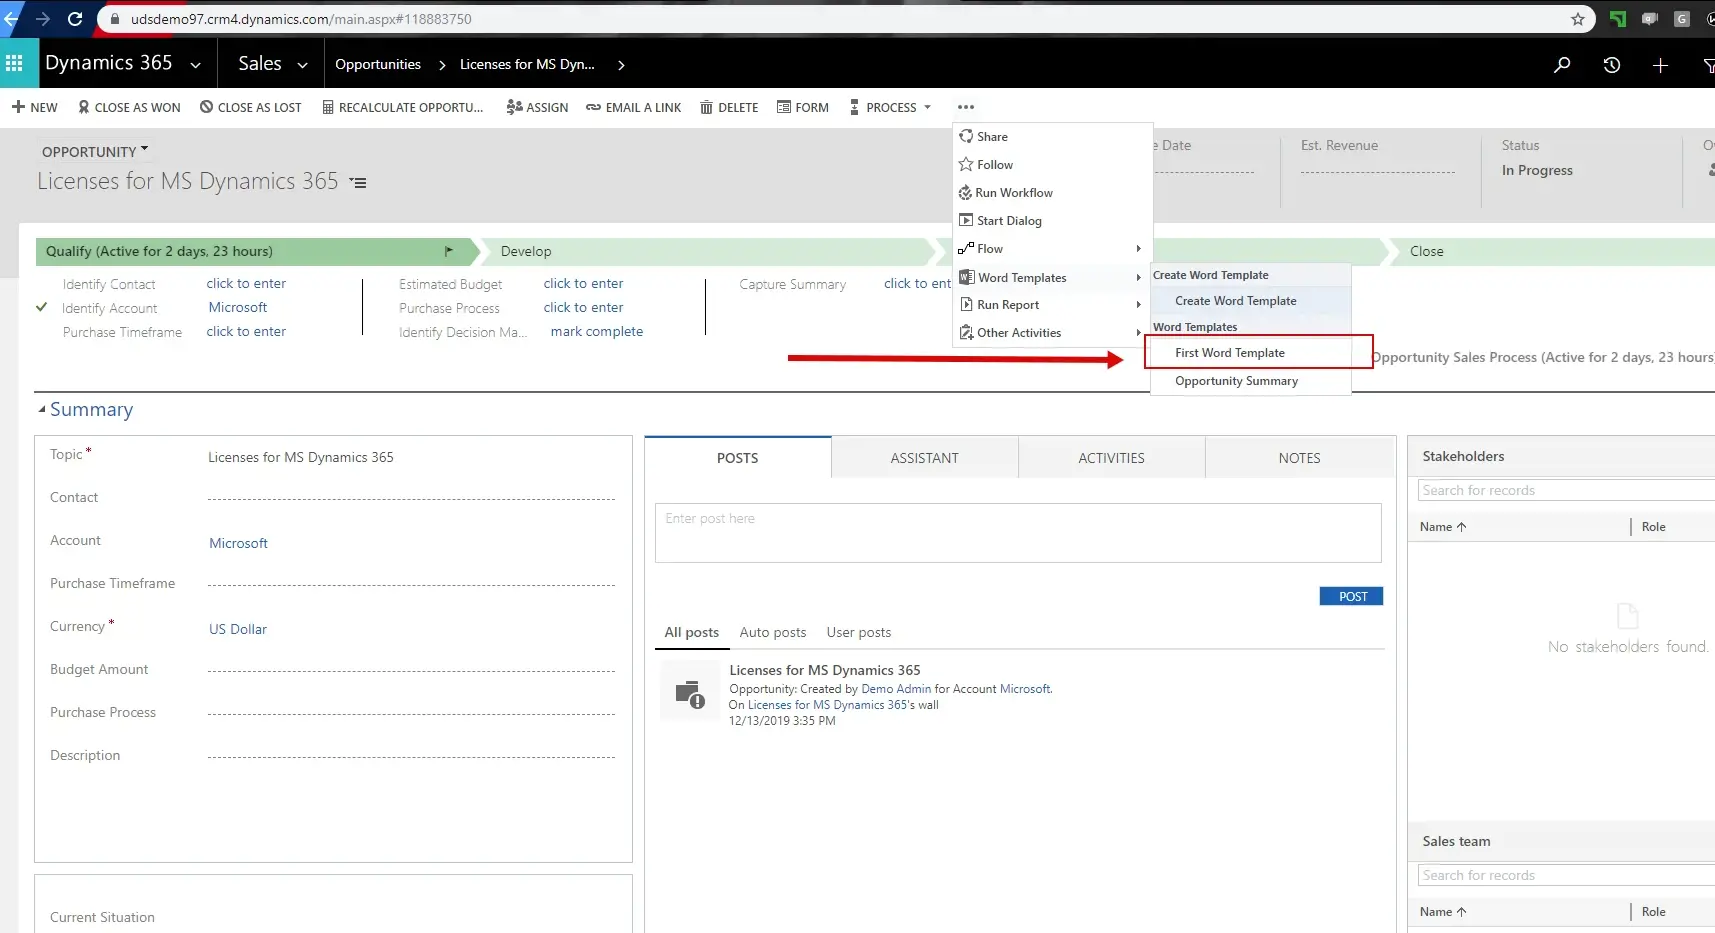
Word File with Data from Opportunity will be downloaded.
That’s it. You don’t need to create files manually anymore. Pay attention that you need to save your source Template file somewhere on your PC. If you need to change the existing Template in CRM, you can do that only from your source file.
Once you lose it, the only way to change the Template is to create the new one.
If you have any problems or questions, feel free to contact us.