
Introduction
As we all know, Power Automate is a great tool that can help you handle the many automation tasks required for your company. This blog post will delve into one of the common business requirements — automated notifications.
Our client wanted to easily stay updated on new contact registrations without entering the CRM. We already used Power BI for visualizing historical data (Contacts registered every day/month/year), but the client also wanted quick access to info on newly created contacts. We set up a notification system through Microsoft Teams to meet this need.
Automated Notifications Implementation
The easiest and quickest way to implement the request is to create an automated cloud flow in Power Automate.
To do this, open Power Automate (don't forget to select an environment on the top right).
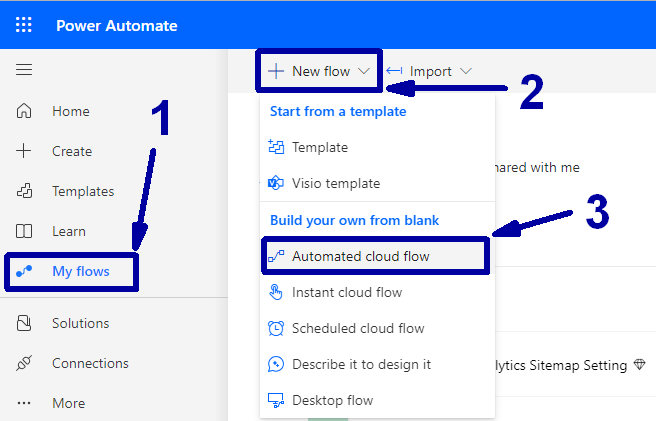
Then, click on the "My flows" (1) item on the left, open the "+ New flow" dropdown (2), and select an "Automated cloud flow" item (3).
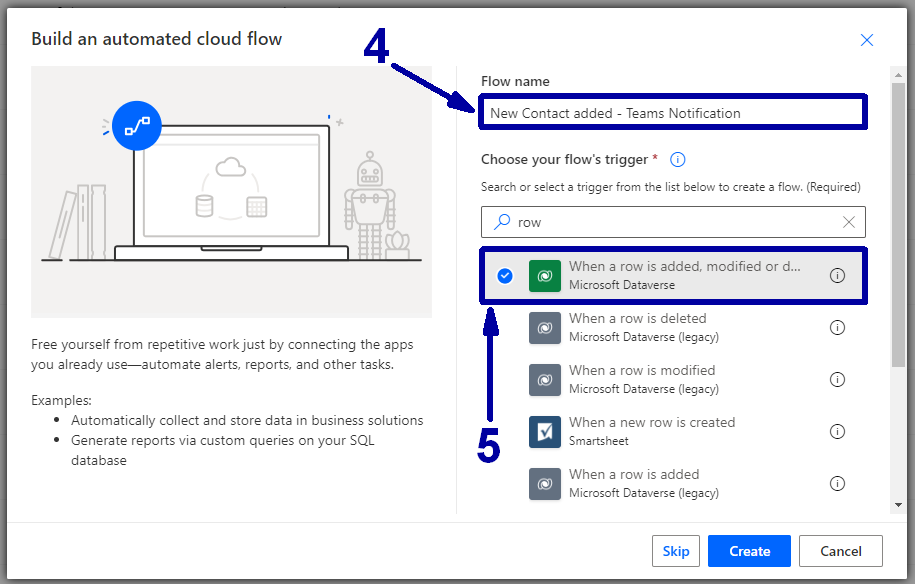
In the following window, provide a name for this flow (4), choose the 'When a row is added, modified, or deleted' option (5), and click the Create button.
Afterward, the flow designer is opened.
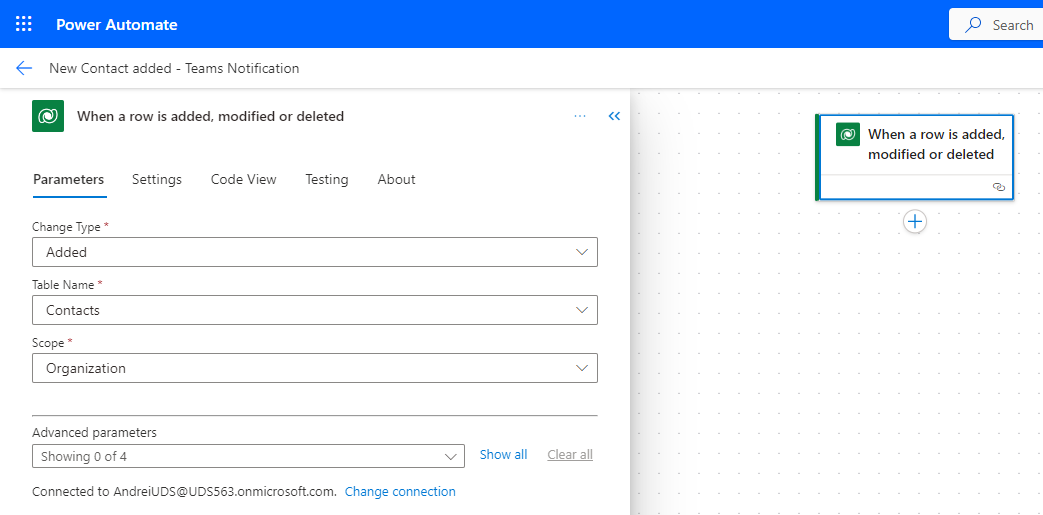
For the initial step, select the following parameters (refer to the screenshot).
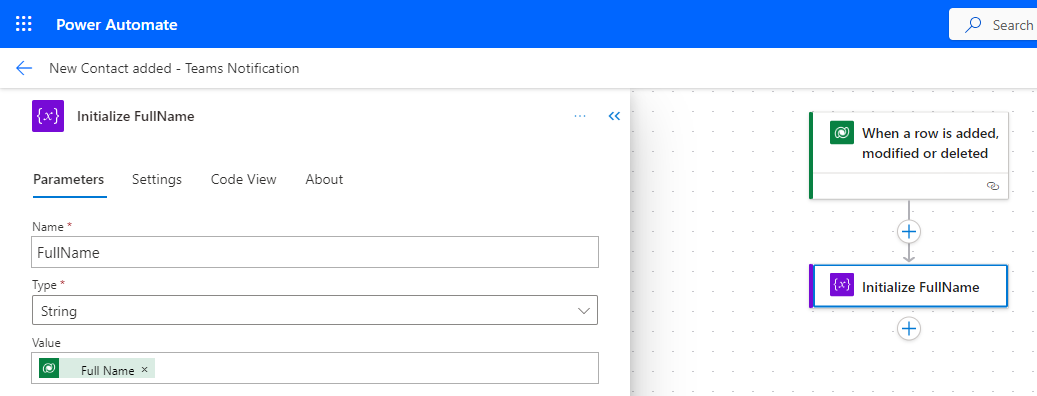
To display the full name of the contact and the link to the contact record in the CRM, I suggest creating two variables for this purpose. This approach facilitates easier debugging in case of any issues.
The first variable will be 'FullName:
The second variable will be the URL:
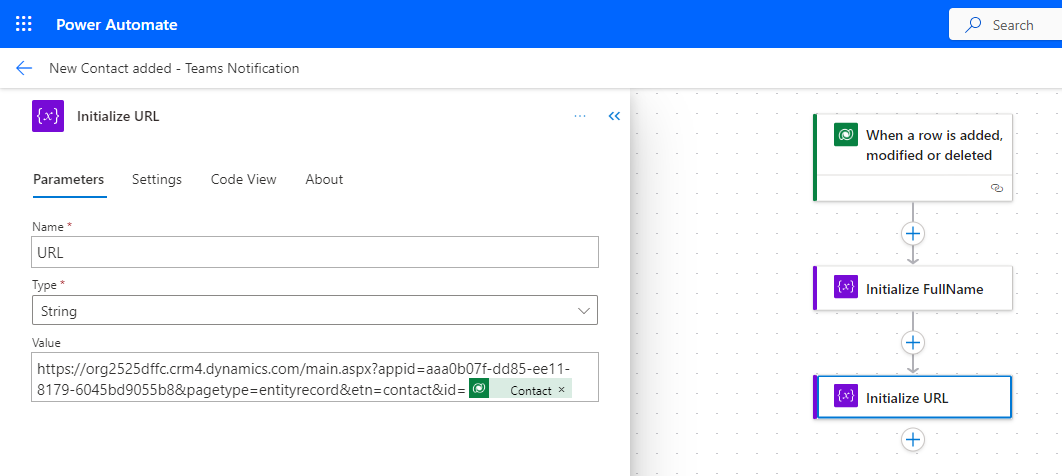
Please pay attention to the "Value" field of the URL variable, as it consists of "two parts". The initial segment (from 'http' until the last "=" sign) can be obtained by opening any contact record in the desired environment and copying everything from the address bar, excluding the record GUID. The last part is the GUID of the recently created record.
Now, moving on to the final step, let's post a message in the Teams chat:
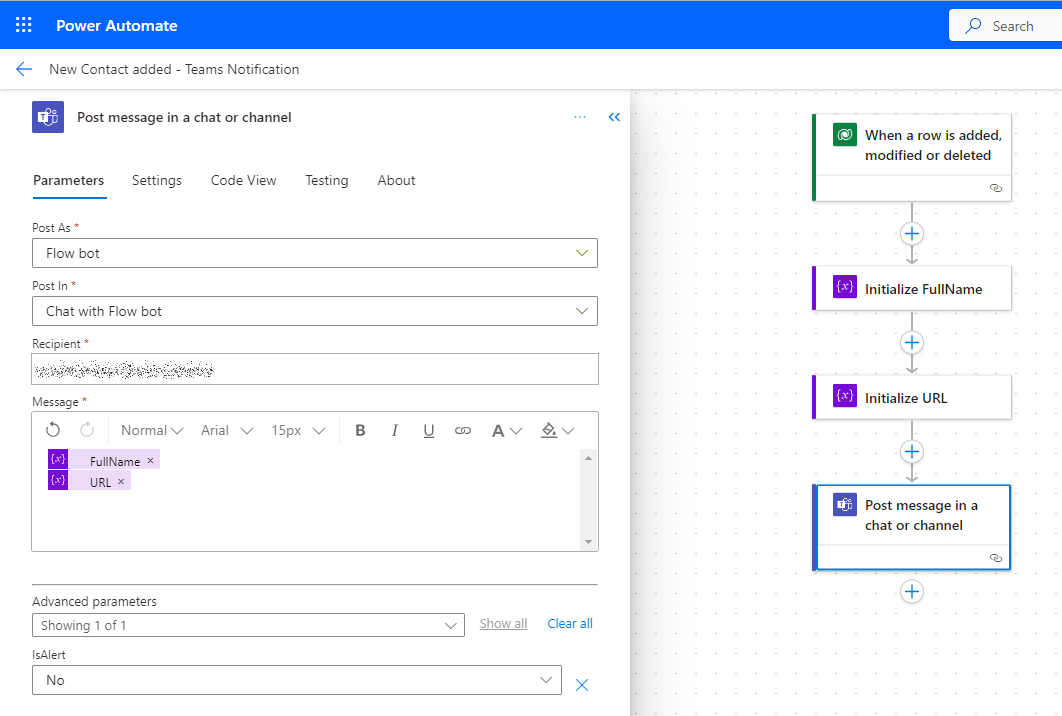
The "Post In" parameter currently has the "Chat with Flow bot" option selected. However, based on your preferences, you can choose either the "Channel" or "Group Chat" option.
For the "Recipient" parameter, an email from the organization is anticipated. This designated individual will receive notifications.
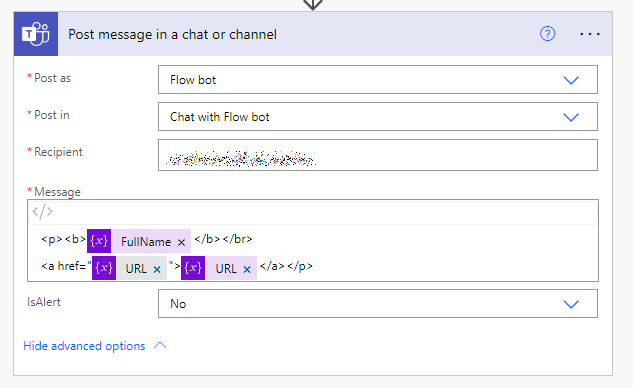
To enhance the appearance of this message, I recommend saving your changes, transitioning to the classic designer, and performing some HTML editing. To initiate this process, click on the three dots in the top right corner and select the "Switch to classic designer" option.
After enabling the Code View, you can use simple HTML to craft a more visually appealing version of your flow in the Message field.
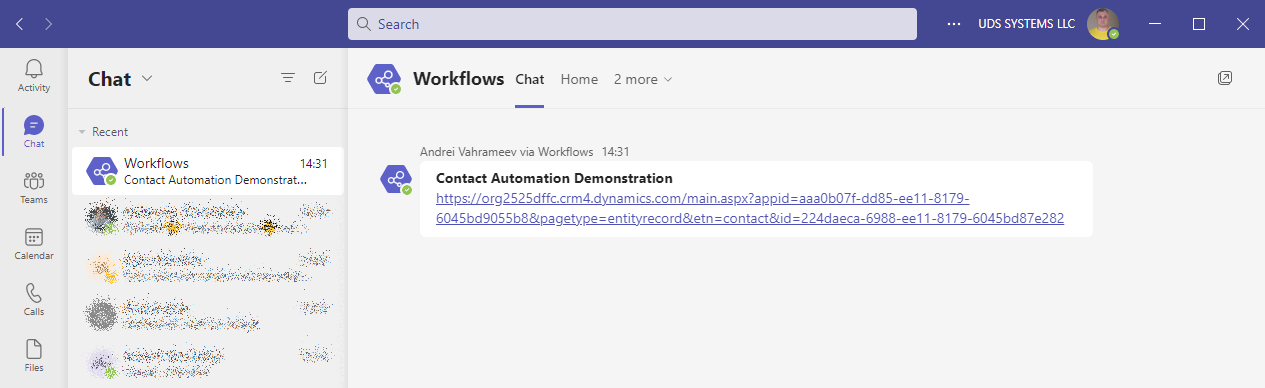
All that's left to do is save your workflow and await the creation of a new contact.
I created a contact named 'Contact Automation Demonstration' for demonstration purposes in the CRM. As you can see, a message about this event was successfully transferred to the Microsoft Teams chat.
Summary
In conclusion, the integration of Power Automate to address the client's need for instant notifications on new contact registrations has proven to be an efficient and user-friendly solution. By leveraging the capabilities of Power Automate's automated cloud flow, we established a seamless process that keeps our client well-informed without the need to access the CRM directly.
Later, this flow evolved when the client integrated it with a round-robin process, assigning owners to the newly created contacts. However, this could be a topic for another blog post.