

Introduction
Welcome to our Microsoft Dynamics 365 guide on views! In this platform, a "view" is a customized display of records from a specific table. It's crafted based on filters, sorting preferences, and selected columns. Users can effortlessly create, save, and access these personalized displays, simplifying the visibility of crucial records. Microsoft Dynamics 365 provides three types of views: personal, system, and public. This article will walk you through creating your own personal view in Dynamics 365 Classic Interface.
Prerequisites
Anyone with access to the system can create a personal view (for two other types of views, administrative security roles are required). Initially, the personal view is visible only to the person who created it. However, its availability to other users can be controlled by sharing the view and granting appropriate permissions such as read, write, delete, append, assign, and share.
Video
Step-by-step Personal View Creation Process in Dynamics 365
1. Navigate to the Entity:
In the upper-right corner of the app or at make.powerapps.com, click on Settings (⚙️) > Advanced Settings > "Advanced Find" button. This button is typically represented by a funnel icon located in the screen's top right corner.

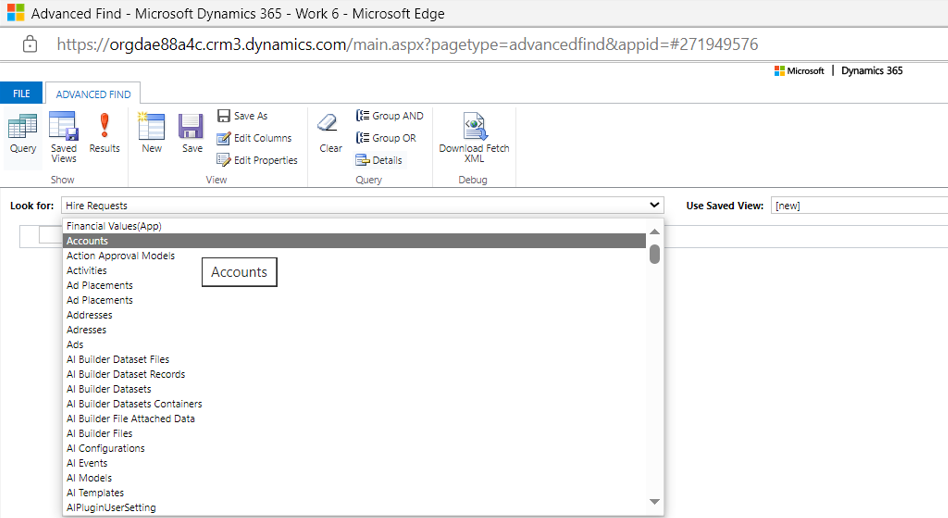
2. Define Your Query:
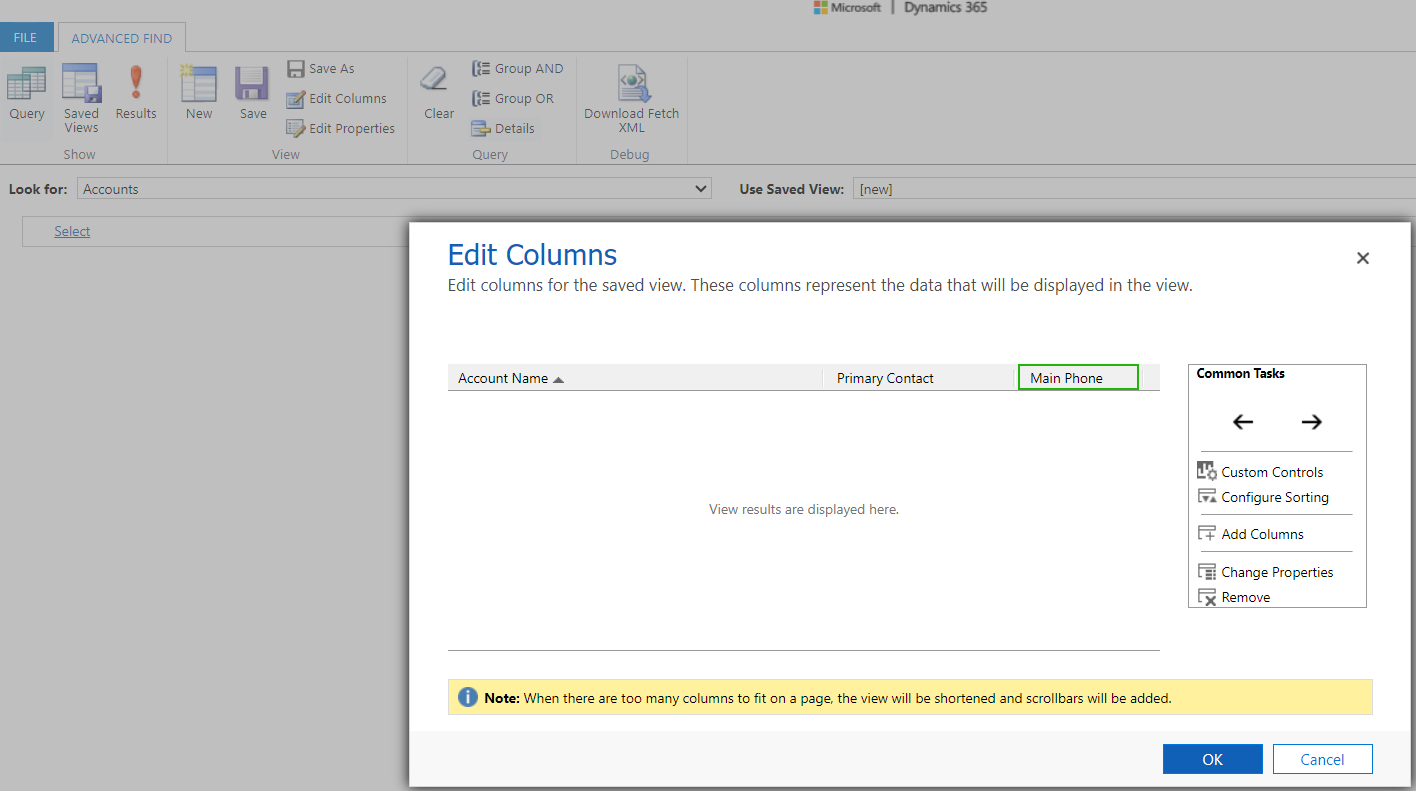
Choose your desired table from the "Look for" dropdown. Then, you have the ability to establish specific conditions and criteria to filter records. Apply your filters by selecting fields, operators, and values. Additionally, you can modify the set of columns based on your preferences.
3. Save the Query as a Personal View:
- After formulating your query, click on the "Save As" button.
- Within the "Save As" dialog box, provide a Name and Description for your view.
- To finalize, click on the "Save" button.
4. Managing your Personal View:
- Once saved, you can access your personal view by clicking the “Saved views” button.
- Your created views are listed in the "My Views" dropdown menu within the table. From here, you can also choose from other available views.

- Select the "Set As Default" option to make a particular view your default. This ensures the chosen view is displayed every time you navigate to the table.

Additionally, this platform allows you to share views and designate access privileges tailored for different user groups. Any unnecessary personal views can also be deleted from here.
Conclusion
Here's how we can create and utilize a personal view: a query of records within an entity tailored to an individual user's specific needs. This view allows users to define particular criteria, filters, and sorting options to display only the most relevant records. Users can keep these views private or share them with other individuals or teams within the current organization.
To learn how to create a personal view in the Dynamics 365 Modern Interface, visit our article Personal View Creation Process in Dynamics 365.
Stay tuned for more tutorials!