
Enable Dynamics 365 Auditing Now to Avoid Problems in Future
In this article, we review Dynamics 365 audit. I mentioned it in one of my previous articles, and it definitely deserves a separate review. Auditing is disabled by default, and usually, organizations enable it only AFTER the problem occurs and it is too late.
If you want to track data changes in Dynamics 365, control data export from Dynamics, or audit user logins – read this article to get information on:
- What are the main use cases
- How to set up audit
- How to review and analyze audit data Dynamics 365

So, There Are Actually 2 Main Use Cases for Audit:
-
When you need to keep track of what is happening to your data. This will allow you to save historical data and revert it if needed. In addition, you can investigate complicated integration problems, when data is overwritten by some logic.
-
When you want to control access to data and export of the data. This will allow tracking Excel export function and data retrievals in the user interface or by other tools.
There are also logging of administration functions like installing solutions by your admins and Microsoft employee and user logging functions, but we leave them out of the scope of the article.
Particularly user login functions are not very useful because it will not track activity each time the user opens the system, but rather once in 24 hours and you cannot see if the user is currently present.
To Setup Audit You Need to Execute the Next Steps:
-
Go to Advanced Settings

-
Expand the settings menu item and go to auditing

-
Click global audit settings

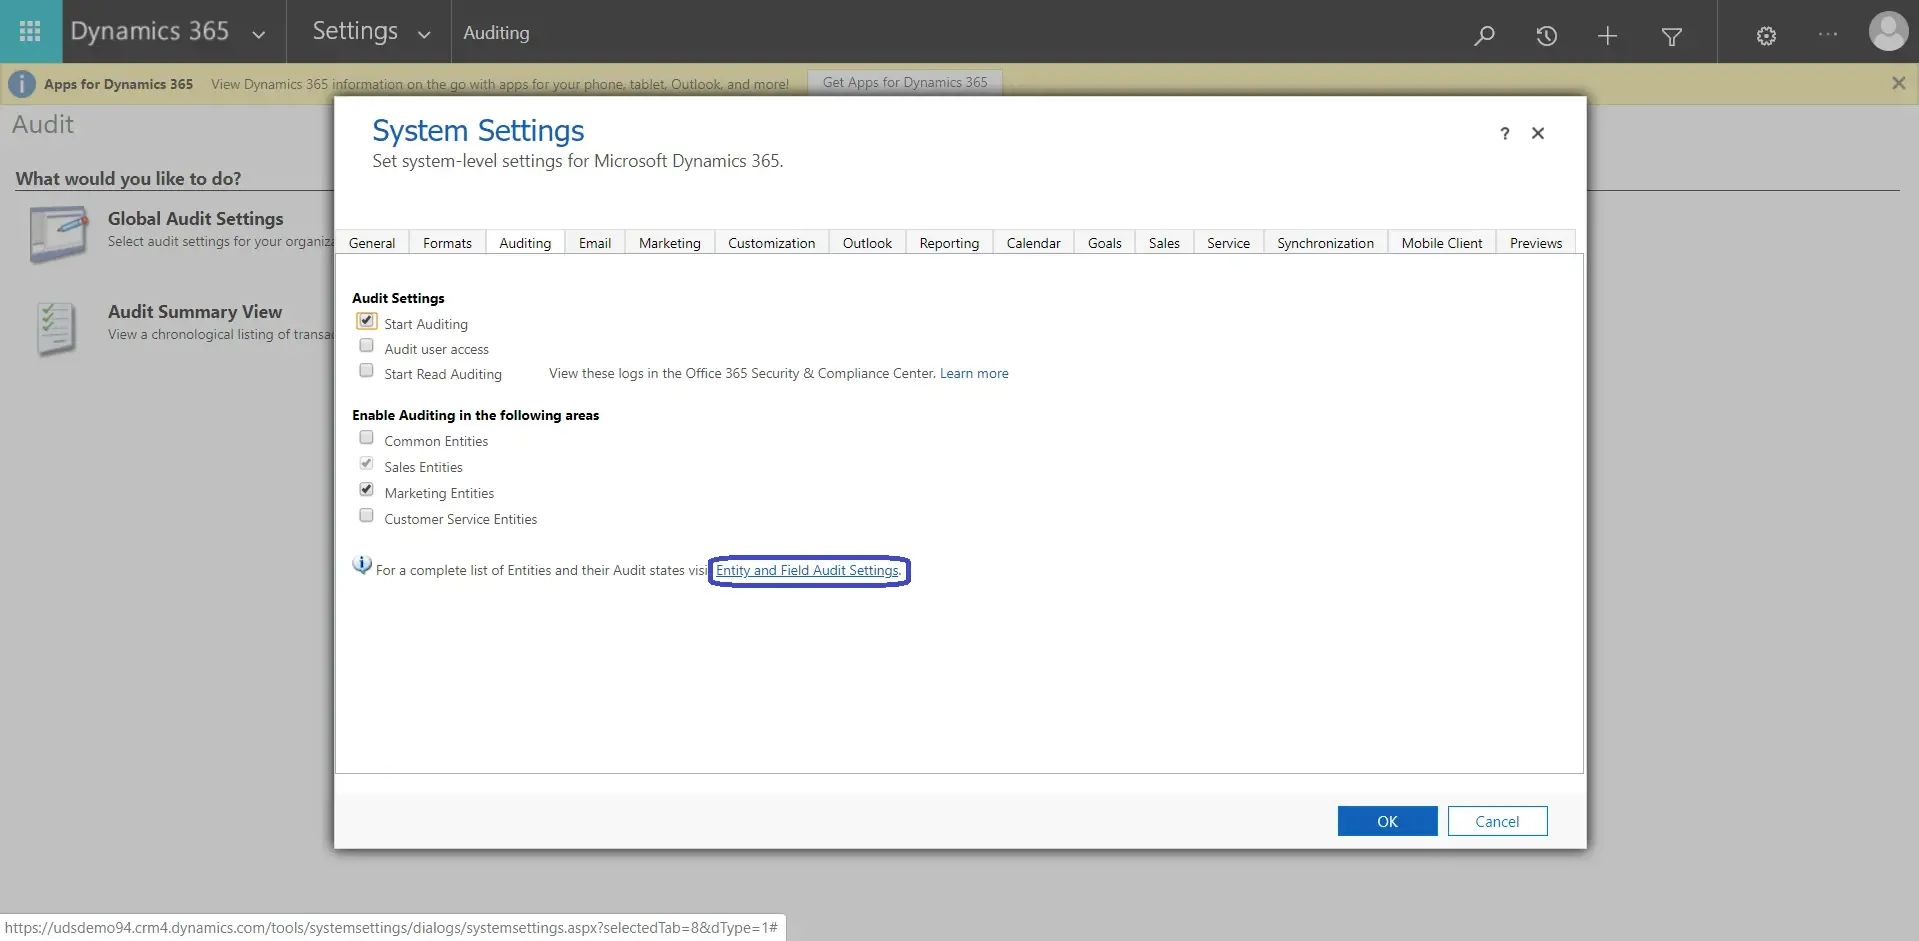
You need to click Start Auditing here before enabling any other options. Then you have the next possibilities:
- Audit user access. Again, it will only track login action once in 24 hours, I do not find this feature particularly useful
- Start read auditing – if you want to protect your data from being exported by users
- Also, you can click on areas you want to be audited. You can put the mouse over the item to see what’s included like on the screenshot. This will track all data changes for specified objects
If you want to track data that is missing in those areas, or you want a more specific setup, click Entity and Field Audit Settings. Here it might become complicated, so keep your seatbelt fastened, you’re going to see Saint Graal of Dynamics 365 customization.
Navigate to the entity you need on the left side panel, then scroll down a little bit on the right page to see Data Services and Auditing areas. Just to note that currently, Auditing settings are not available in the new interface, so do not succumb to the temptation to click Try a new experience.
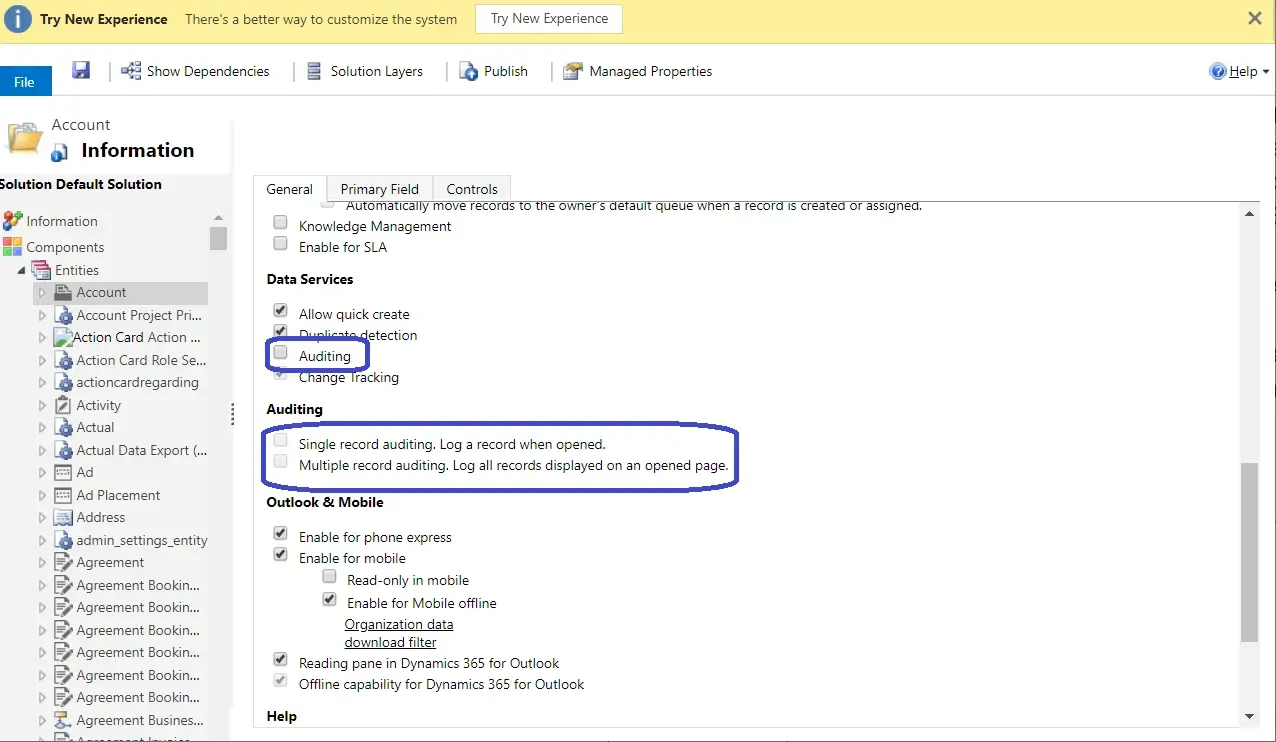
We need 3 settings here
-
Auditing will enable tracking all changes
-
Single record auditing will enable tracking when the record is opened
-
Multiple record auditing will enable tracking when the user retrieves data as a view or search
Well, that was kind of a workload. Now you are all set to track your data. Before we proceed to how actually use it, I would like to note that auditing can consume a lot of space.
There are 3 places where you can see the audit data.
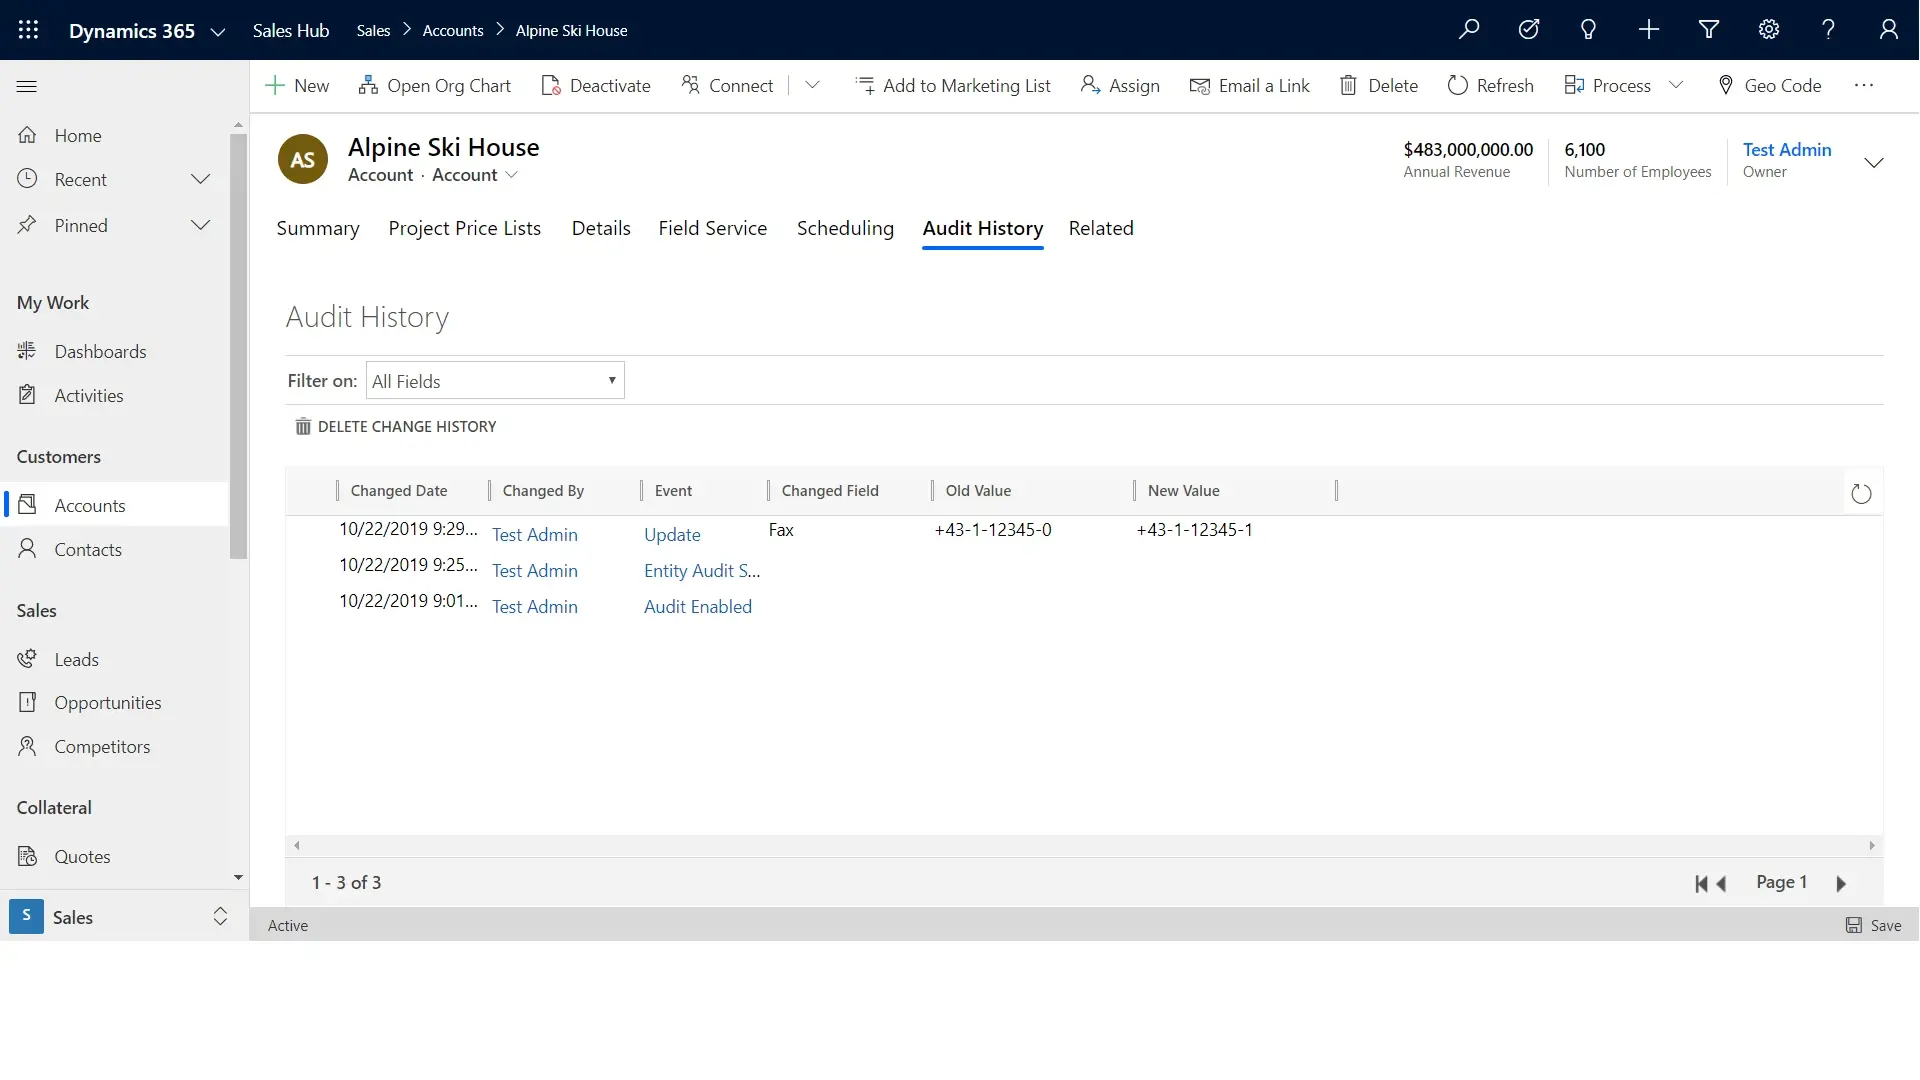
The first one is the actual record. You’ll be able to see here all changes made to the record. To view them, open Related -> Audit History tab.
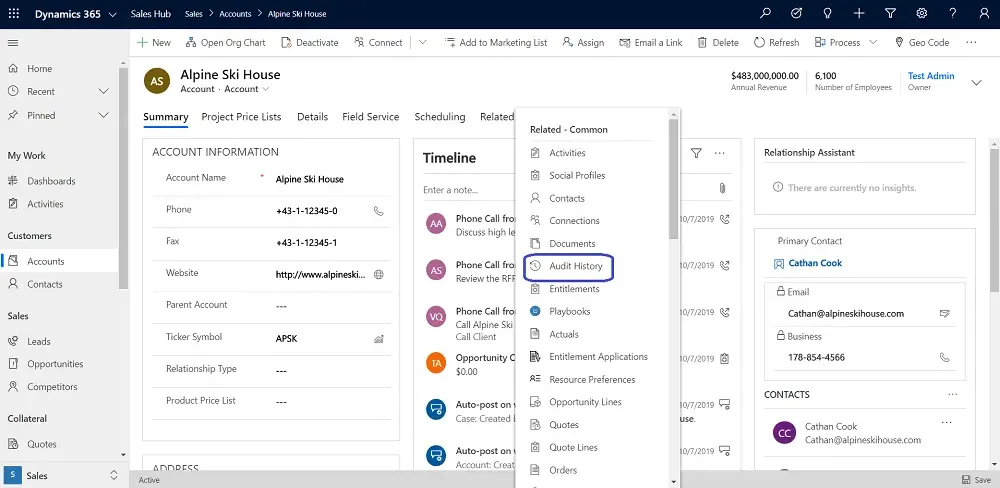
Here you’ll be able to see what data was changed by whom and when.
If you want to see who accessed what data in reading mode, we need to go to the Office 365 Security and Compliance Center. Here you need to press Turn on auditing to start collecting logs.
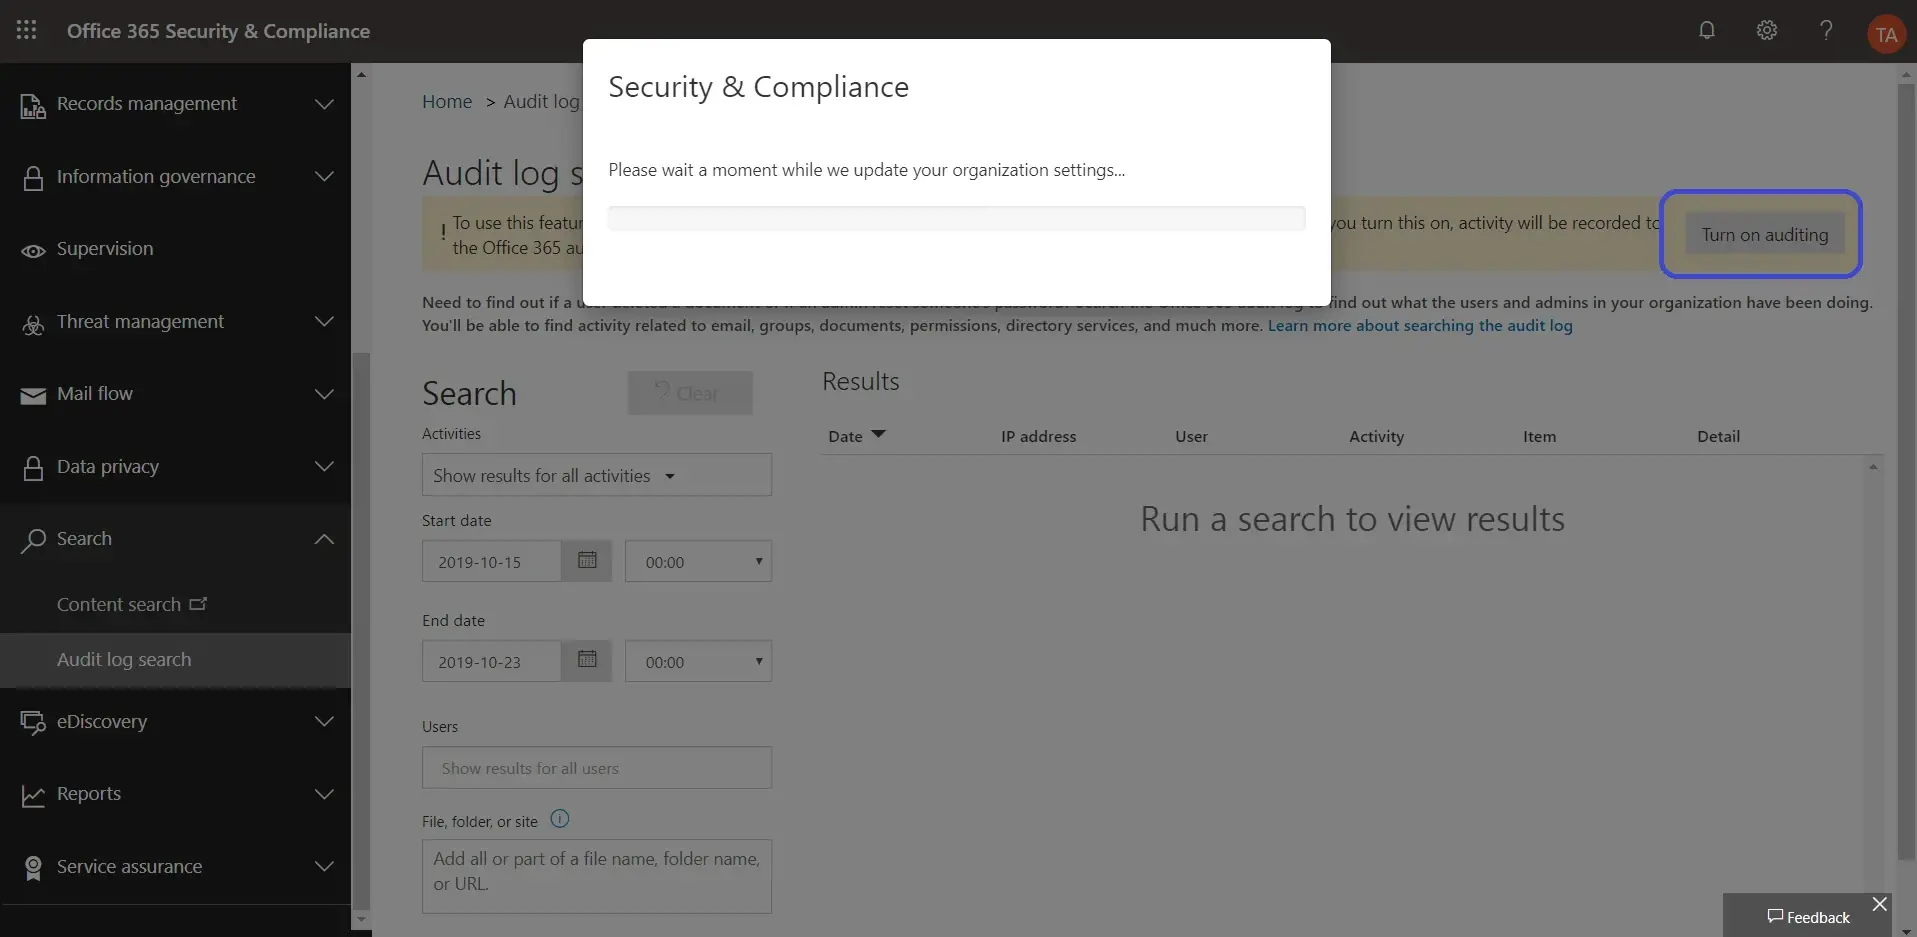
Since it will take several hours for logs to be initially collected, we will end our setup journey here. After they are collected – you should be able to navigate who and when accessed Dynamics 365 data.
In case you have a very complicated setup or need personal advice, feel free to contact us.