
Introduction
Lead-scoring models in Dynamics 365 empower businesses to automate and streamline the lead qualification process. They offer a structured framework for assigning scores to leads based on interactions, demographics, and engagement levels. This step-by-step guide will walk you through creating, viewing, and managing lead-scoring models, helping optimize your lead management strategies within the Dynamics 365 platform.
Benefits of Lead-Scoring Models:
• Automated Decision-Making: Lead-scoring models automate lead evaluation, ensuring a systematic and efficient process.
• Precision in Targeting: By considering specific activities, demographics, and interactions, the models enable precise targeting of leads.
• Sales-Readiness Identification: Establish a sales-ready threshold, automating the transition of leads to sales when they meet specific criteria.
• Customization for Specific Entities: Tailor lead-scoring models to focus on either accounts or contacts, aligning them with your business needs.
• Continuous Improvement: Regularly review and refine your lead-scoring models based on performance data, ensuring ongoing optimization.
Step-by-Step Guide
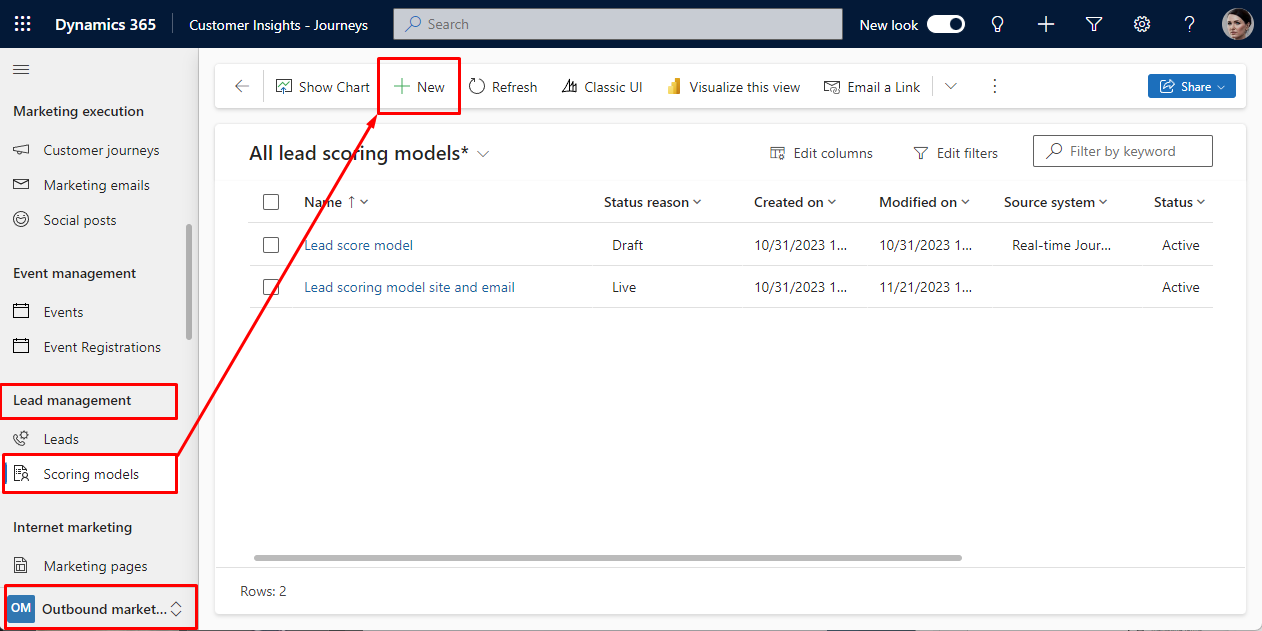
Step 1. Navigate to Scoring Models:
• Go to Outbound marketing > Lead management > Scoring models.
• Here, you can view, edit, and create lead-scoring models.
Step 2. Design the Model:
• Open the designer on the Design tab.
• Drag tiles from the Toolbox tab to create condition/action pairs.
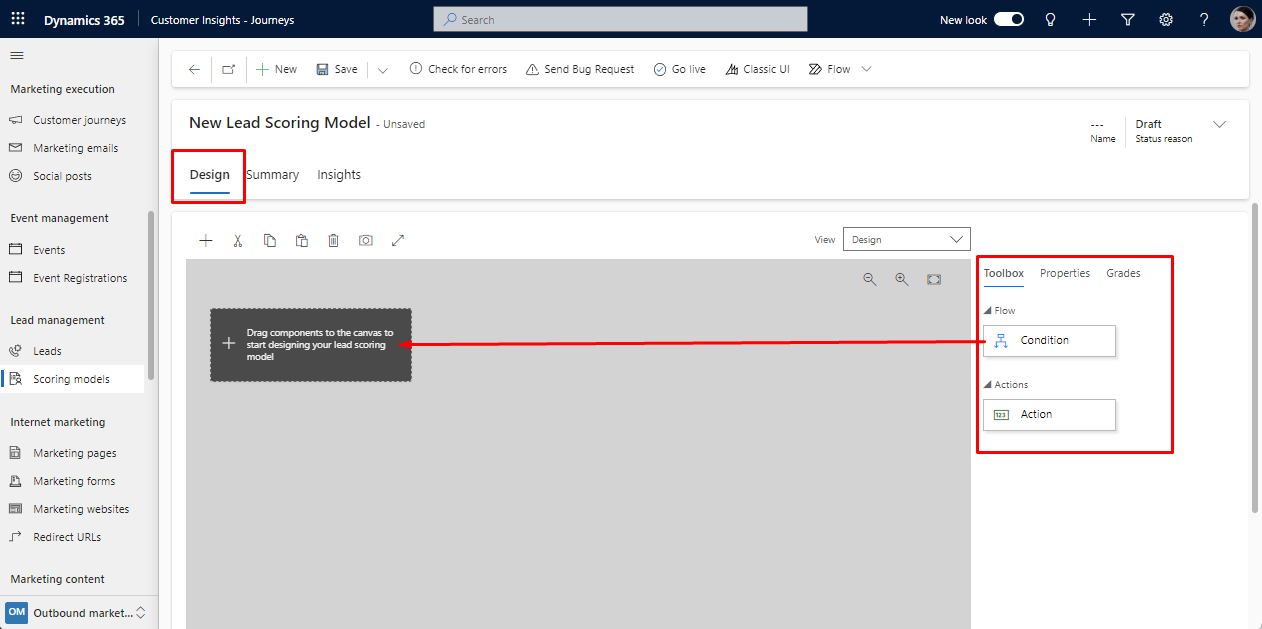
• Conditions represent rules, and actions define score adjustments.
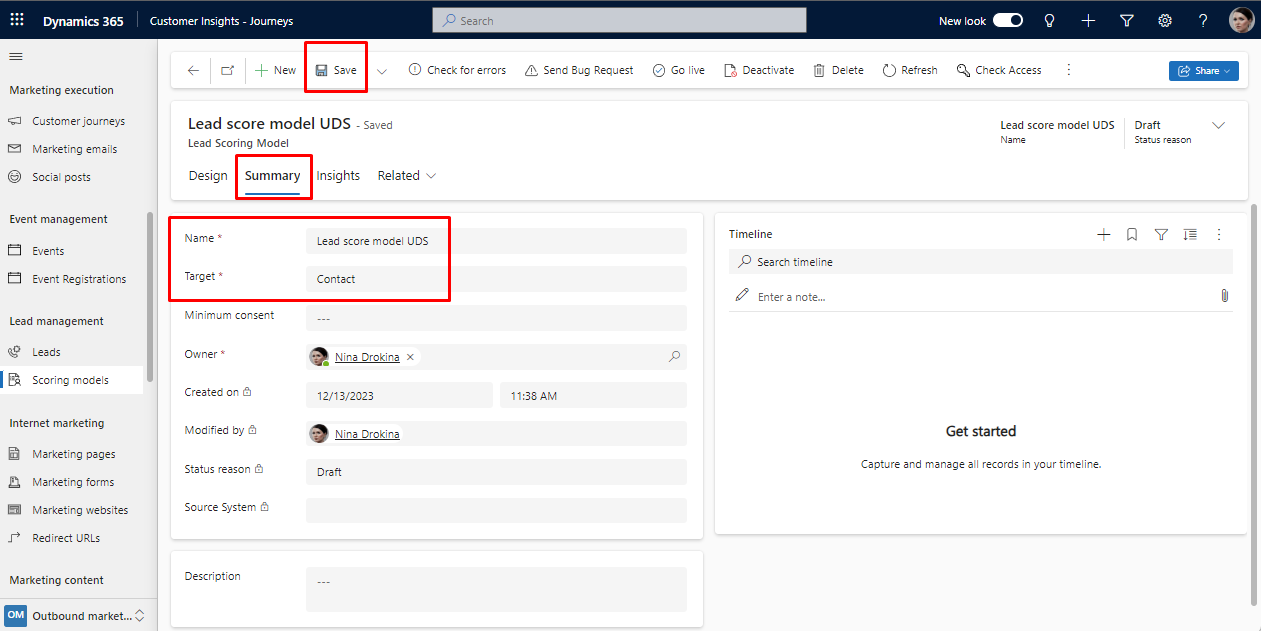
Step 3. Name and Choose Entity:
• Open the Summary tab.
• Enter a name in the Name field.
• Set the Entity target to Account or Contact based on your needs.
• Click Save to apply the settings.
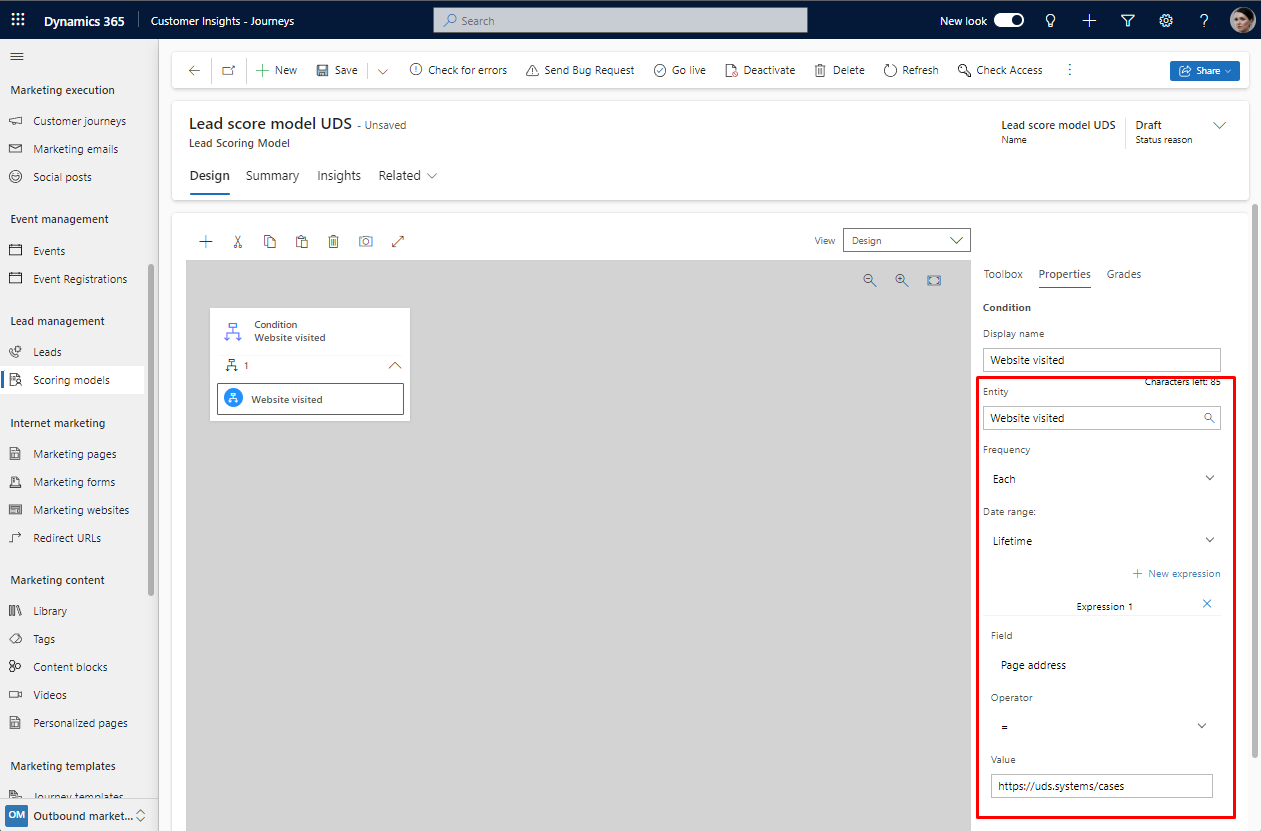
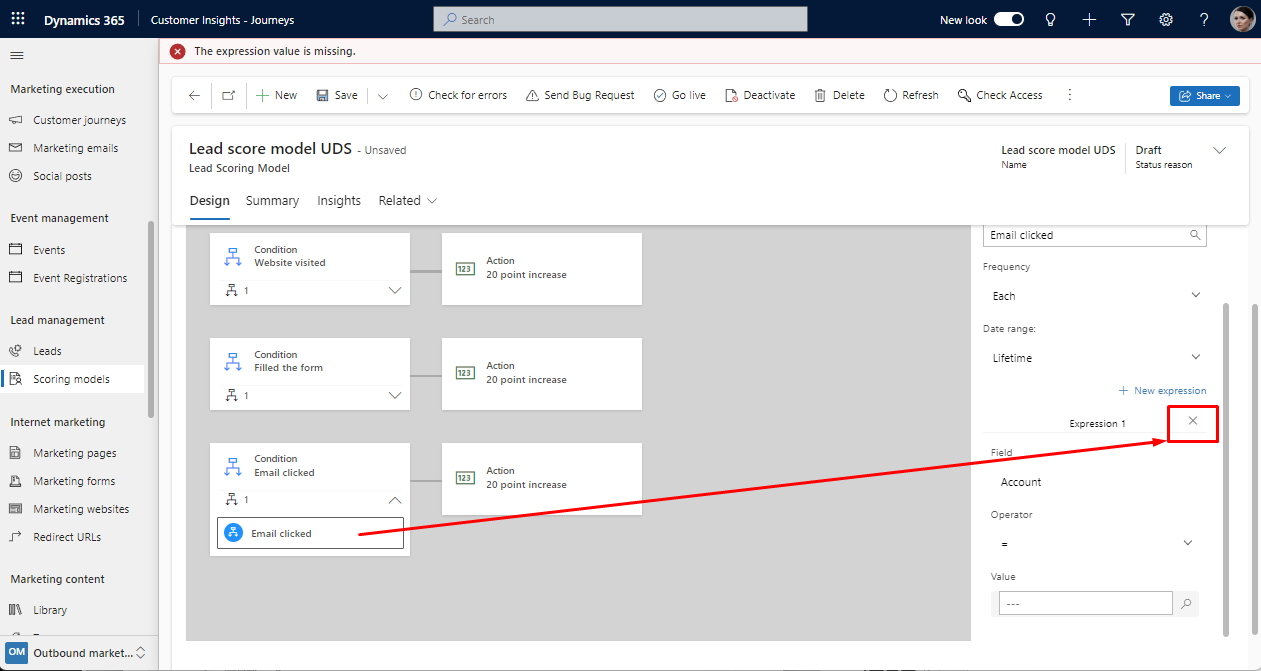
Step 4. Set Up Conditions:
• Add a condition tile (Display name).
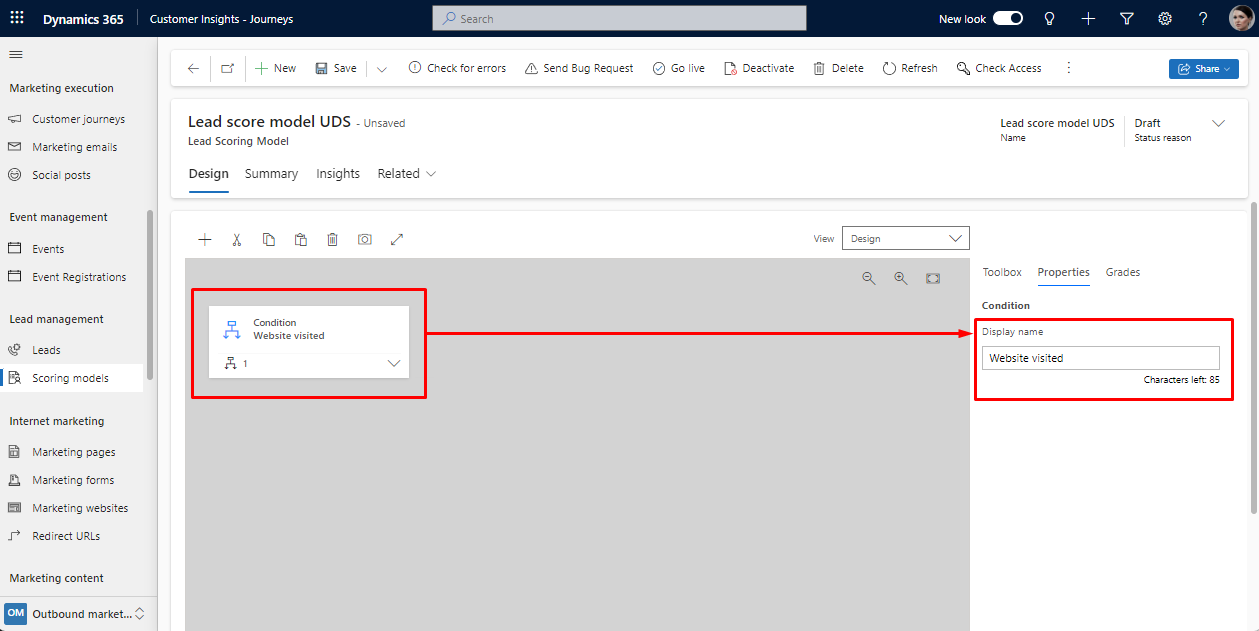
• Create child conditions to establish logic.
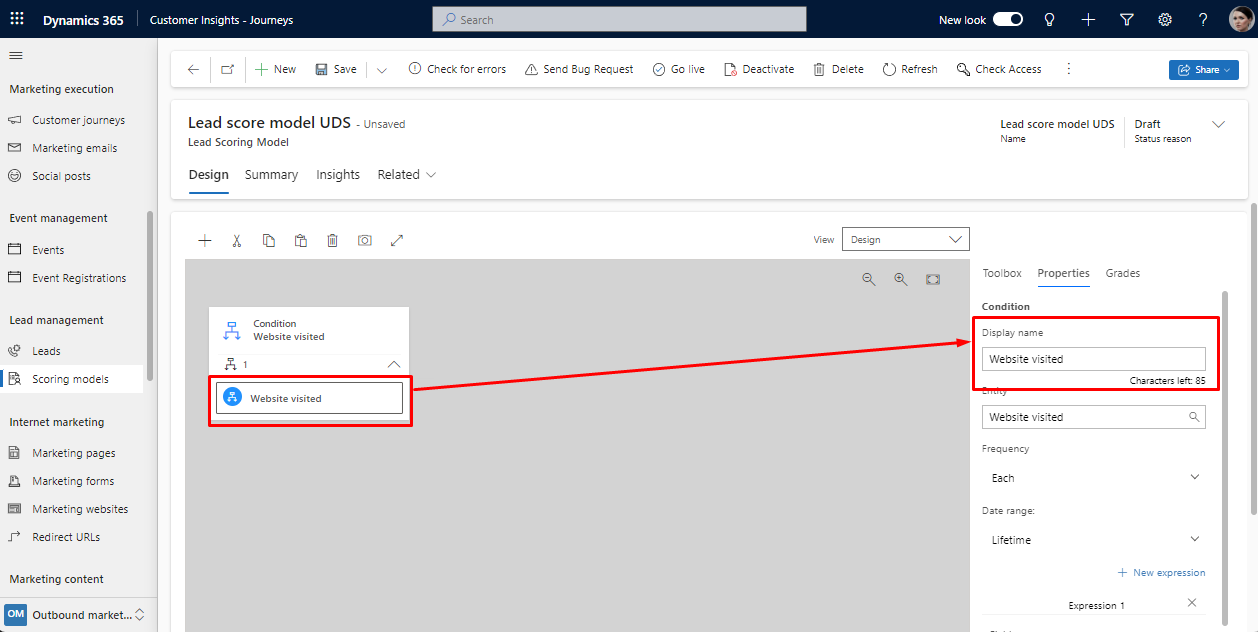
• Set logic parameters like Entity, Frequency, Date Range, and New Expression.
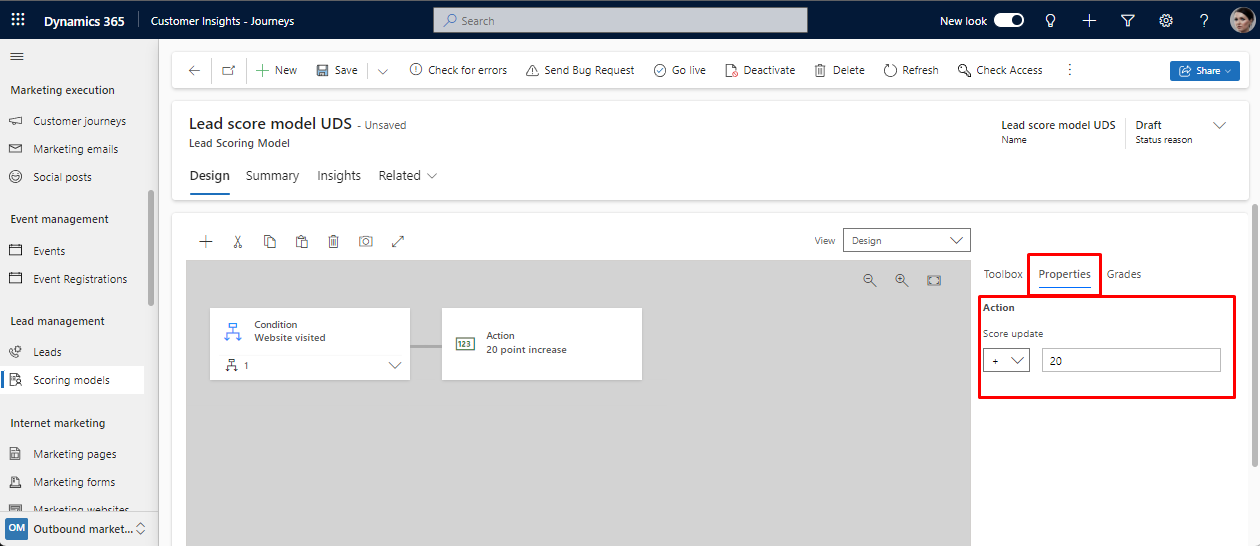
Step 5. Set Up Actions:
• Add an action tile after a condition tile.

• Open the Properties tab and set the score to increase or decrease by an integer value.
Step 6. View All Conditions:
• For a quick overview, switch the View drop-down to Text.
• It displays a compact, text-based view of your rules.

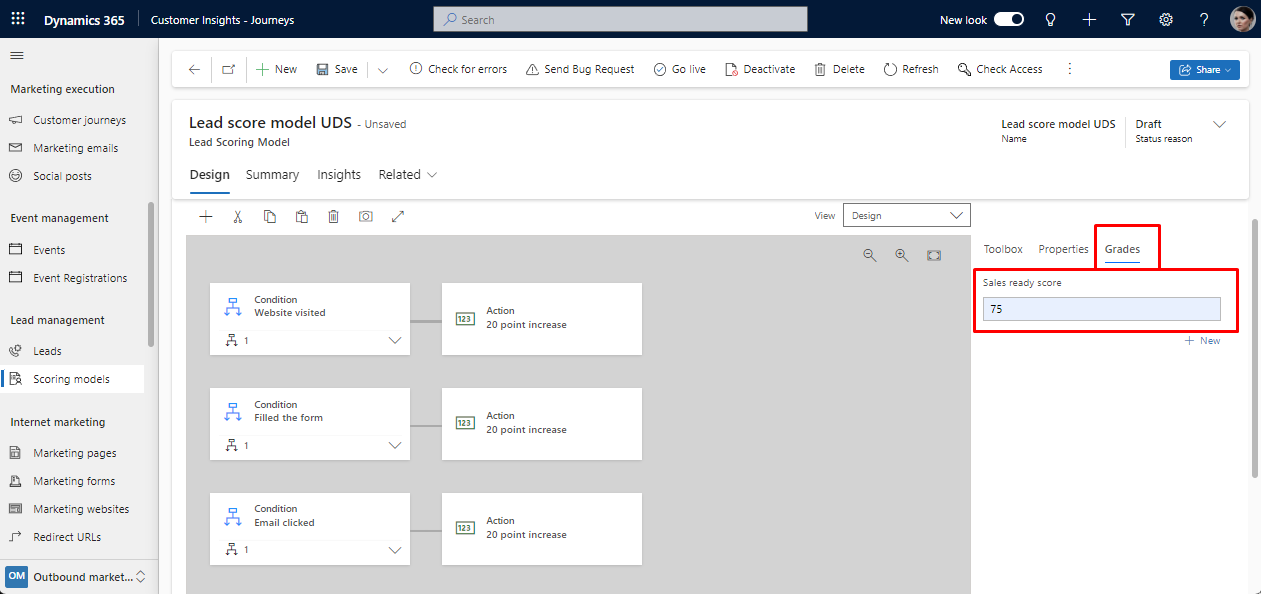
Step 7. Establish Grades and Sales-Ready Score:
• Open the Grades tab.
• Set the Sales Ready Score to determine when a lead is "sales-ready."
• Add grades and define score ranges for interpretation.
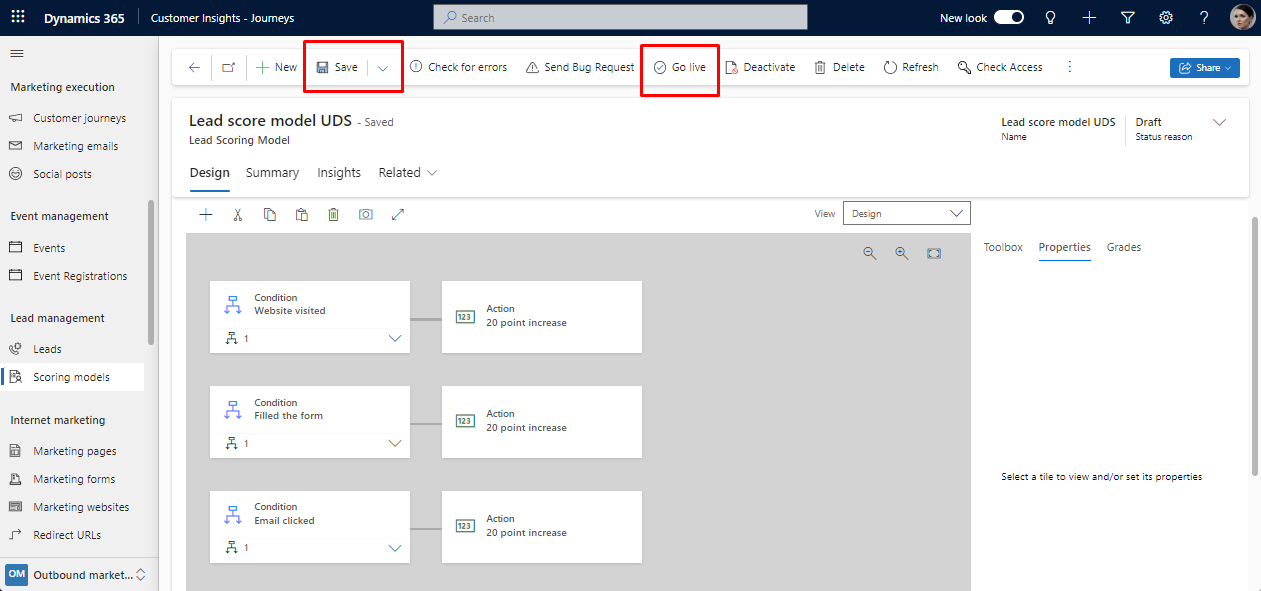
Step 8. Save and Go live:
• Save your lead-scoring model and check for errors.
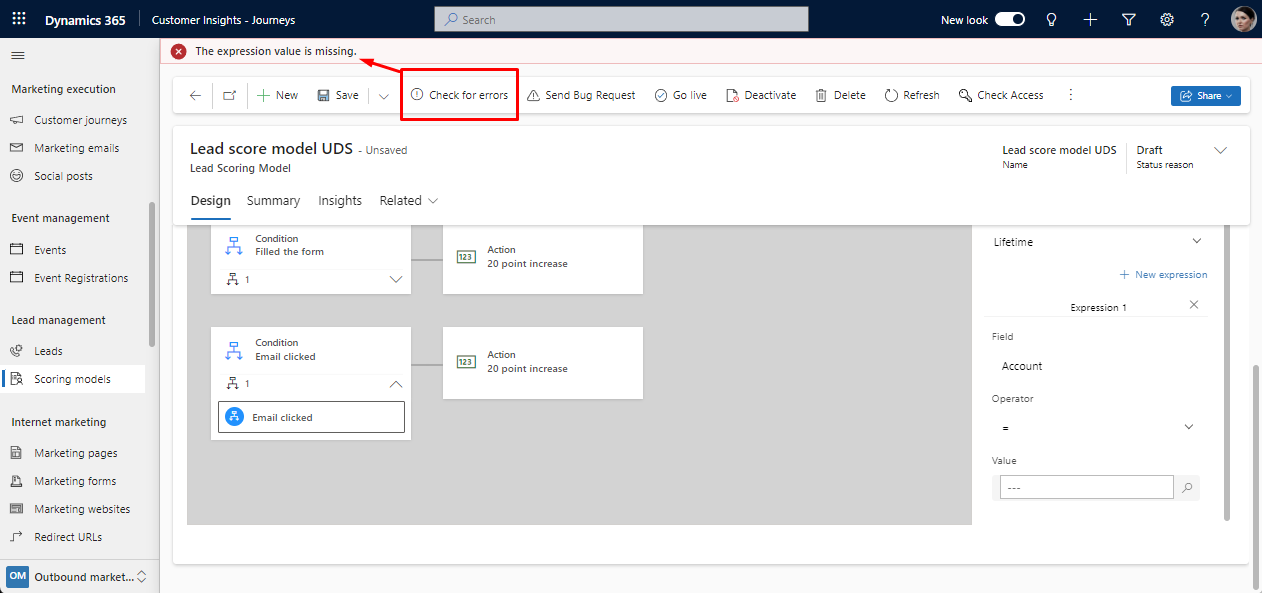
If you have such errors, please open child conditions and check if the expressions were set. If you don’t need the expression, delete this section.
• Go live with your lead-scoring model.
Step 9. Monitor leads scored:
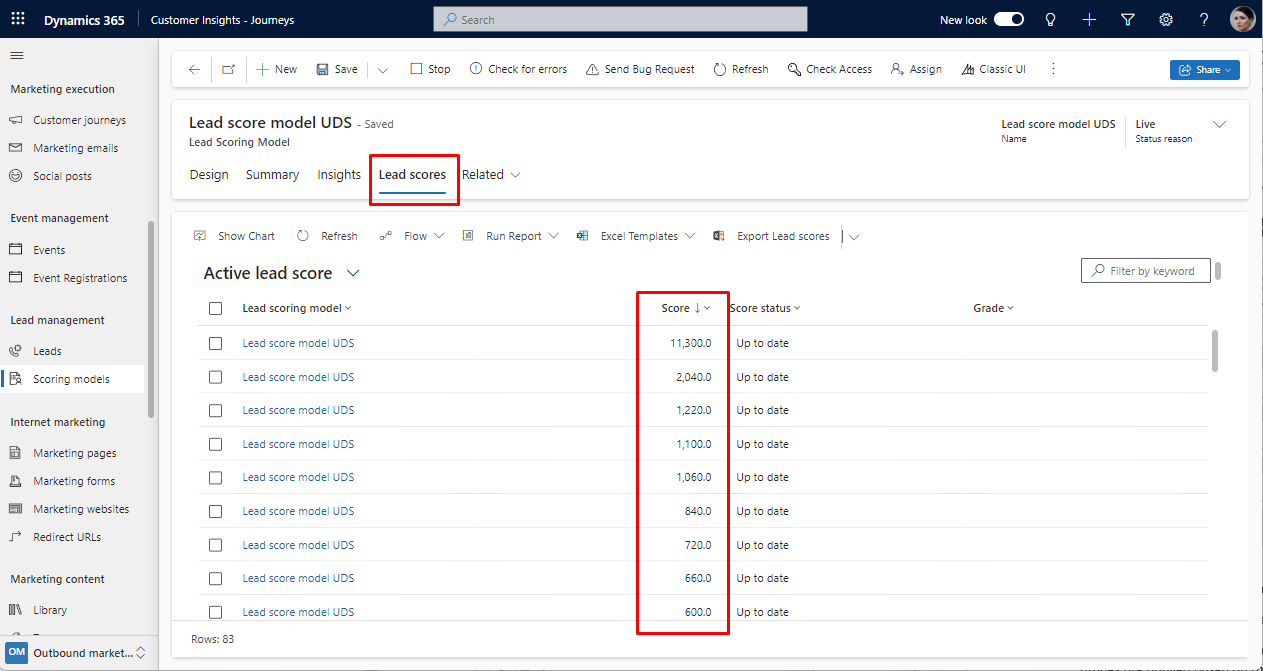
Monitor leads scored according to the model. To find all the leads that a selected model has scored:
• Go to Outbound marketing > Lead management > Scoring models to open a list of models, then open the one you want to inspect.
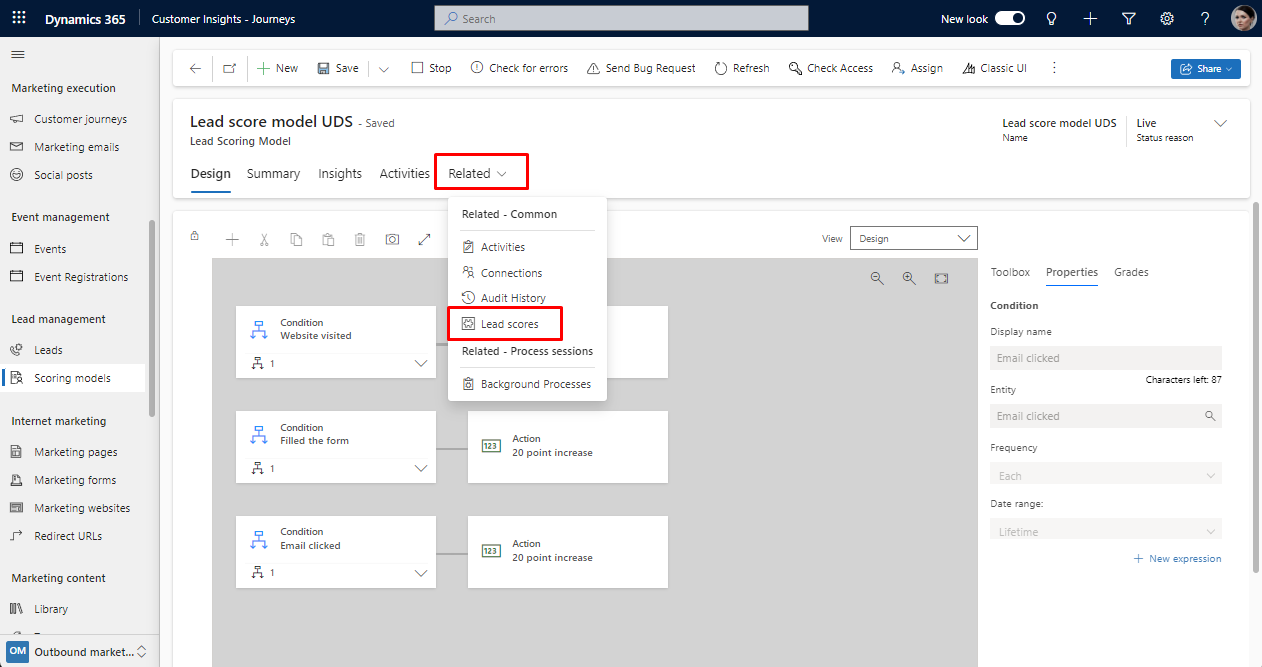
• Select the Related tab to open a drop-down list of related entities, then select Lead scores.
Step 10. Continuous Improvement:
• Regularly review and refine your lead-scoring models based on performance. You can see lead score results directly on the lead form.

Note: You can create multiple lead-scoring models, each scoring leads independently. The scores and grades are applied based on the entire model, and sales-ready leads trigger workflows for further actions.
Conclusion
Implementing lead-scoring models in Dynamics 365 is a strategic move to enhance the effectiveness of your marketing and sales efforts. The ability to systematically evaluate leads based on diverse criteria ensures that your sales team can prioritize and focus on leads most likely to convert. Dynamics 365 provides a versatile platform for creating and managing these models, allowing businesses to fine-tune their lead qualification processes for improved results. As you embark on this journey of lead scoring, keep a watchful eye on performance metrics and be prepared to iterate and refine your models for continuous improvement.