Introduction
Many of you know that in CRM, you can upload a picture instead of showing the company letters on the selected form. This helps you remember specific records better and facilitates the perception of companies. But did you know that they can be displayed in a separate column on the view? Today, we will talk about how to achieve such a result.
Icons and Script
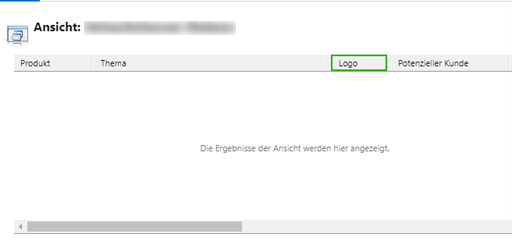
First, we need to create a new field, for example, "Logo," and display it on the required view.
You also need to add the script that will be responsible for retrieving company icons and displaying them in the "Logo" column:
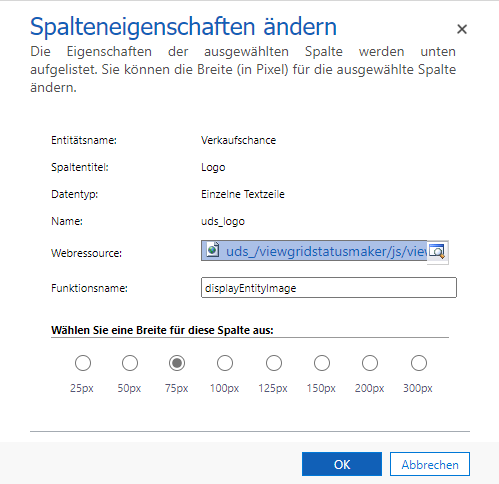
Example script:
async function displayEntityImage(rowData, userLCID) {
    var str = JSON.parse(rowData);
    var accountId = str["customerid_Value"]?.Id?._rawGuid;
    var entityLogicalName = str["customerid_Value"]?.LogicalName;
    var resultarray = [];
    if (accountId && entityLogicalName && entityLogicalName == "account") {
        var accountIdGuid = accountId.replace(/(.{8})(.{4})(.{4})(.{4})(.{12})/, "$1-$2-$3-$4-$5");
        await Xrm.WebApi.retrieveRecord("account", accountIdGuid, "?$select=entityimage_url").then(
            function success(result) {
                var link = result.entityimage_url;
                if (link) {
                    resultarray = [link, ""];
                }
                else {
                    resultarray = ["", ""];

                }
            },
            function (error) {
                console.log(error);
            }
        );
    }
    return resultarray;
}
The JavaScript function expects two parameters:
• rowData – row object specified in layoutxml
• userLCID – calling user's Locale ID (LCID)
In our case, we only use a row object. From this object, we need the value from the company field. We can see that this is a lookup field on the selected view, and we know that its schema_name is customerid. So, we can get the ID of the company and the logical name of the entity. Next, we must ensure it's the company (the logical_name is account), since there may be other lookup fields on the view.
The next step is retrieving the company icon. We know it is located at the link recorded in the entityimage_url field of the account entity, so we make a corresponding request and take the value of this field. At the end of the function, we need to return an array of two elements:
• The first element is a link to the icon.
• The second element is a tooltip that appears when hovering over the icon (in our case, the tooltip is unnecessary).
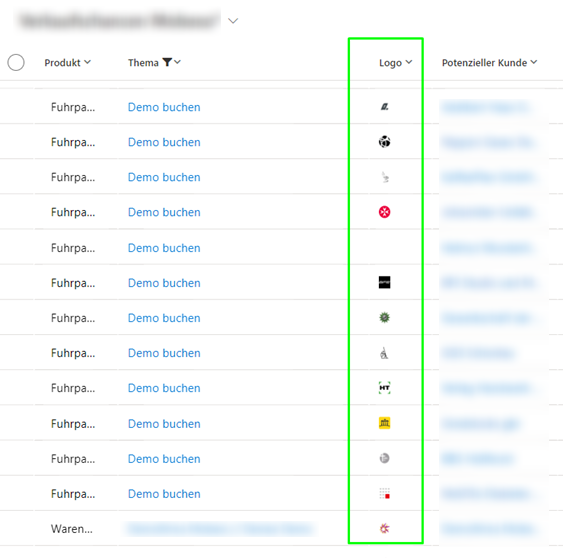
If you did everything correctly, published and viewed the script, you should see the corresponding companies' icons on the selected view.
Automation of Icon Updates
But we will go further and automate the update of these icons on companies. To do this, we added a plugin that is triggered by the creation of an Opportunity record. Then the following algorithm is run:
- The Website field is checked on the company. If it is not empty, then we take the value of this field. Otherwise, we check the E-Mail field.
- If the E-Mail field is not empty, then we take the value of this field. Otherwise, we check the value of the "Primärer Kontakt" field.
- If the "Primärer Kontakt" field is not empty, we retrieve the email address from the linked contact.
- If the email field is not filled in, then the algorithm stops.
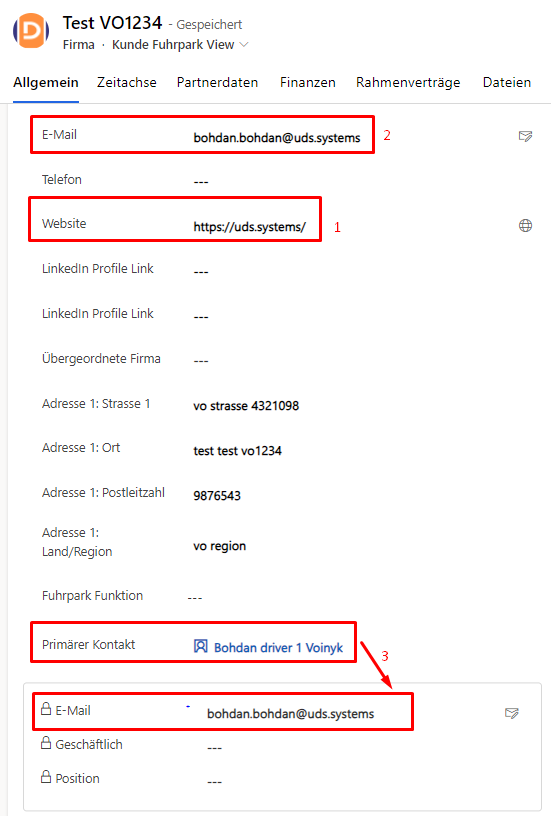
We can see that the selected fields contain either a website address or an email address. If the value from the email field is selected, we consider that the site address is after the @ sign. For example, in the email bohdan.bohdan@uds.systems, the site address is uds.systems.
Having identified the site, we can easily get its icon using the hidden API from Google:
https://www.google.com/s2/favicons?domain=${domain}&sz=${size}
By substituting the website address instead of ${domain} in the link and the desired icon size instead of ${size}, we will easily get a favicon. It should be noted that the image will be returned to us in PNG format; therefore, we do not need to convert it to another format. After receiving the icon, we can simply insert it on the company in CRM.
Summary
Now our process is automated. Icons on firms are automatically updated when an Opportunity is created. In addition, they are displayed in a separate column, which makes it easier to visually perceive the list of open opportunities. You will easily create associations with specific firms, making it easier for you to work.
If you have any inquiries or need assistance, we are here to support you. Please don't hesitate to contact us at any time.