
Introduction
In one of our previous posts, we discussed the advantages of Modern Advanced Find and how to activate it for your Microsoft Dynamics 365 environment. Today, we will guide you through adding a table to the Modern Advanced Find.
The Request
Suppose we received a request to add a Competitors table to the Sales Team Member application. However, there is no need to include Competitors as a separate left-column item.
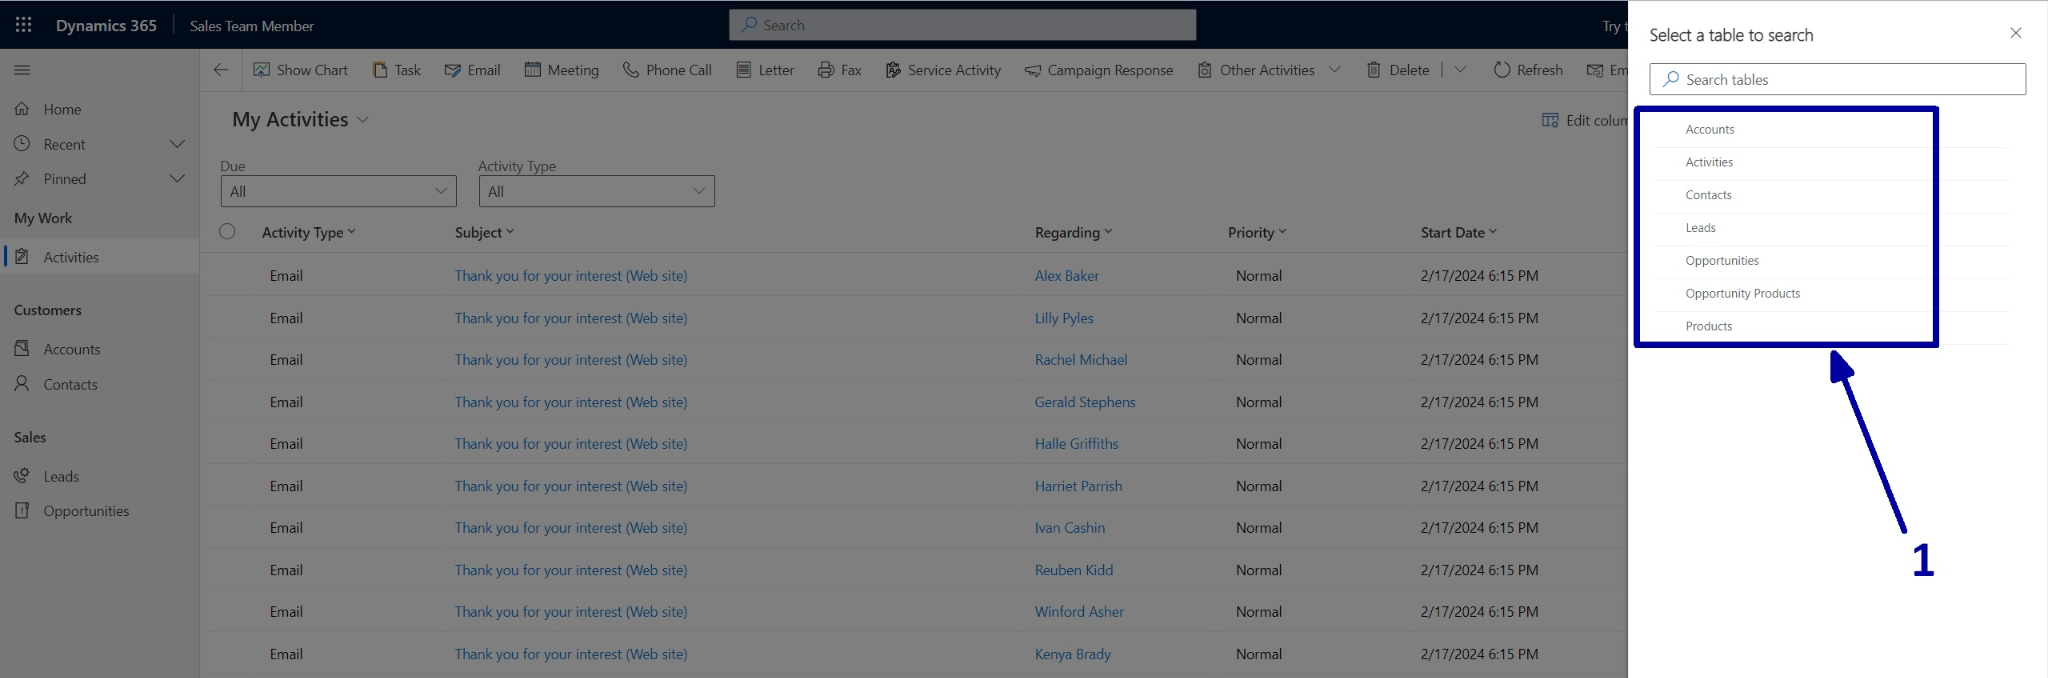
As you can see, when we attempt to utilize the Modern Advanced Find for Competitors, no Competitors table is available (1).
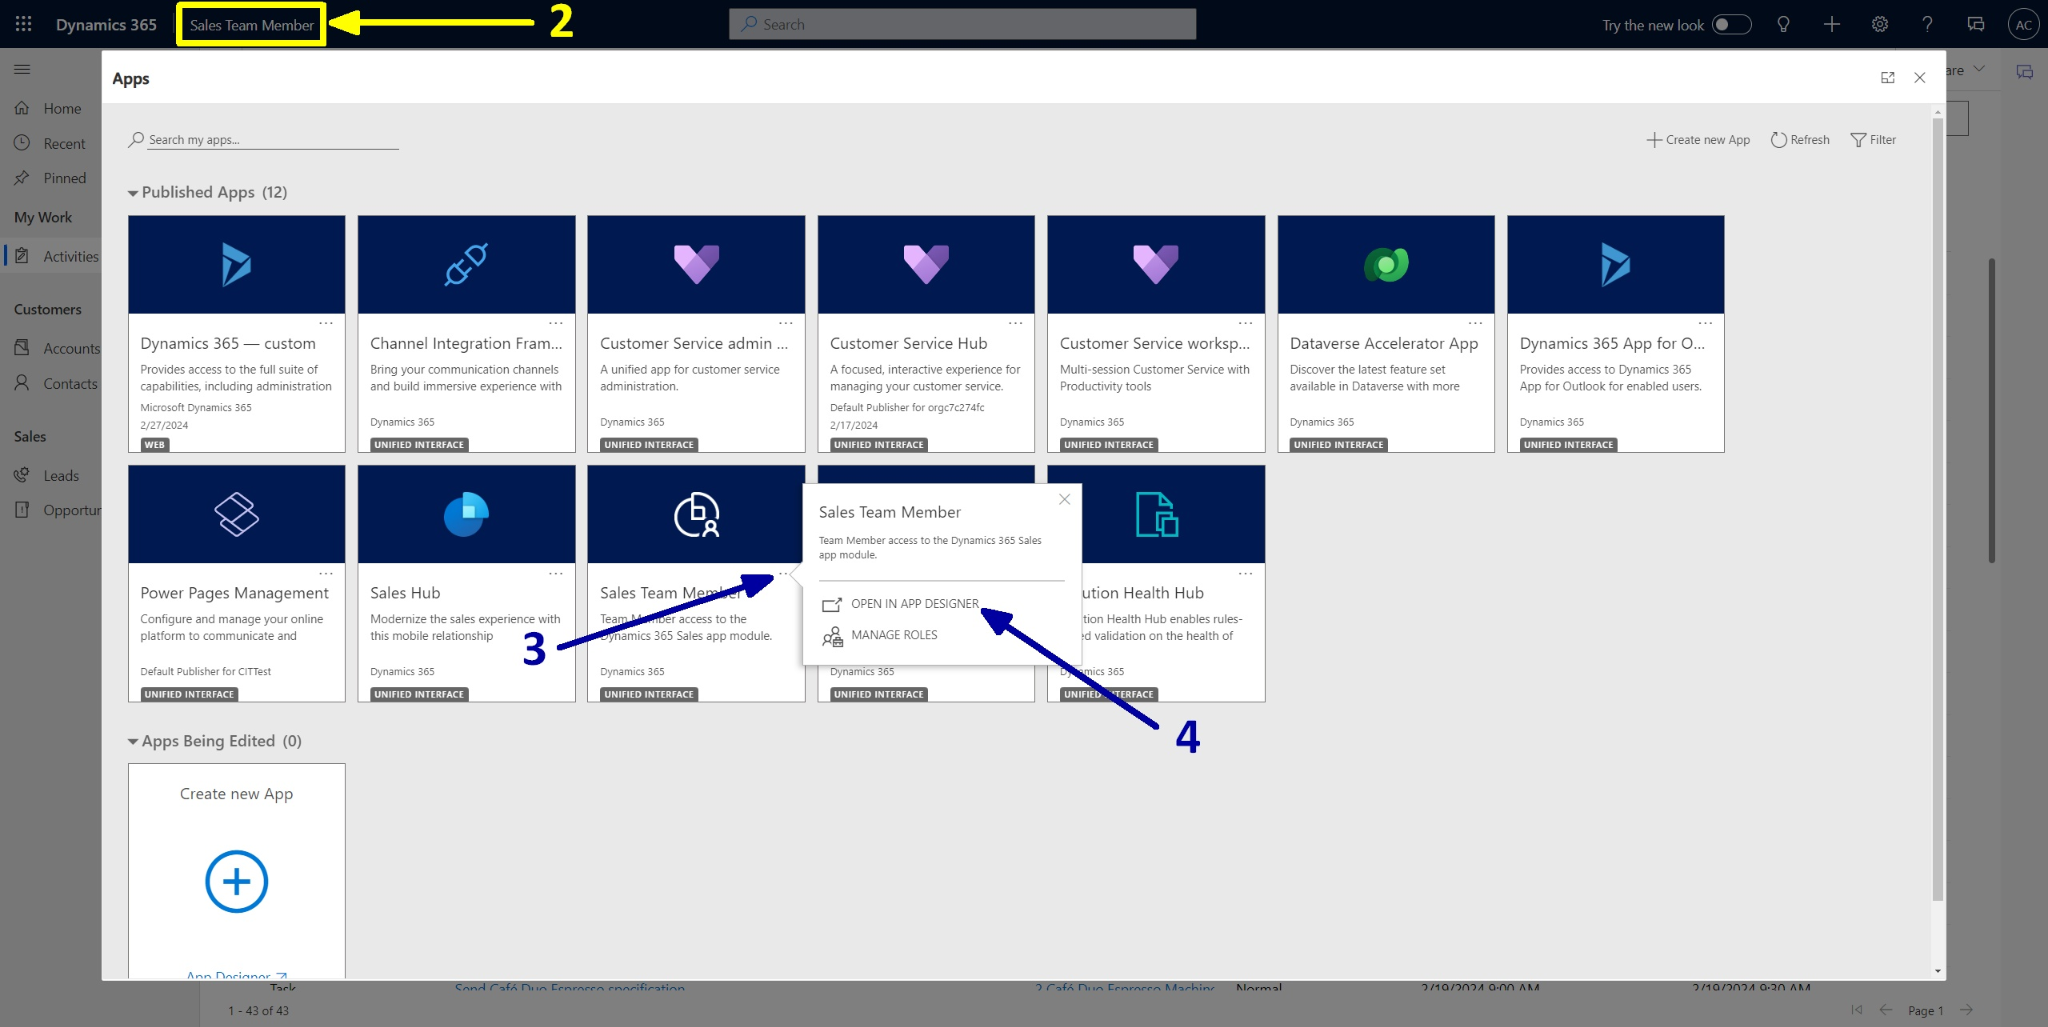
To add this table, we need to click on the current application name (2), locate the Sales Team Member application tile, click on the three dots (3), and select the "Open in app designer" option.
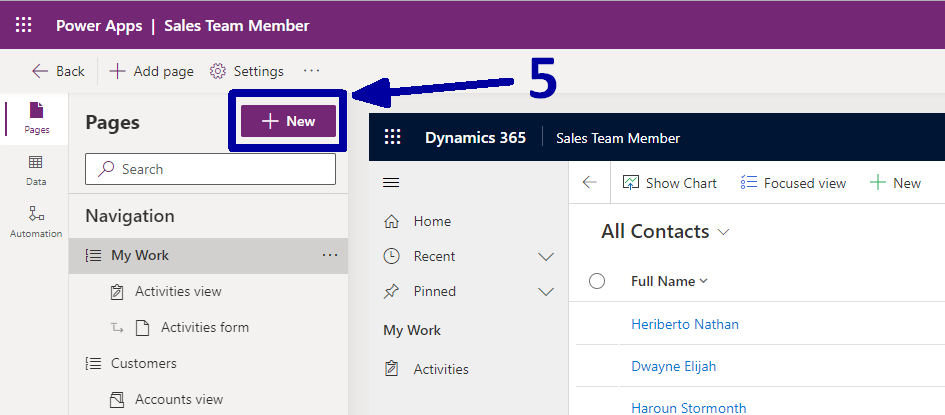
Afterward, you will be automatically redirected to Power Apps, and the Sales Team Member application will open for modifications.
Here, you need to click on the "+New" button (5).
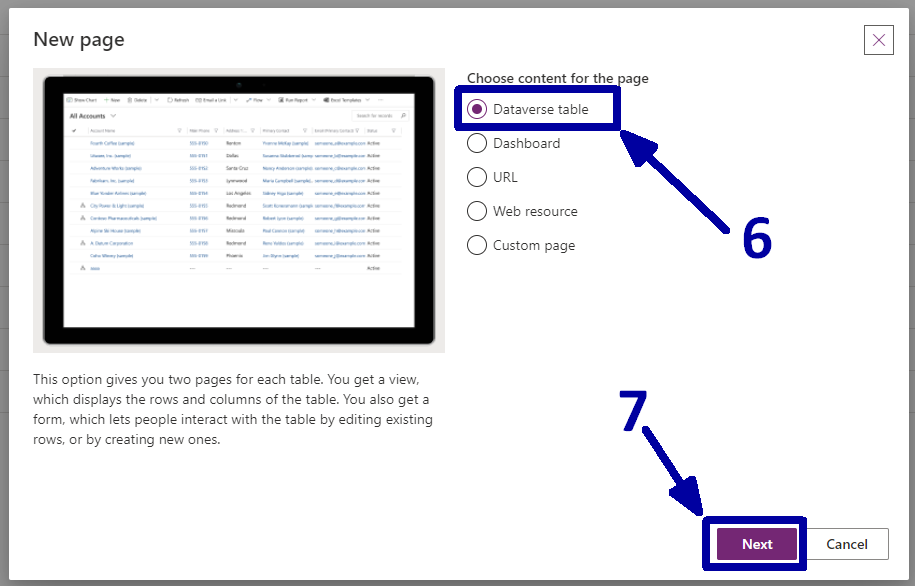
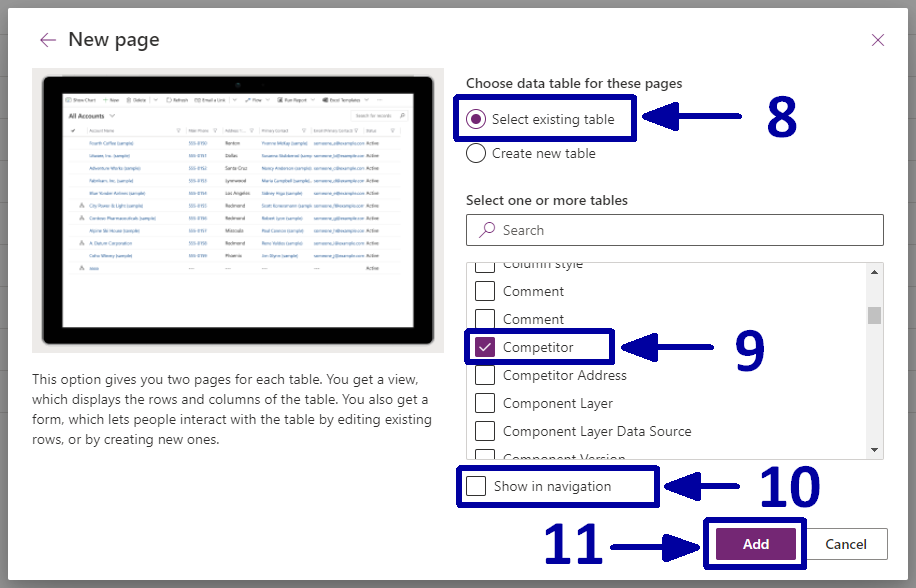
In the popup window, choose the "Dataverse table" option (6) and click "Next" (7).
In the next window, we choose the "Select existing table" (8) option because "Competitors" is an existing table in our CRM. Then, we find and select the "Competitors" table (9) from the list of all tables and uncheck the "Show in navigation" option (10) as requested. Finally, the last step is to click the "Add" button (11).
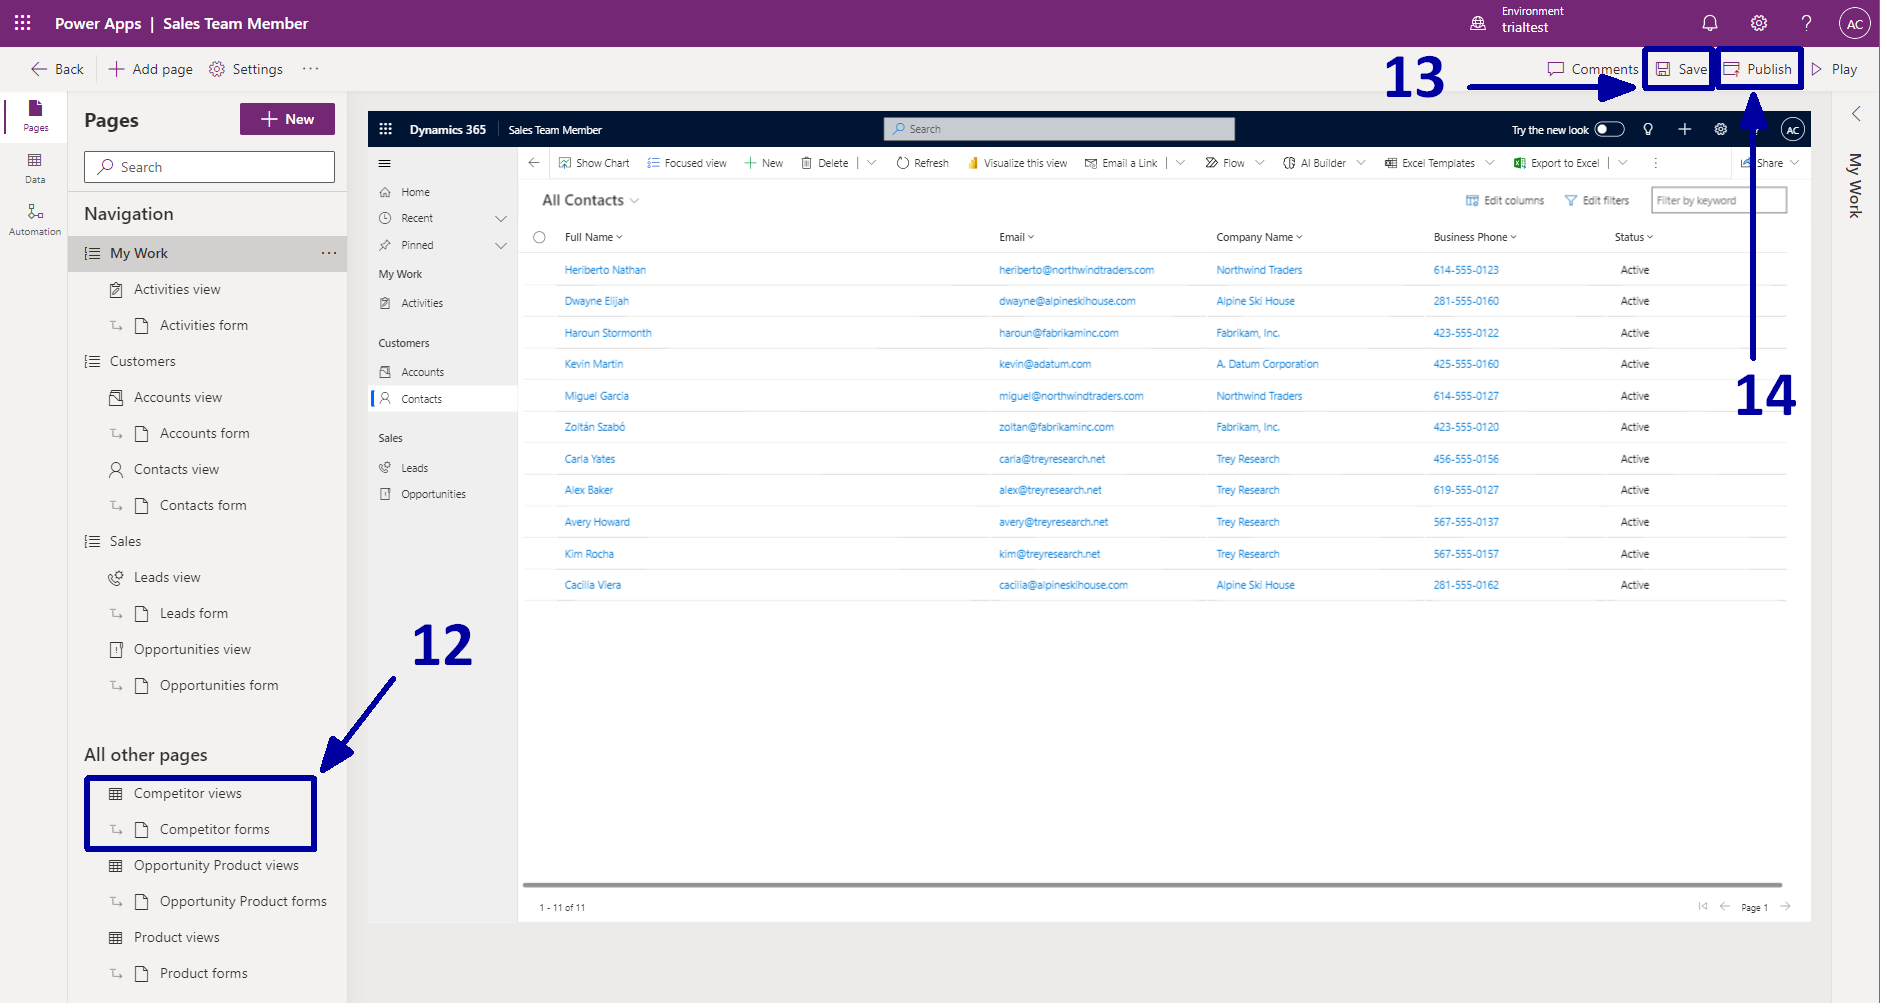
After that, you will be redirected back to the Power Apps page, where you will notice that the Competitors views and forms are also present here (12). Now, click on the "Save" button (13), wait for the save to complete, and then click on "Publish" (14).
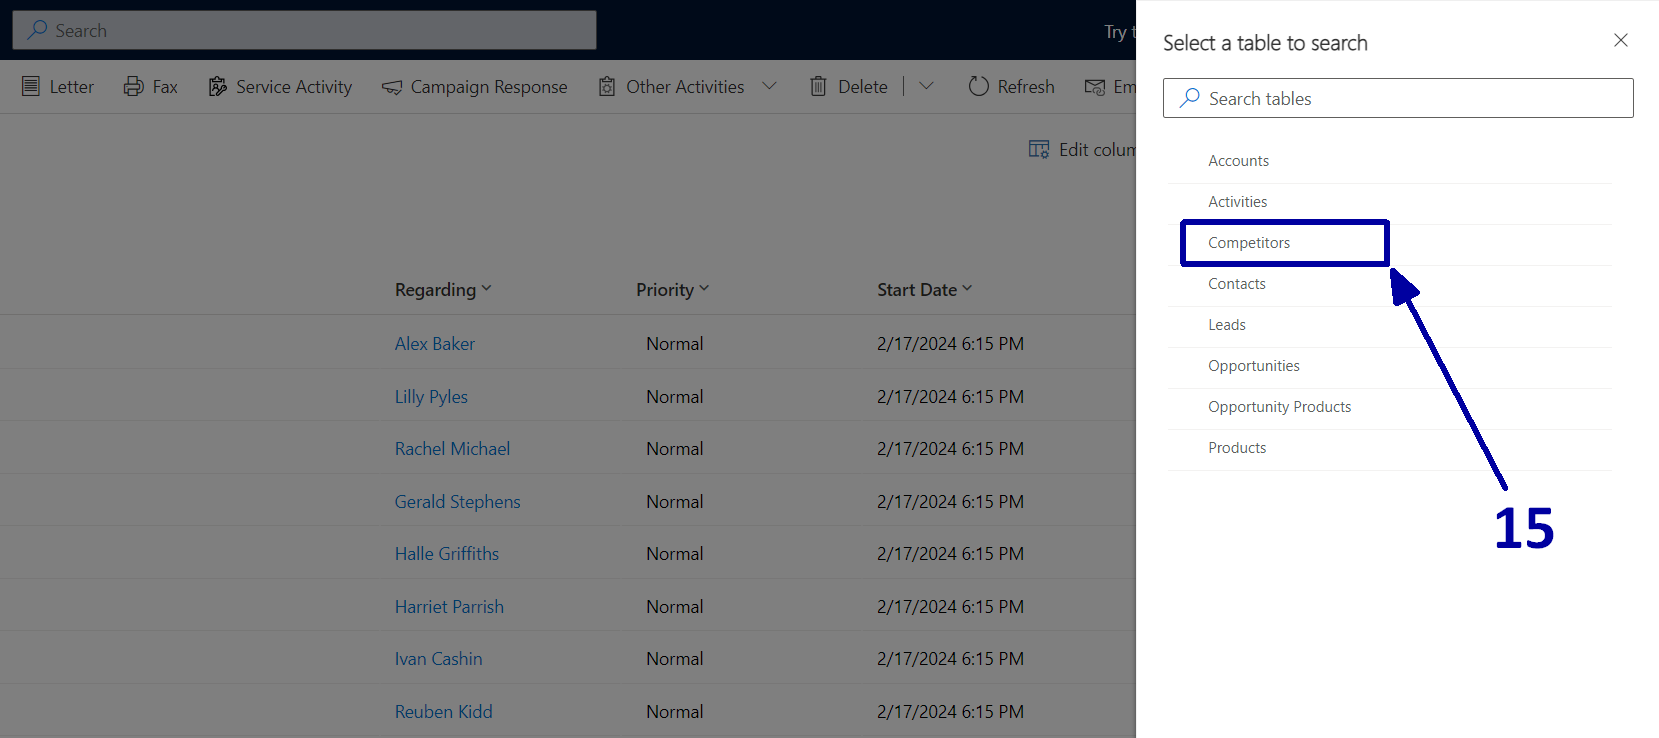
After publishing, navigate back to the D365 CRM and refresh the page.
Then try to use Modern Advanced Find again, and you will notice that the Competitor table is now available for filtering (15).
That's it :-)
Conclusion
In this article, we explore the seamless process of incorporating a table into the modern Advanced Find feature in Dynamics 365. Leveraging the platform's advanced capabilities, users can now efficiently organize and analyze data by adding custom tables.
Following our step-by-step guide ensures smooth integration, empowering Microsoft Dynamics 365 users to enhance their search and query experiences for optimized data management and decision-making.
We hope this guide has been valuable in expanding your understanding of Dynamics 365's capabilities and empowering you to make the most of its features. Please don't hesitate to reach out if you have any questions or require further assistance. We look forward to continuing to support you on your Dynamics 365 journey.