

Introduction
In the previous tutorial, we discussed the concept of personal views, their benefits, and the process of creating personal views. Since personal view creation is permitted for anyone with access to the system, there's a possibility that, after prolonged use, users might accumulate an excessive number of personal views. This can potentially overwhelm users and complicate navigation among the views. Let's explore how to delete a personal view in Microsoft Dynamics 365.
As a bonus, we'll discuss how to delete system views created by System Administrators or Customizers. If you have the proper security role, you can remove them. I'll demonstrate this in the second part of the video. We also have the public view type, but we won't delve into it as system-defined public views cannot be deleted. Others can be managed at the same place as system views.
Video
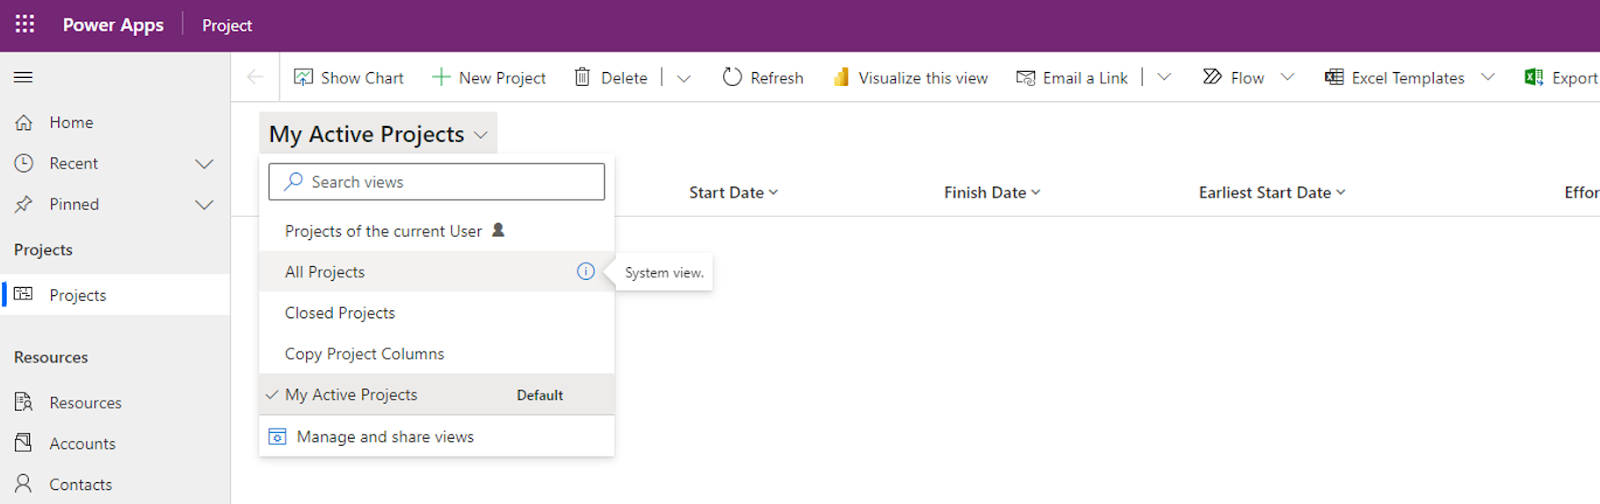
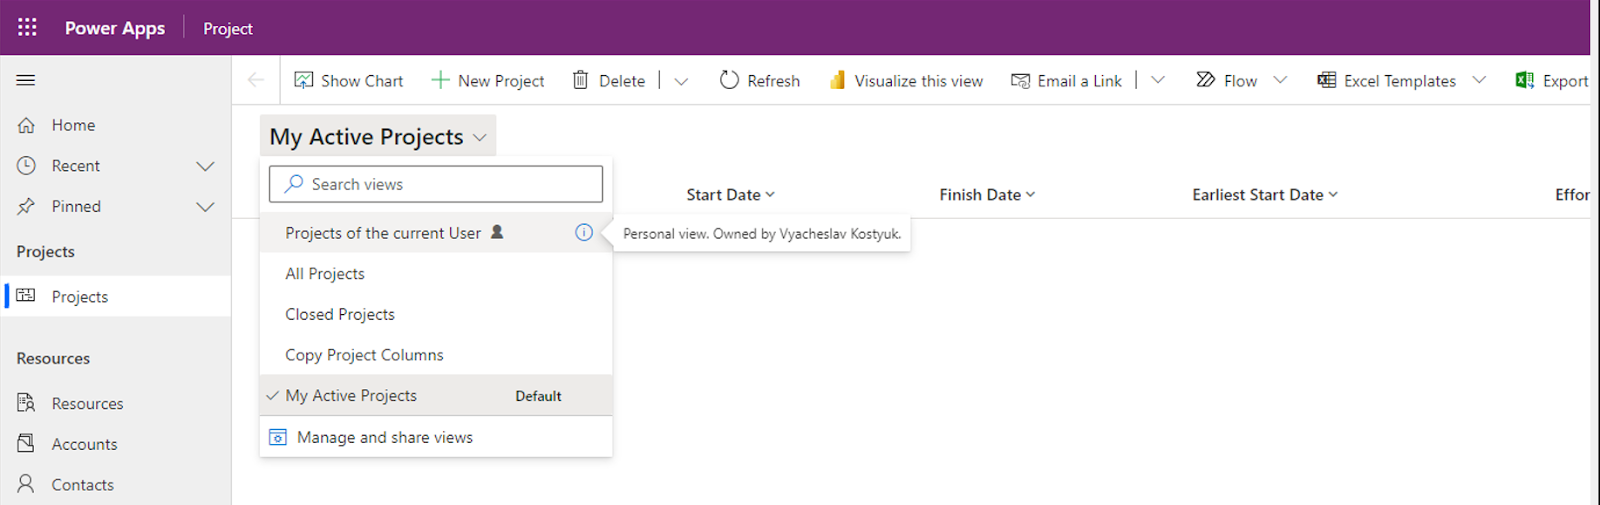
How To Differentiate a System View and a Personal View
To differentiate between system and personal views:
• Access the drop-down menu to see all the views.
• Personal views have a specific icon next to them (👤). System views system views do not have this icon.
• For more details, move the cursor to the information button on the right side (🛈).
Step-by-Step Guide to Deleting a Personal View in Dynamics 365
- Navigate to the Entity:
• In the upper-right corner of the app or on make.powerapps.com, click on Settings (⚙️).
• Choose "Advanced Settings."
• Click on the "Advanced Find" button. This button is typically represented by a funnel icon and is located in the top right corner of the screen.

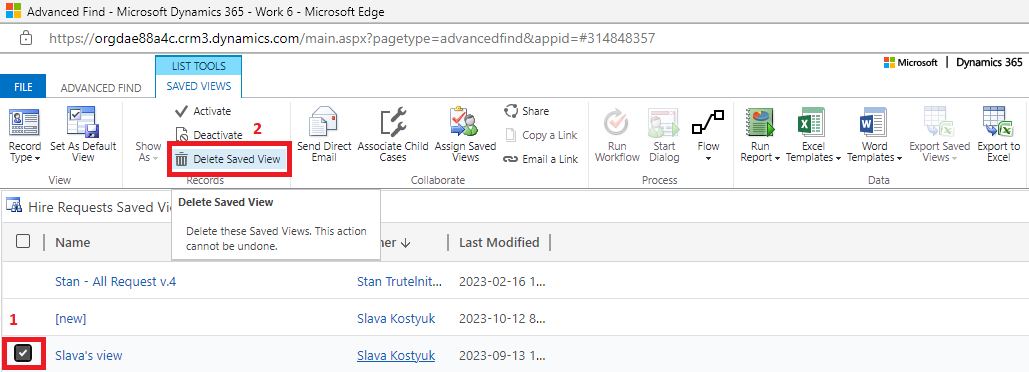
2. Define Your Query:
• In the Advanced Find window, choose the table from which you wish to delete views, and then click the 'Saved Views' button.
• A list of views will appear.
• Choose the desired view by checking its checkbox, then click on ' Delete Saved View.'
Note:
• It's possible that you may not have the necessary user rights to perform this action.
• If that's the case, you can request the owner of the view to grant you the appropriate access privileges.
Step-by-Step Guide to Deleting a System View in Dynamics 365
As previously mentioned, you must possess either the System Administrator or System Customizer security role. There are two methods to achieve this:
Option A: For Advanced User
For those who work with solutions for future changes or migration across different environments, follow these steps:
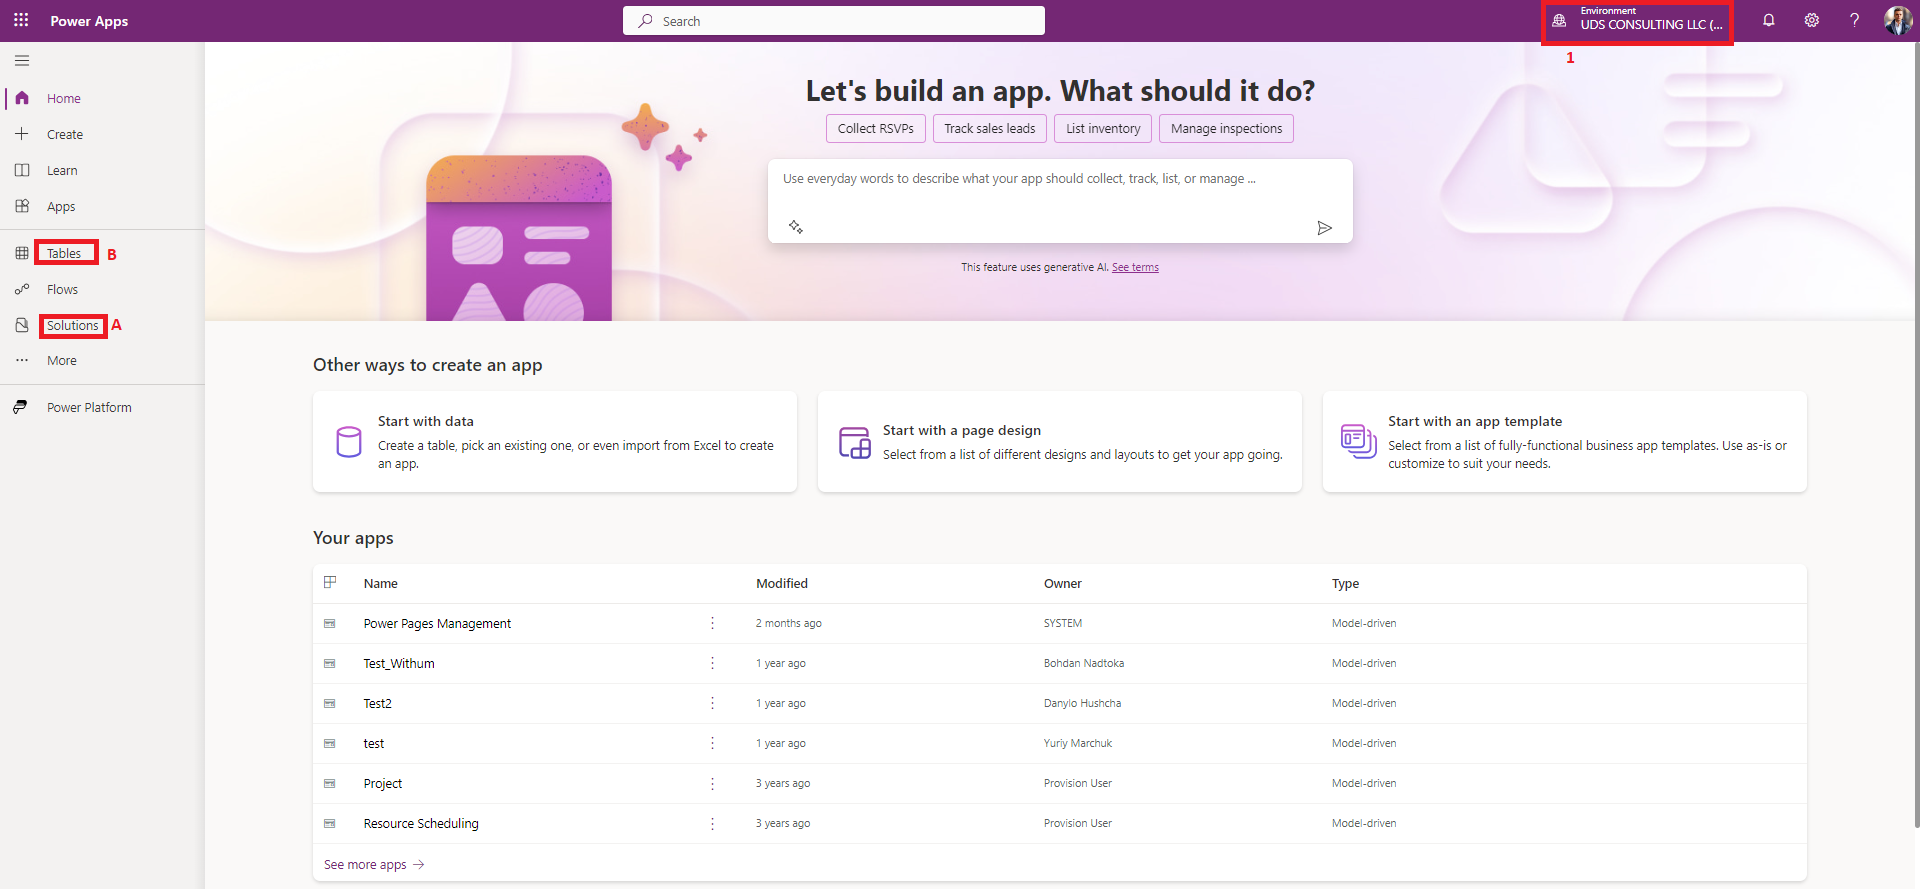
1. Navigate to https://make.powerapps.com.
2. Ensure that the correct environment is selected.
3. Click on 'Solutions' and locate the solution you're working with.
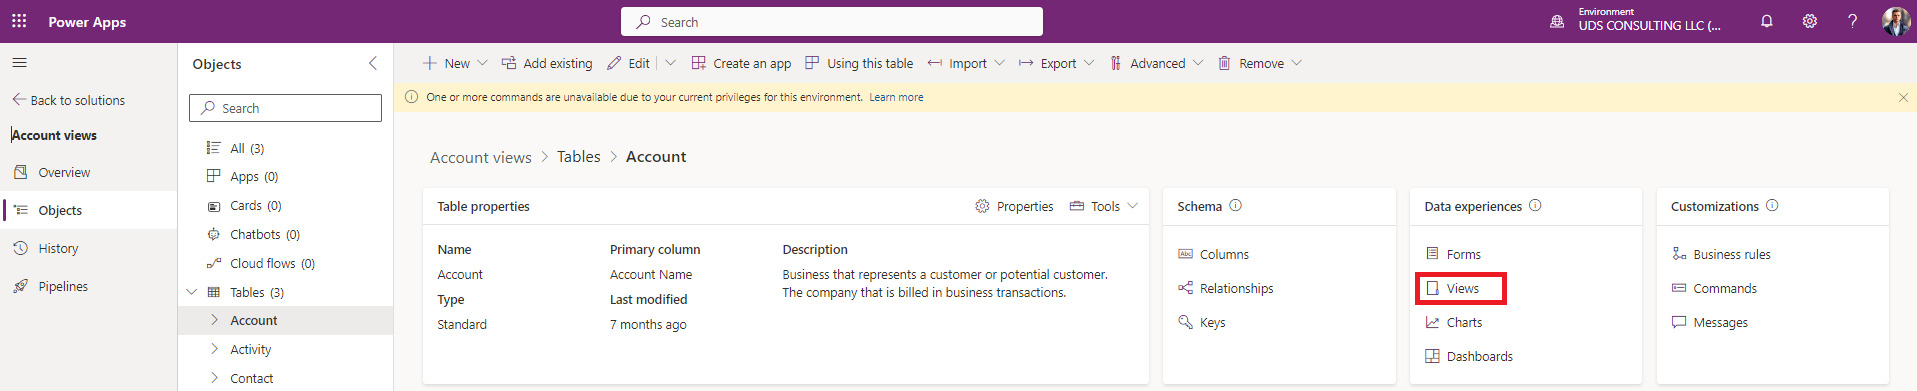
4. Find and select the table you wish to modify and open its views.
5. To delete specific views, tick the checkboxes next to the views, then click 'Remove' followed by 'Delete from this environment.'
6. Remember to publish your changes after making modifications.
Option B: For Non-Advanced Users
If you do not plan to migrate changes across different environments, these simplified steps can be followed:
1. Navigate to https://make.powerapps.com.
2. Click on 'Tables.'
3. Continue with the last two steps mentioned above: selecting tables, choosing views, deleting, and then publishing.
Conclusion
Now, you can distinguish between personal and system views and take appropriate steps to delete each of the mentioned items, enhancing the user experience.
If you have any questions, feel free to contact us.
Stay tuned for more tutorials!