
Introduction
Data is crucial in business operations. Accurate, timely data informs decisions, such as tracking customer interactions and analyzing marketing campaigns. The DateTime field in Microsoft Dynamics 365 is essential for capturing and using temporal information.
This article covers creating DateTime fields and integrating them with Power Automate. We'll show how to build a flow that updates DateTime fields in real time, enhancing workflow efficiency and data accuracy. Let's begin.
The Requirement
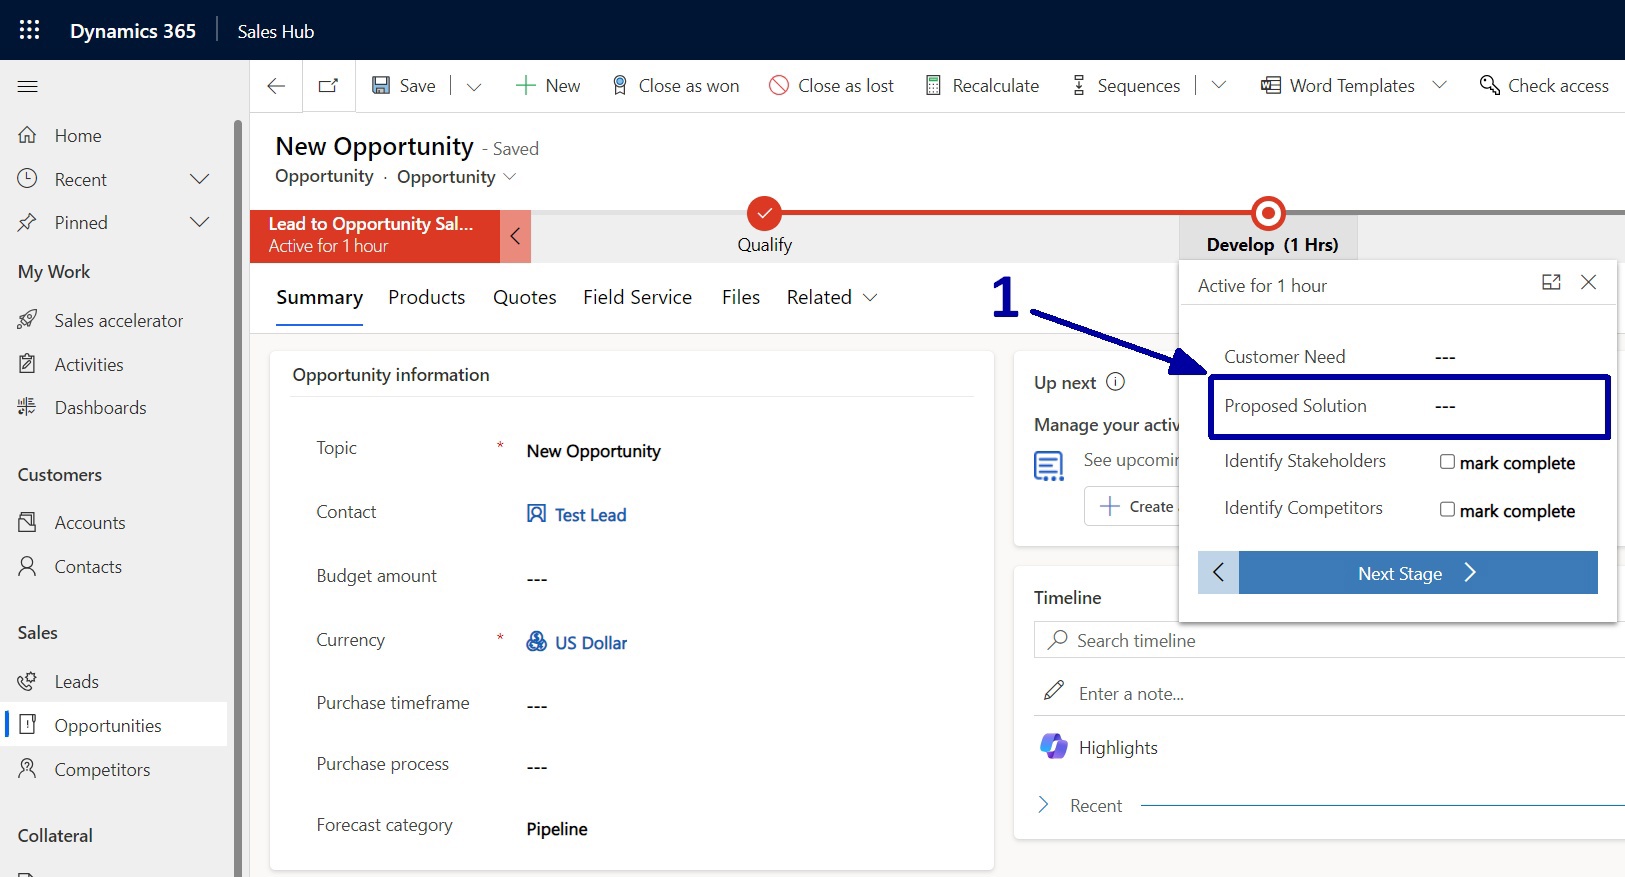
For the Power BI chart, it is necessary to determine the time it takes for a solution to be proposed for a newly created opportunity. Since we have an out-of-the-box "Created On" DateTime field, we require another one that automatically populates when the "Proposed Solution" field is filled with data. Then, the time between these two fields will be calculated in Power BI and filtered by the Opportunity Owner.
How To Create DateTime Field in Dynamics 365
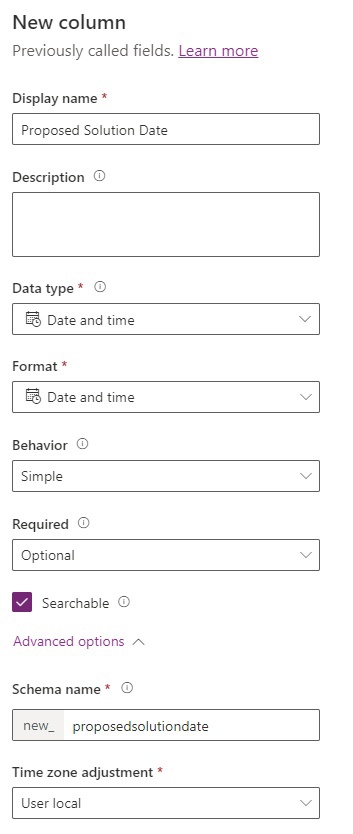
The first thing that needs to be done is to create the DateTime field. Assuming you are familiar with field creation, I will show you what the creation process is expected to look like.
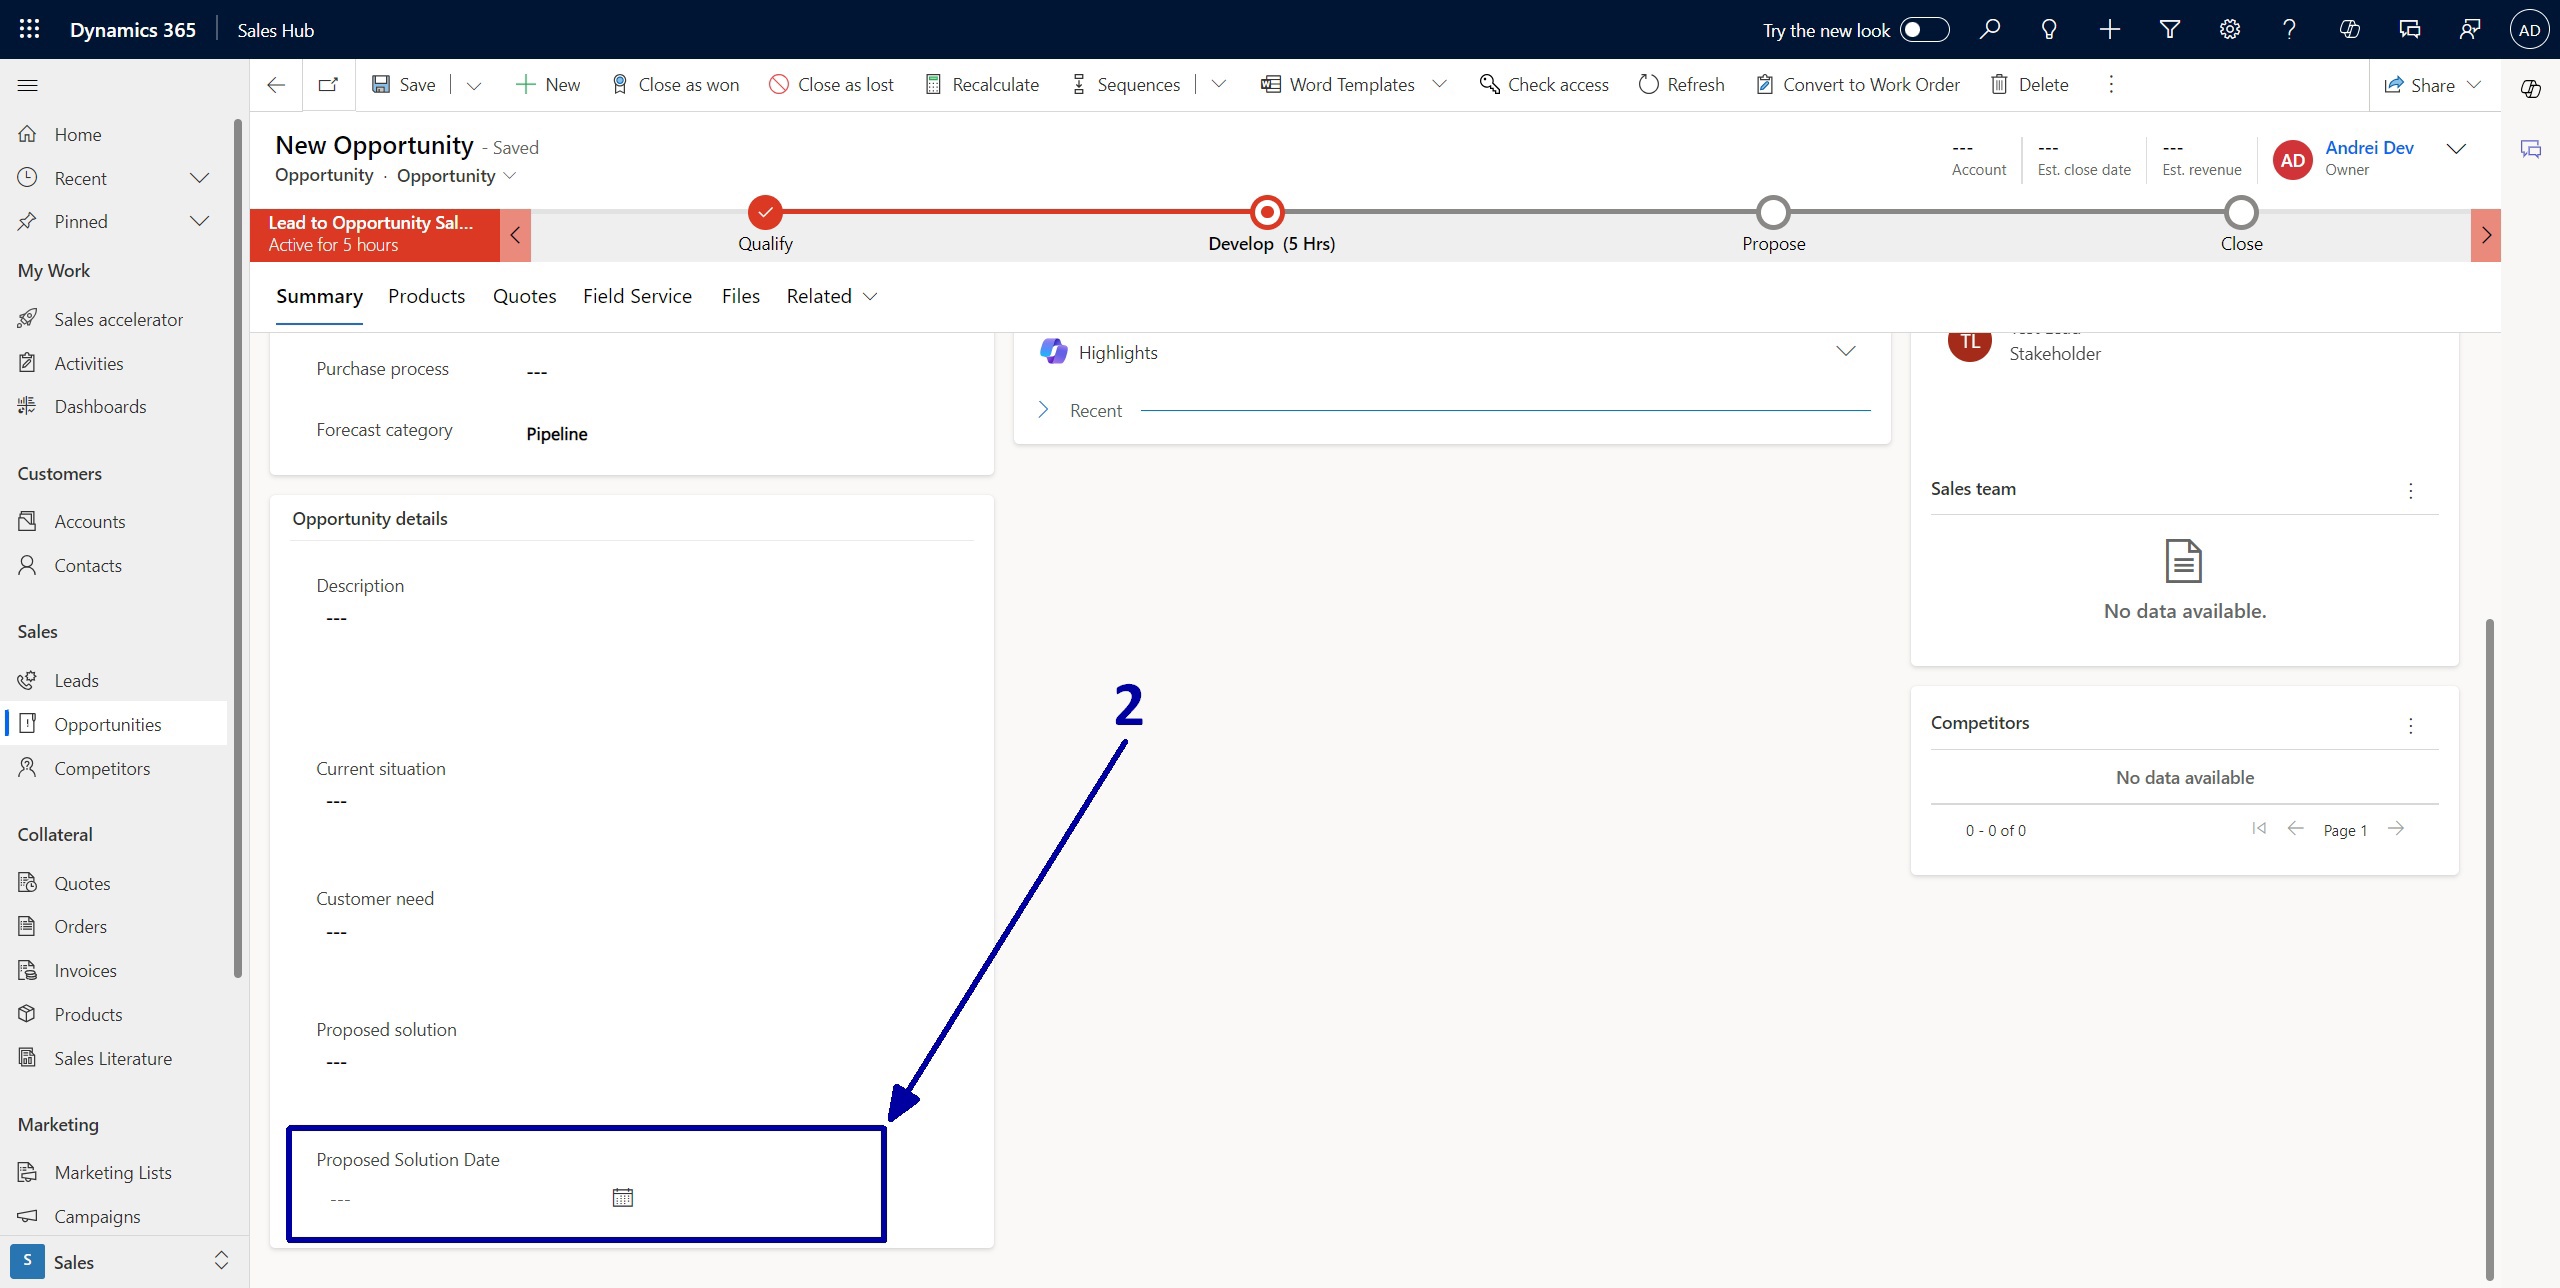
After that, we will place this field on form (2) for demonstration purposes.
It is worth mentioning that this type of DateTime field is usually not needed on the form, but for testing purposes, I suggest you add these fields to the form and make them hidden by default and/or read-only.
Now it’s Power Automate time!
I'm assuming you are already familiar with Power Automate and know how to create an automated cloud flow for a specific environment, so let's walk through our flow step-by-step.
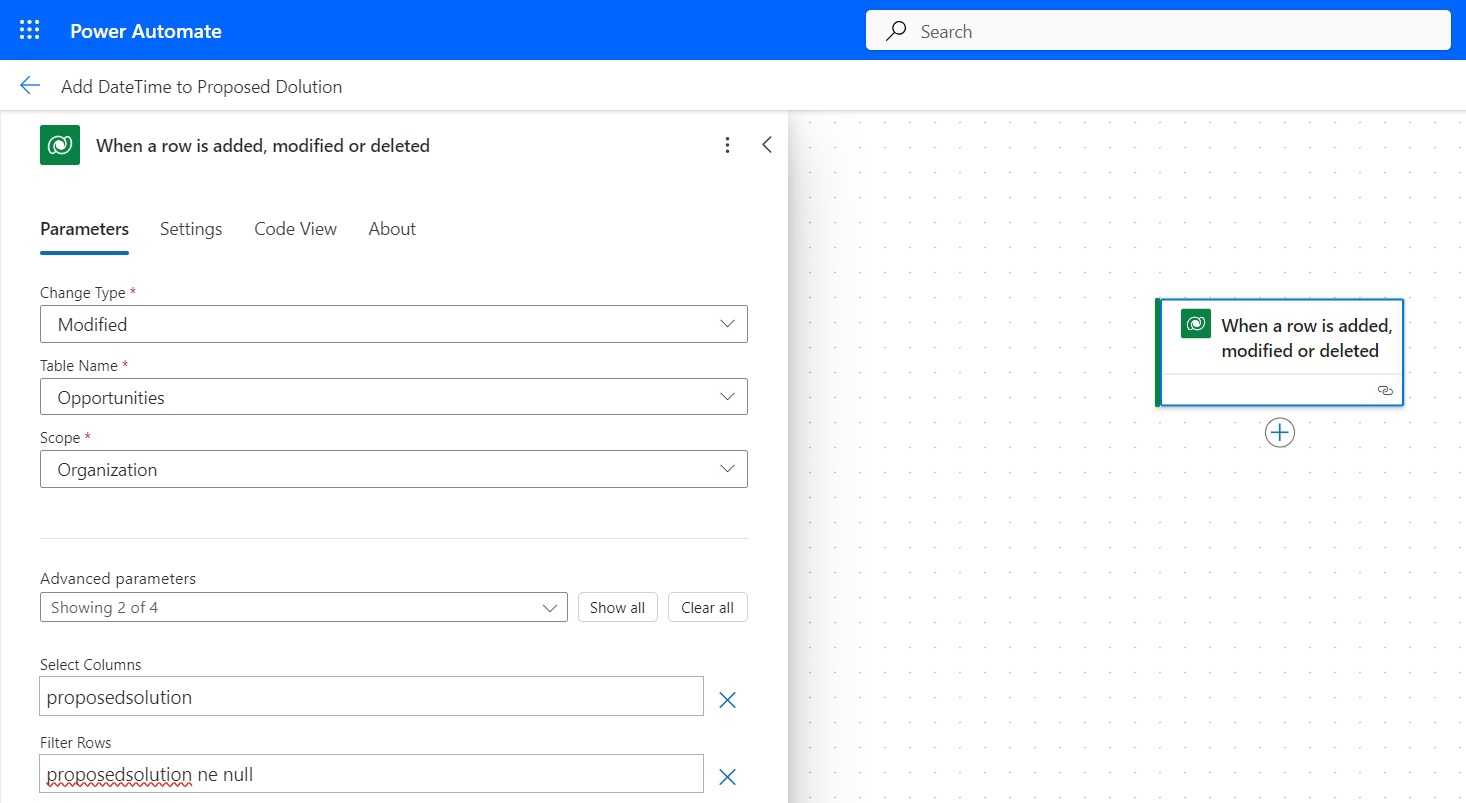
First step: The Trigger
Whenever a Proposed Solution is updated (whether manually, through an integration, or another flow), this process will be triggered with the new data. If this field is cleared, the process will not be triggered.
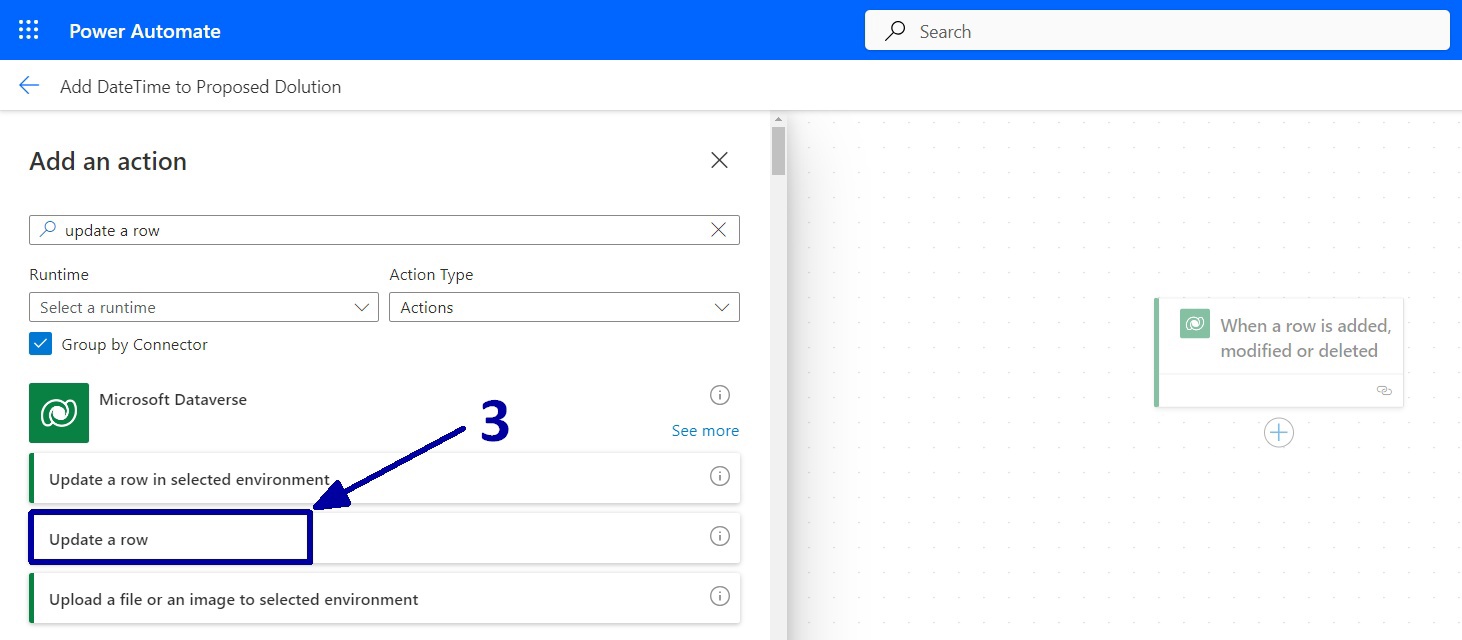
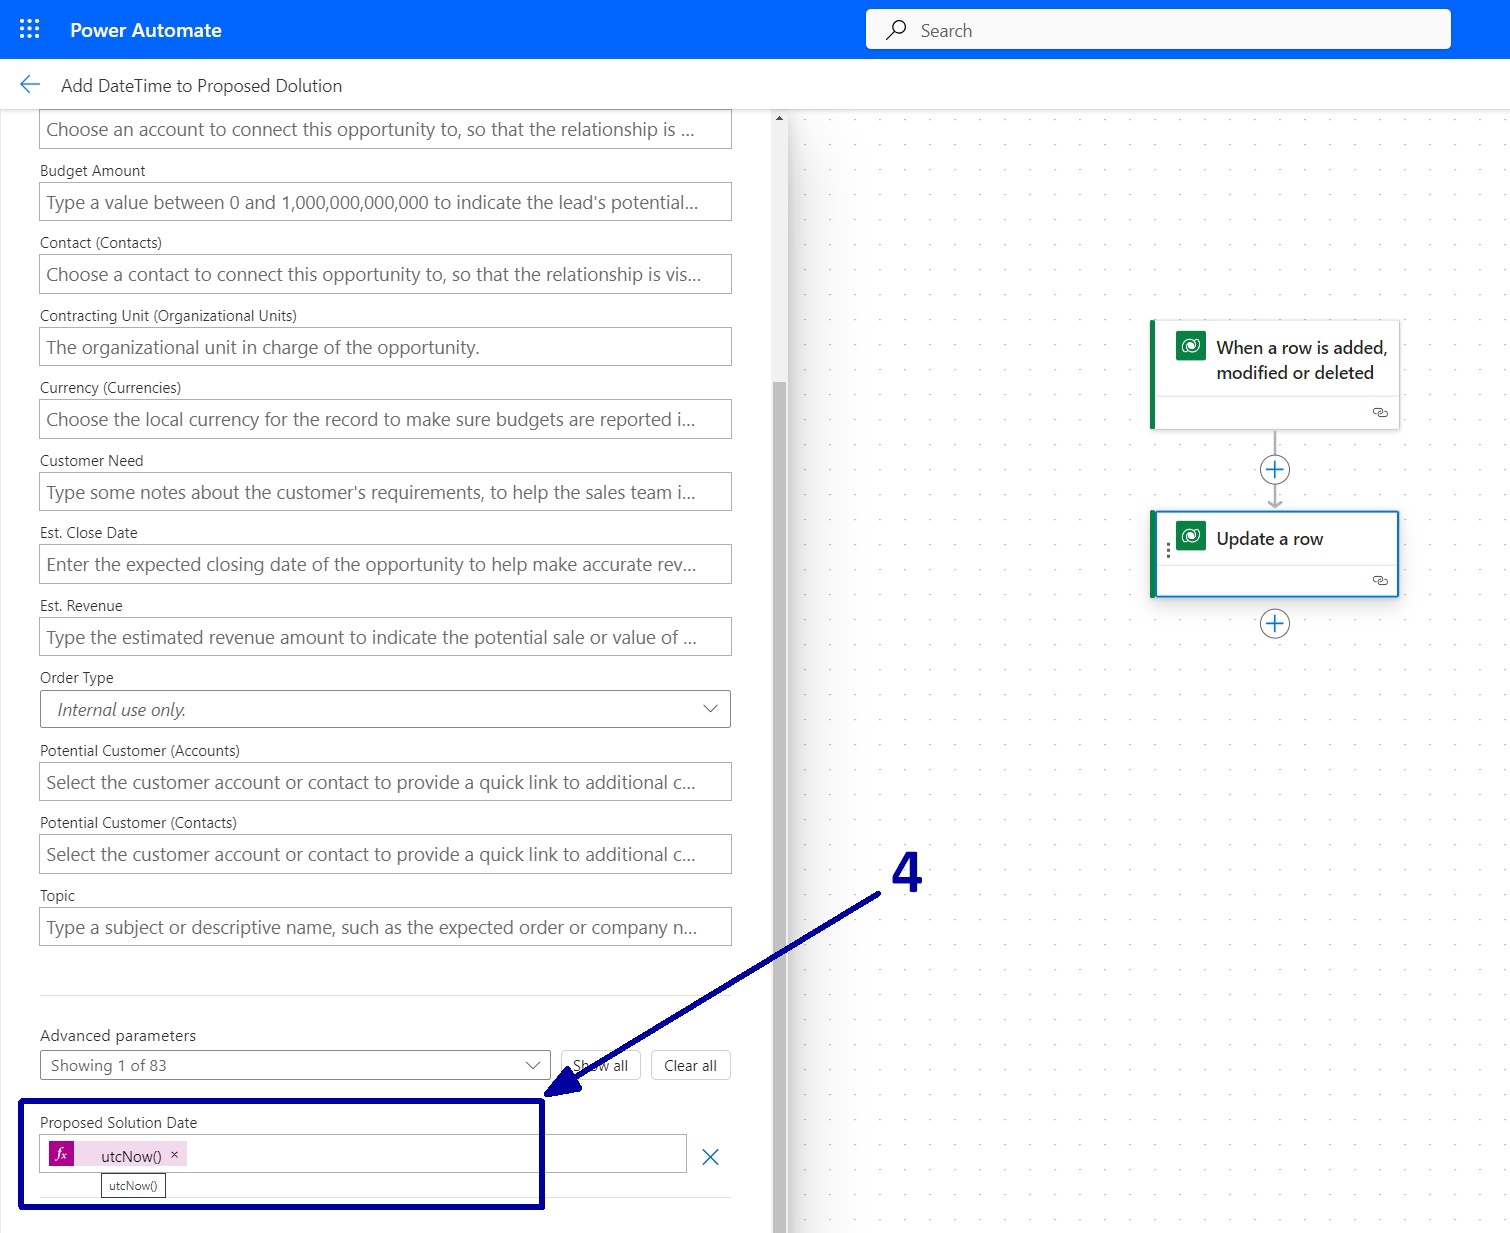
Next and final step: Updating the Proposed Solution Date field.
Just add Update a Row action from the Microsoft Dataverse connector.
In this final step, we will update the Proposed Solution Date field with the utcNow() function. As a result, a current timestamp will be stored in this field.
Now, all you need to do is save this flow and give it a try.
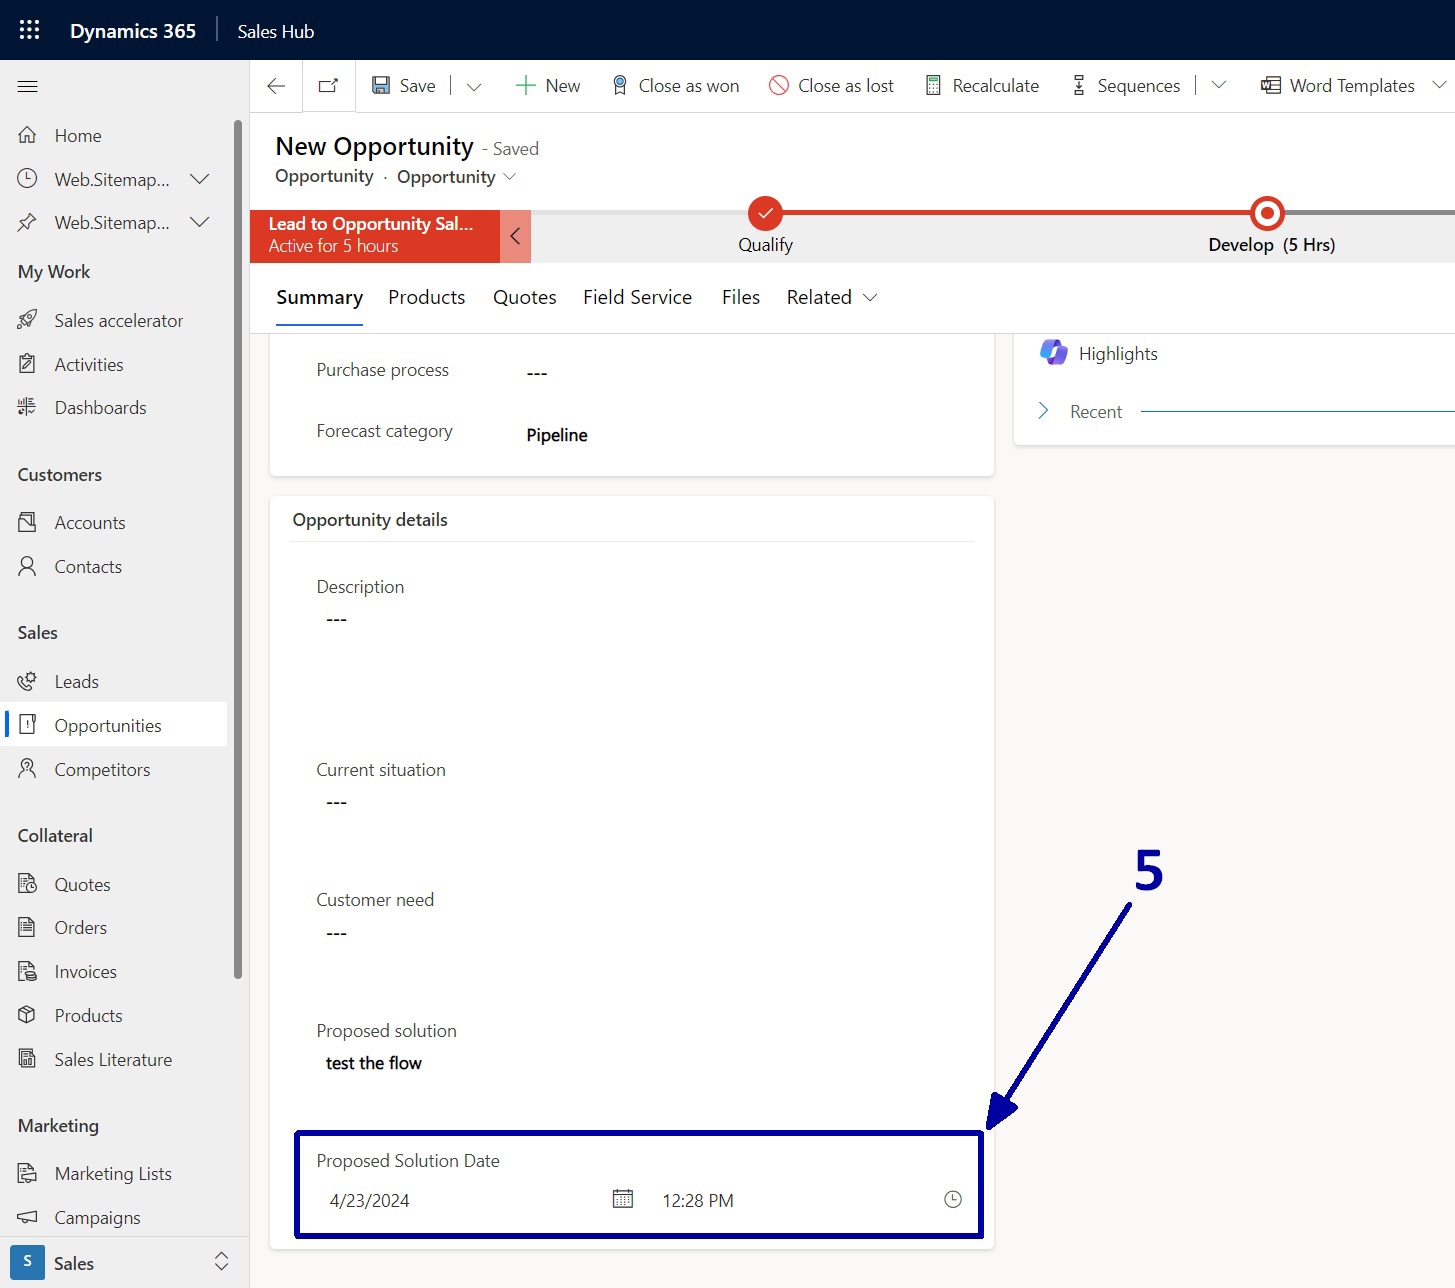
Write something in the Proposed Solution field, save your changes, and refresh the form after a couple of seconds.
As you can see, the DateTime field has been populated (5).
Here are a couple of hints for our readers:
● If you require a timestamp for when the field was cleared, remove the filter from the trigger, create a new DateTime field, and add a condition to the flow.
● If you're monitoring an option set, create a DateTime field for each option. Your trigger won't need a filter, but it will require a switch with actions based on the selected option.
Summary
Making the most of data is crucial for staying competitive and fueling growth in business. DateTime fields in Dynamics 365 aren't just data points; they're strategic assets enabling organizations to fully utilize their temporal data. By leveraging DateTime fields in Microsoft Dynamics 365, businesses can make informed decisions, enhance performance, and progress toward sustainable growth in a data-centric environment. We hope this article was useful to you. If you have any questions, UDS consultants are always here to help.