
Introduction
In the fast-paced world of customer relationship management, effectiveness and simplicity are essential. Microsoft Dynamics CRM is a powerful tool which proposes a multitude of peculiarities to give enterprises a hand with running their customer interactions. However, with its vast capabilities comes the opportunity for an overly complicated interface, especially when multiple forms are present for a single entity. This can lead to confusion and inefficiency, hindering your team's productivity.
To optimize the user experience, it's important to streamline the interface by hiding forms that are not substantial to your diurnal operations. By doing so, you guarantee that your crew can focus on the most relevant and needful info without being overwhelmed by superfluous options. In this tutorial, we will guide you through the process of managing forms in Dynamics CRM, including hiding unnecessary ones and enabling existing ones, to help you create a cleaner, easier to utilize interface.
No matter what job you do, a CRM administrator or a business user tasked with customizing Dynamics CRM, this guide will furnish the knowledge and instruments to simplify your CRM environment. Let us start making your Dynamics CRM experience more intuitive and forceful.
The request
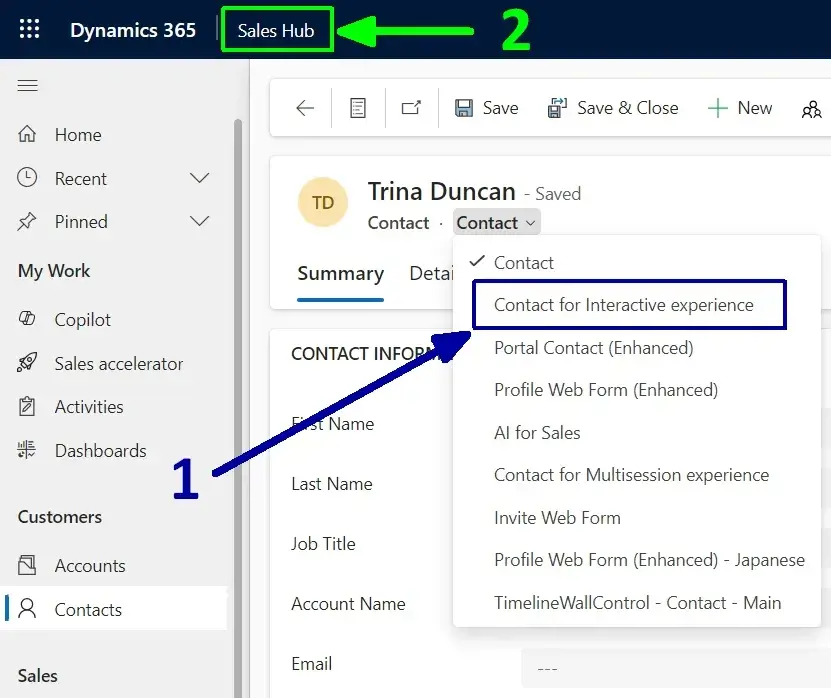
Contact records have an unnecessary form available and a required one that is missing. You are asked to remove the ‘Contact for Interactive Experience’ form (1) from the Sales Hub app (2) and to enable the ‘Information’ main form, which is currently not visible in the form selection dropdown.
The Step-by-Step Process
1. The easiest way to access the available forms list is to click on the application name first (3), then click on the three dots on the application title (4) and select the ‘OPEN IN APP DESIGNER’ option (5).

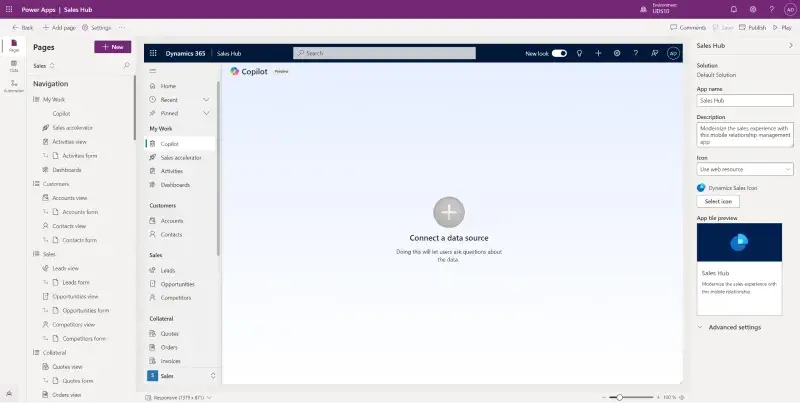
2. As a result, you will be redirected to the Power Apps and the Sales Hub designer will be opened.
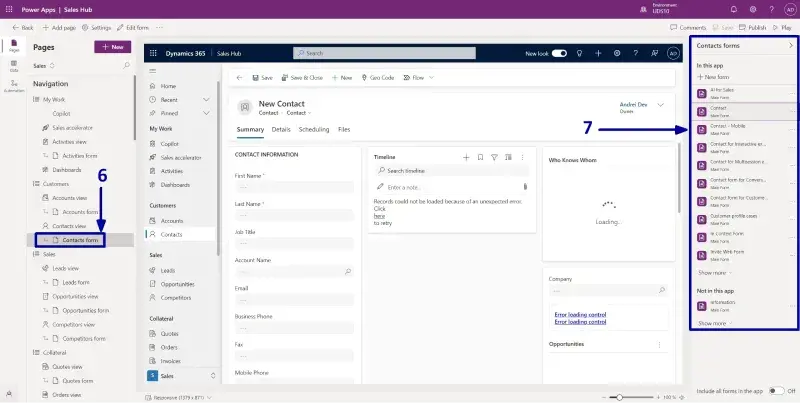
3. On this page, the first thing you need to do is to select the ‘Contacts form’ item (6) and pay attention to the right sidebar with the list of forms available for the Contact entity (7).
4. Now, as you are asked to enable the ‘Information’ main form, you need to click on the three dots after the ‘Information’ form and select the “+ Add” option (8).

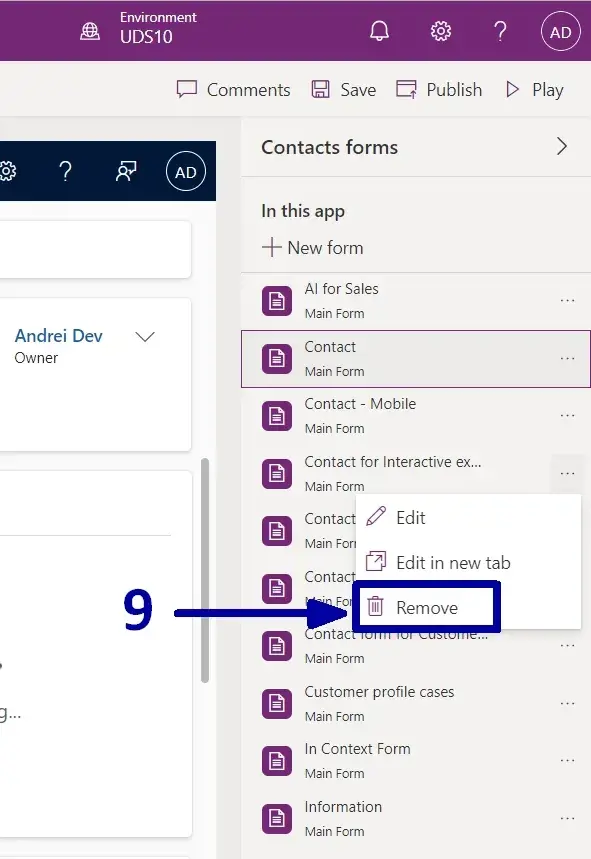
5. And, because you are asked to remove the ‘Contact for Interactive Experience’ main form, you need to click on the three dots after the ‘Contact for Interactive Experience’ form and select the “Remove” option (9).
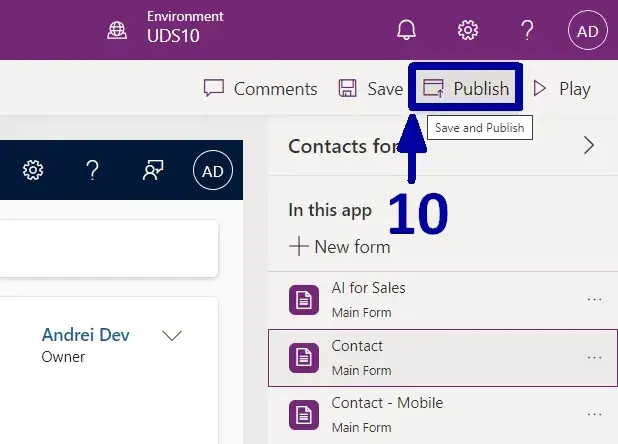
6. Just click on the Publish button (10) on the top right to save and publish your changes.
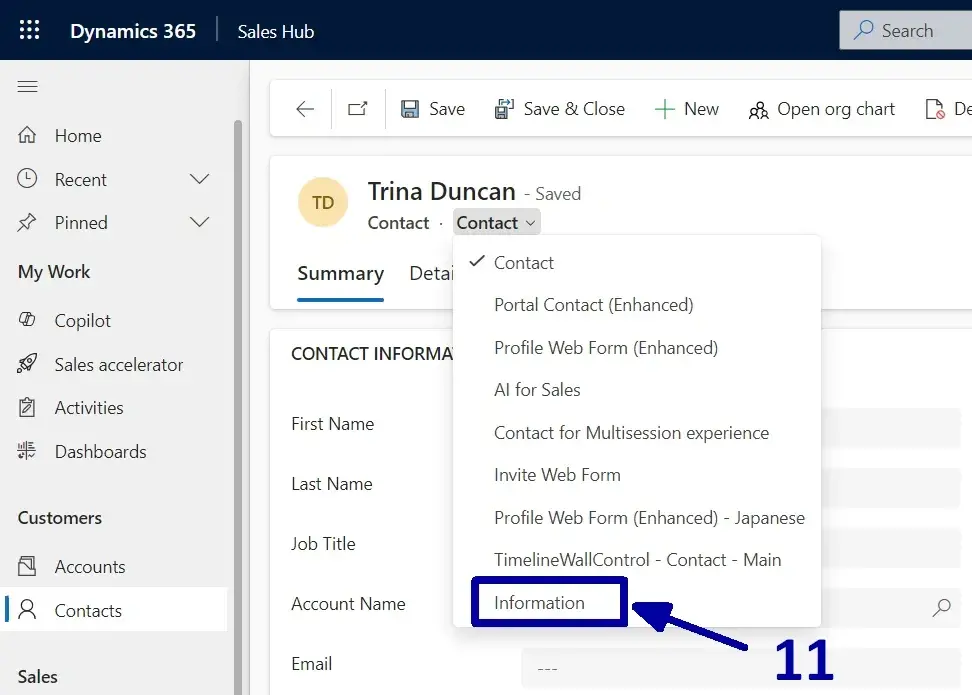
7. After the publishing has been done (the Publish button becomes enabled again), you can switch back to the CRM to check for your changes. As you can see, the ‘Contact for the Interactive Experience’ form has been removed, and the ‘Information’ form (11) has been successfully added to the form list dropdown.
Summary
Going through the above process, you have grasped how to constructively run forms within Dynamics CRM to create a streamlined and efficient interface. Now, you know how to hide unnecessary forms and enable the significant ones. Furthermore, this operation will give your team admittance to the most relevant and useful information and reduce confusion and clutter.
Customizing your Dynamics CRM environment to fit your specific needs is a mighty way to improve your organization's efficiency and effectiveness. By carefully selecting which forms are seeable and which remain hidden, you can handle the interface to sustain your business processes better and obtain your goals.
Thank you for devoting time to this tutorial. We hope it has granted you beneficial insights and practical steps to optimize your Dynamics CRM setup. If you have questions or require more assistance, do not hesitate to reach out.