Introduction
To begin with, it is worth mentioning what a Power Platform environment is, what it is needed for, and what types of environments there are.
So, a Power Platform environment is a space or container for working with your organization's business data and applications, offering storage, management and distribution, data processing, and the use of various applications.
You can create and configure environments for your tasks. In particular, you can also separate applications by roles, security requirements, target audiences, etc. For example, you can create separate environments for different departments or teams, remote offices, or international branches, separate environments for testing and work, or use one environment for all tasks.
Each environment can have no more than one Microsoft Dataverse database. Since the environment is created within the Microsoft Entra client, only users within this client can access its resources.
All the applications can be tied up to the data sources in the same environment. For instance, suppose you have two environments, Production and Sandbox. In that case, an application from the Sandbox environment will not be able to connect to the Dataverse database of the Production environment and vice versa.
Licenses and/or administrator settings regulate the ability to use different types of environments. There are such environments, as Sandbox, Default, Trial, Developer, Production, and Microsoft Dataverse for Teams. All of them possess their own distinctive characteristics and varied approaches to security.
In this article, you will be able to take a closer look at such an environment as Sandbox.
Sandbox Practical Application and Main Functions
Sandboxes are used to develop and test a product separately from production. In other words, Sandbox is a special environment designed for testing and experimentation without the risk of affecting production systems. It allows developers and testers to test new features, changes, and updates safely. This type of environment offers key features such as Copy and Reset.
The Copy feature assists in creating an exact copy of the production environment in the Sandbox. This peculiarity is beneficial for testing changes in an environment that matches the current production system. Copying includes data, configurations, and settings, which provides realistic testing.
The Reset feature allows you to return the Sandbox to its original state, removing all changes and data made during testing. It is useful for starting a new testing cycle from a clean slate and helps avoid accumulating errors and unnecessary data.
These features provide flexibility and security in developing and testing new solutions, minimizing the risk to production systems.
Sandbox Safety and Access Levels
In the Sandbox, users have full control over security within the environment, which allows them to entirely manage their test environments, including creating, editing, and deleting resources.
To run tests in the Sandbox, users only need user access, which allows them to interact with test data and check the functionality of applications.
To create new resources in the Sandbox, developers need a higher level of access: environment creator access. This level of access allows the creation and configuring of new applications, databases, and other necessary components within the test environment.
! Note. All manipulations with environments are carried out through the Power Platform admin center (https://admin.powerplatform.microsoft.com), and you must have the right to work with them (as a service administrator or a delegated administrator).
Some Practical Tips on How to Create a New Environment
Once you enter the admin center, you should go to the Environments page. Here, you can see a list of the existing environments and sort them by the desired column if necessary:
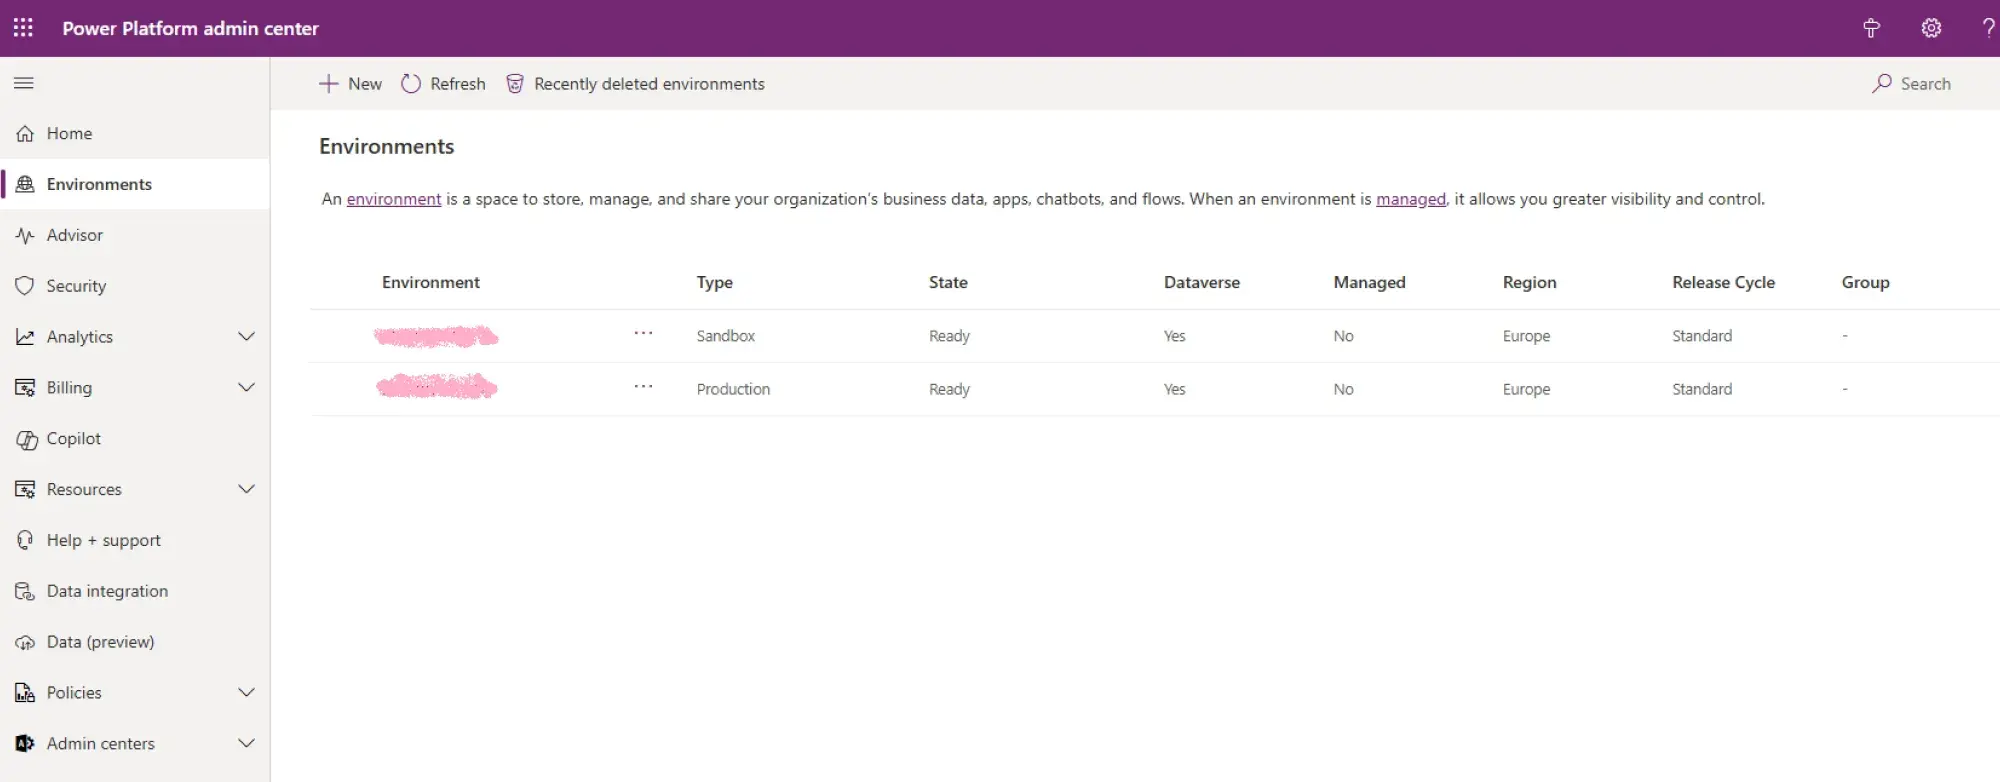
There are two environments in the screenshot.
To create a new environment, click on the "+ New" button in the upper left corner, and a panel with the settings for the new environment will open on the right:
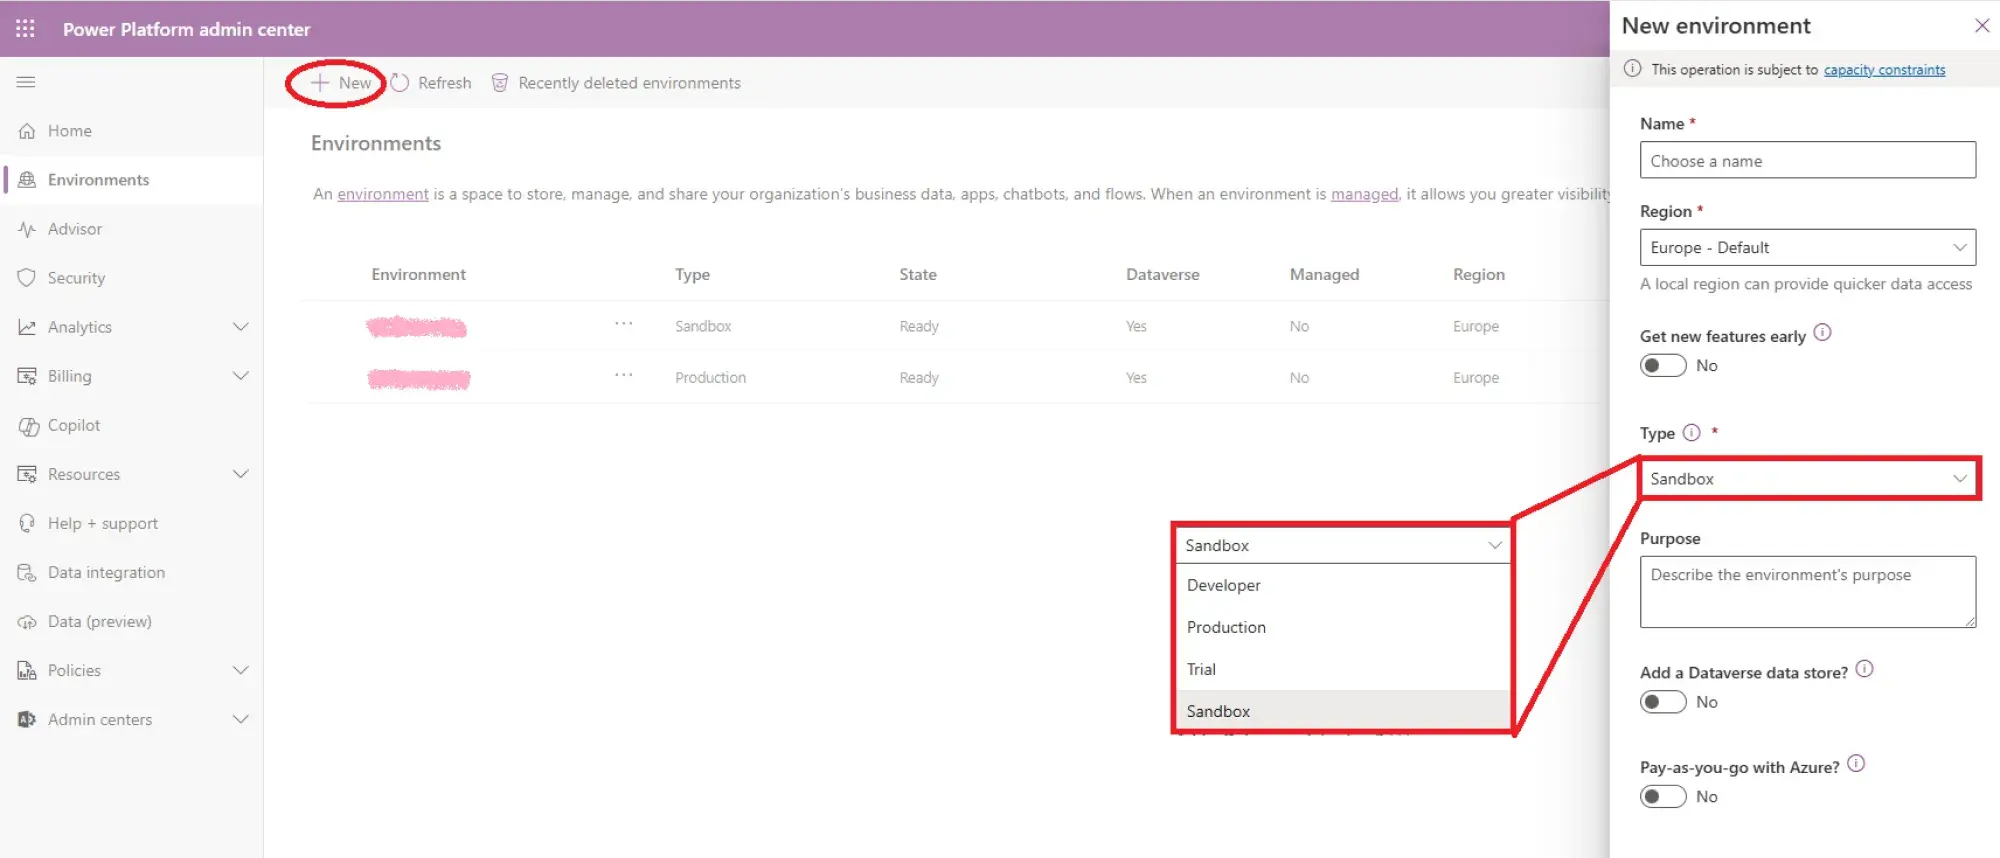
Now, you need to specify the basic settings for your new environment:
- Name: A unique name for the environment you are creating.
- Region: The region where your environment will be hosted. The closer the region is to potential users, the lower the latency and, therefore, the better the performance.
- "Get new features early": when you intend to get access to new features and updates before they are officially released, click on "Yes".
- Type: The environment type.
- Purpose: A brief description of this environment’s purpose.
- "Add a Dataverse data store": opt for "Yes" if you want to add a Dataverse data store to this environment.
- "Pay-as-you-go with Azure": to associate this environment with an Azure subscription to pay for specific Power Platform services, like Dataverse and Power Apps, select "Yes." This action will allow paying only for the resources and services you actually use, which is cost-effective.
! Note. If you have selected to create a database, you will be asked for additional settings in the next step:
- Language: This is the default language for this environment.
- URL: Your organization's unique URL to be used to access your environment.
- Currency: The primary currency used for reporting in this environment.
- "Enable Dynamics 365 apps": If you intend to deploy such apps as Dynamics 365 Supply Chain Management or Dynamics 365 Sales automatically, press "Yes."
! Note. You must have the appropriate Dynamics 365 license to click on "Yes." If you do not select "Yes" during the database creation, you will not be able to change this later and install Dynamics 365 apps in this environment.
- "Deploy sample apps and data": to enable the sample apps and data, press "Yes". Sample data is useful for experimentation and learning.
! Note. Set "Enable Dynamics 365 apps" to "No" to make this setting available.
- Security group: to limit access to this environment, choose a security group. Click on "No" for public access.
Once you have created it, you can go inside the environment you have created, view the settings, or make changes:

The top menu allows you to perform basic actions with the environment. For this, specify the following parameters:
- Settings: here, you can enter the settings change mode.
- Convert to production allows you to convert the current environment to a production one.
- Backup + restore allows you to create backup copies or restore data from them.
- Reset allows you to reset the environment to its original state, deleting all data, settings, and configurations created after its creation.
- Delete: deleting an environment completely destroys it as well as all the data and configurations associated with it.
Summary
Thus, by following the simple, clear, and fairly easy-to-implement recommendations given above, you can easily create an environment such as a Sandbox.
As you can see, a Sandbox environment has quite an important practical application, from testing and experimentation without the risk of affecting production systems to analyzing potentially malicious code in a secure environment.
Sandboxes allow developers and testers to test new features, changes, integrations, or updates safely, providing various benefits, like safe experimentation, risk-free bug fixing, faster development cycles, and compliance with security policies.