
Complicated Dynamics 365 Reports and Data Export Add-Ons
In Microsoft Dynamics 365 you don’t have direct access to the database, and there is a good reason behind such limitation. However, what if you need it?
For example, you need to build complicated reports with a specific selection of data, OR you need to integrate with a warehouse solution supporting only database access. Also when migrating some or all functionality to another system (This, of course, would never happen if we were supporting your implementation).
Whatever your reason – in this article, we review the installation and configuration of the Data Export Service add-on that will allow making copies of your Dynamics data to an external database.
The installation process consists of 3 steps:
-
Installing Data Export Service add-on from the marketplace
-
Configuring Azure SQL Database and access
-
Enabling synchronization for Data Export Service
Installing and configuring the add-on itself is not that complicated, but configuring Azure SQL and fulfilling requirements might be challenging. If these steps are complicated, please feel free to contact me or ask your technical support team for help.
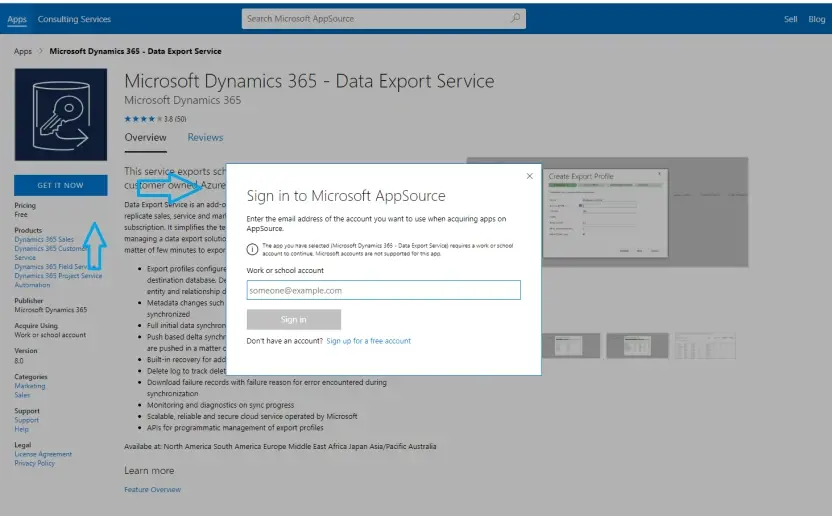
1. Installing Data Export Service Add-On From the Marketplace
So, first, we need to go to the Dynamics marketplace page of Data Export Service add-on. To install the add-on click GET IT NOW on the add-on page.
You need to log in with the administrator account of your Dynamics 365 tenant. The installation process should be smooth.
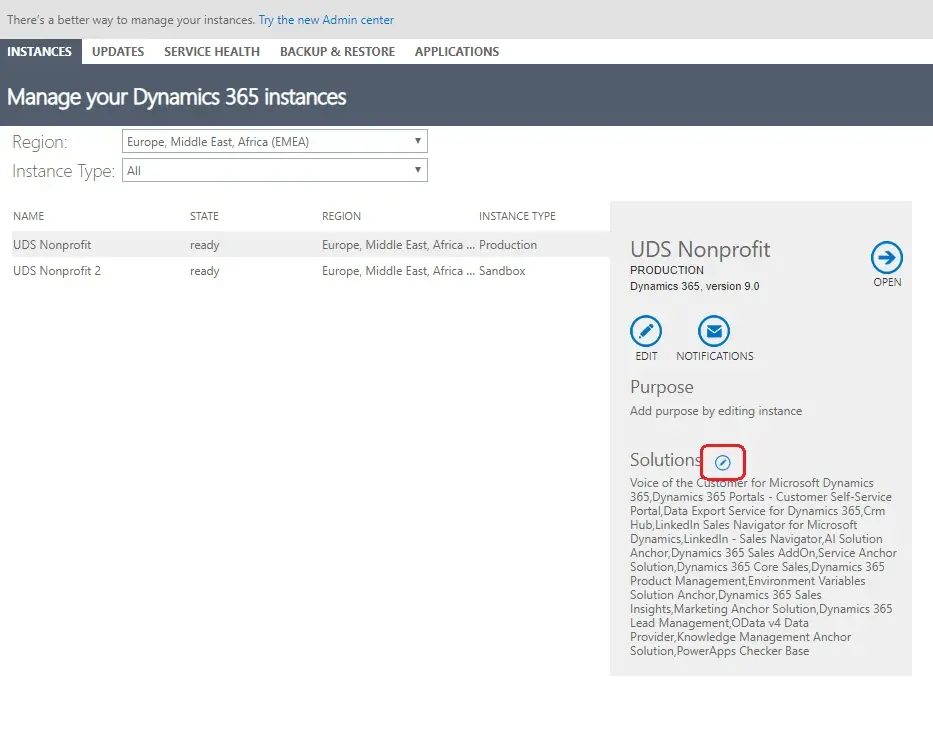
Installation status can be verified in your Dynamics 365 administration portal, you can navigate to your Dynamics admin portal from the Office admin portal. There is a section called Admin Centers.

In Dynamics 365 Admin center, click pen near Solutions. Here you’ll be able to see the solution installation status.

2. Configuring Azure SQL Database and Access
Let’s start by configuring Azure SQL Database. You can create an Azure SQL database in the same or another tenant as Dynamics 365.
This section will contain 2 parts:
2.1 Create Azure SQL Database
2.2 Create an Azure Key Vault
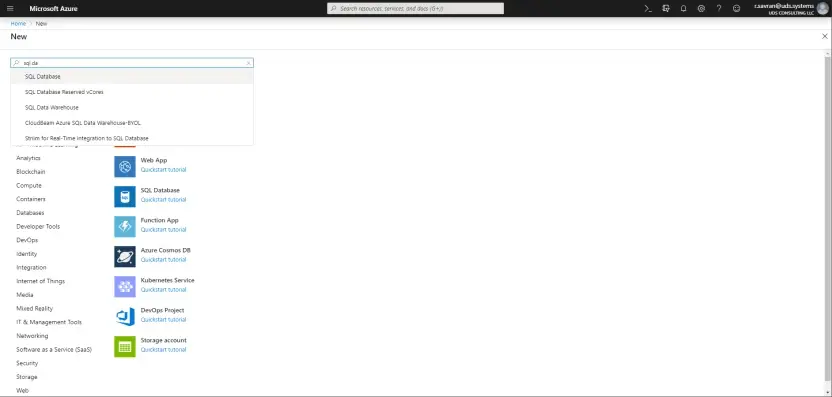
2.1 CREATE AZURE SQL DATABASE
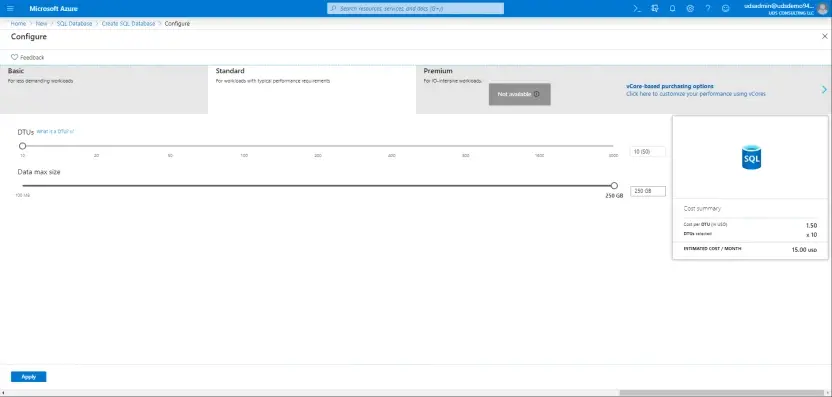
Go to the Azure admin portal and open the SQL databases section. Click Add and specify the required parameters.
You will need a unique server name and other parameters you can adjust to your case. Put in the exact password instead of asterisks, of course.
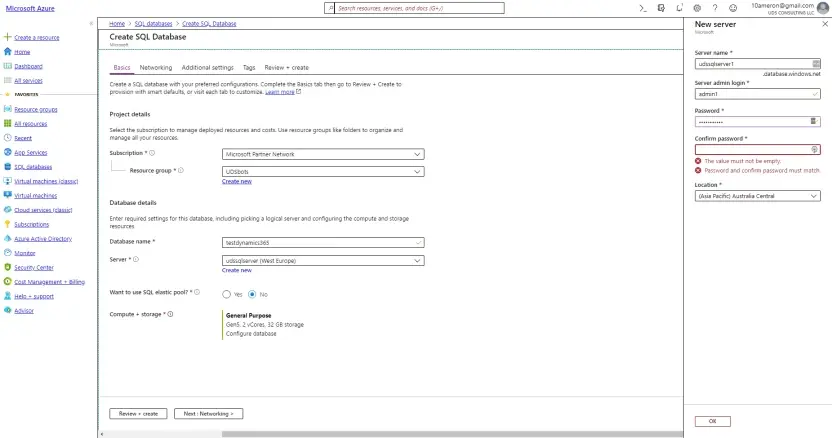
Next, you need to select a subscription. This will depend on your Dynamics storage usage. You can get more information on the topic of how to analyze your storage in my other article.
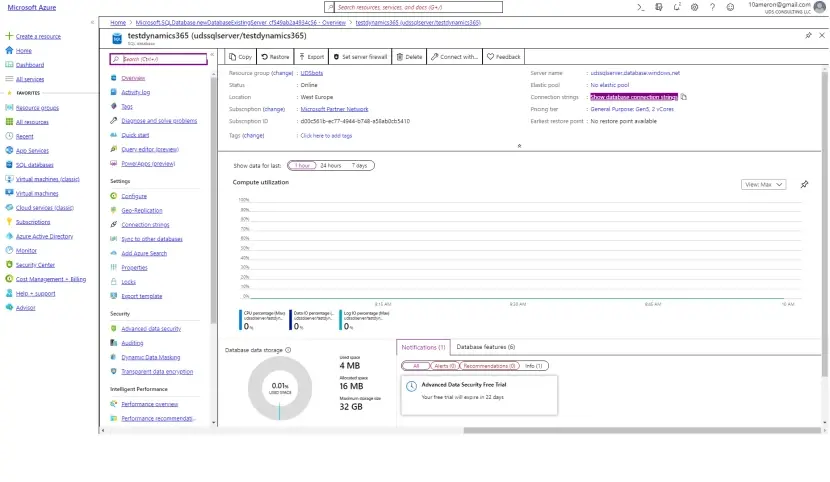
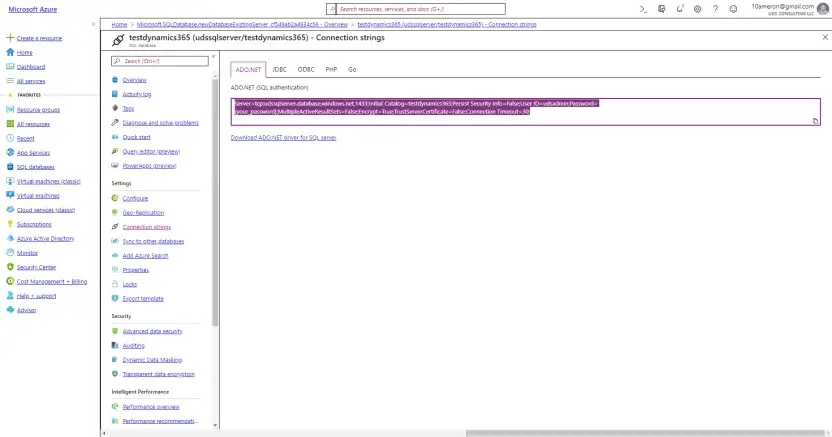
You need to open the created database and click Show connection strings. We will need the Connection string later.
Then copy the connection string for future use. Don’t forget to replace the password with current data. You can do it in later stages as well for security reasons.
2.2 CREATE AZURE KEY VAULT
Next, we need to create an Azure Key Vault to store connection details to the database. It should be under the same Azure as Dynamics 365, this is an important requirement.
Azure Key Vault allows us to save sensitive information and publish it for usage by different users and applications. This is the best way to manage (passwords and access) data.
Before we proceed with creating the actual Key Vault, I’ll explain several things about its content.
We are interested in 3 components of Key Vault:
-
Key - this is an identification how external applications can access secret data
-
Secret - actual sensitive data, for example, password or connection string in our case
-
Access policy - who can access the data. In our case, it will be a Data Export Service add-on
If you got this, the next steps should be pretty easy to understand and execute.
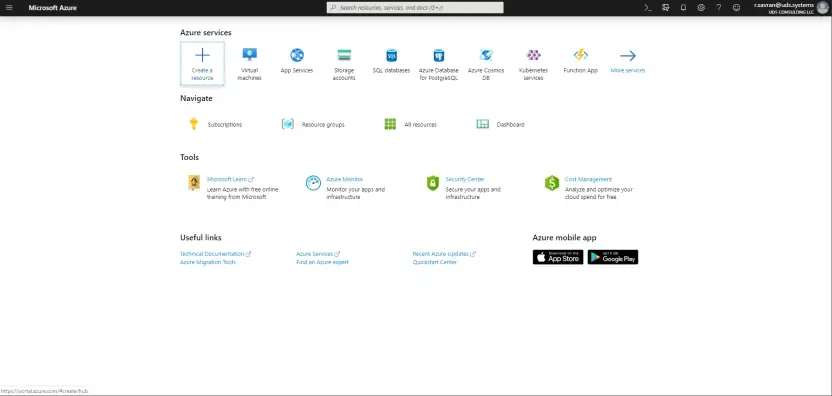
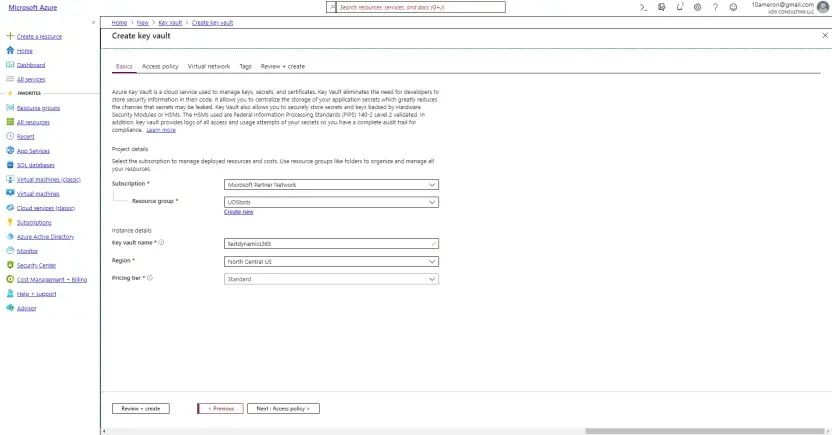
Click Create a Resource and select Key Vault. Specify parameters and click Review and Create.
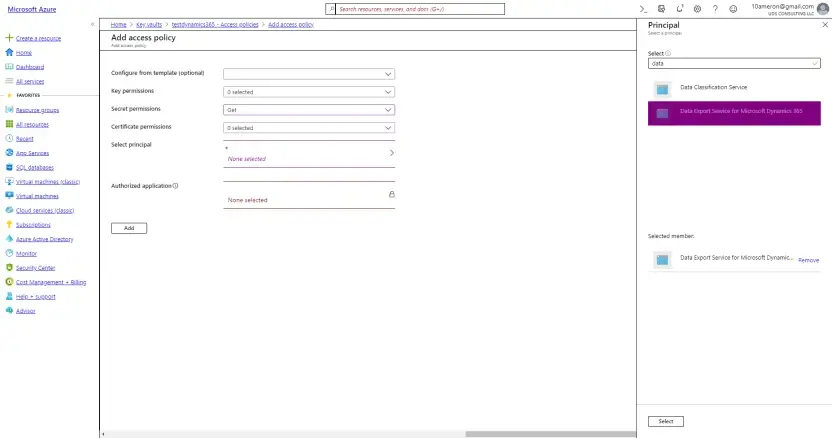
Open created Key Vault and Go to Access policies. Add a new access policy, you need to add Secret permission Get, so the add-on can access the connection string. We don’t need any other permissions here. Click Select Principal and find Data Export Service. Select it and add Access Policy. In case you don’t see Data Export Service in the principal list, the add-on is not yet finished installation, or you skipped the add-on installation step.
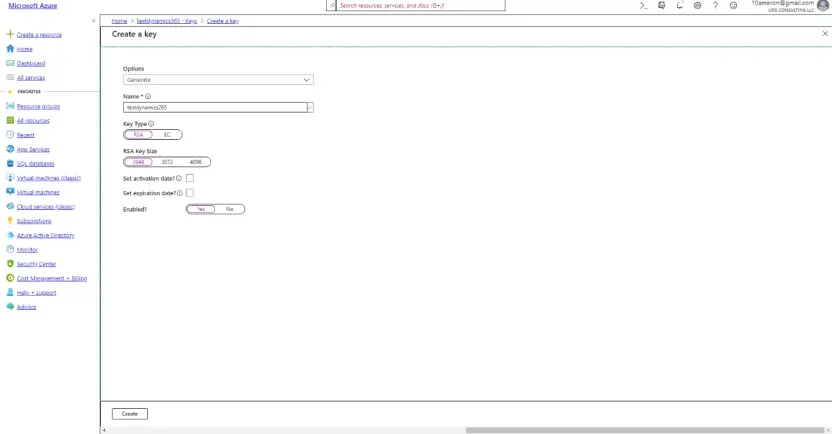
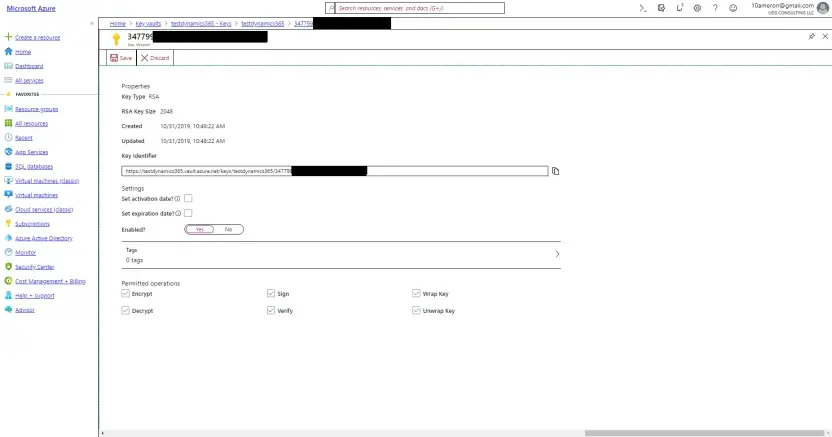
Next, we need to add a Key. Go to Keys and press Generate/import button. We don’t need any specific parameters here. Just click Create. When the Key is created – you need to open it and click Current version. You need to copy the Key identifier here to use it in the next stage.
Finally, we need to add a secret. The secret is the connection string in our case. If you remember you saved it in previous stages, please refer to them if you don’t have it. At this stage, we need to replace the password with the actual password.
Go to Secrets and click Generate/import. Specify the name and put the Connection string with a replaced password in the value field. Click Create.

Now you need to add additional parameters for Dynamics 365 to understand the Secret we’ve just created. This is the least logical section in the guide, but I tried to make it simple to reproduce.
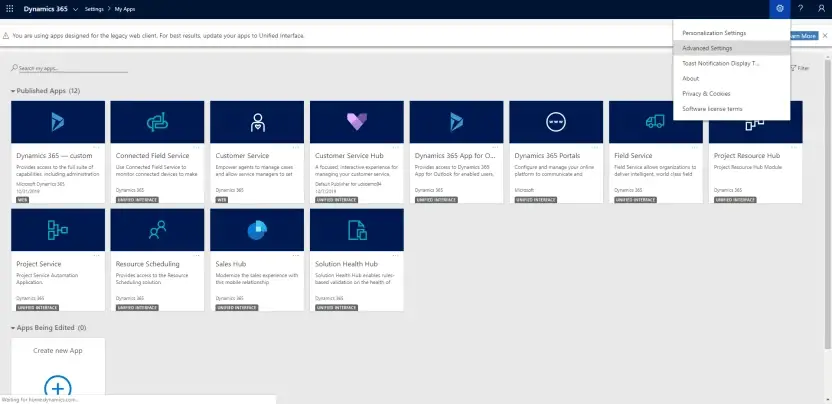
Log in to your Dynamics 365. Click the Settings icon and then Advanced Settings.
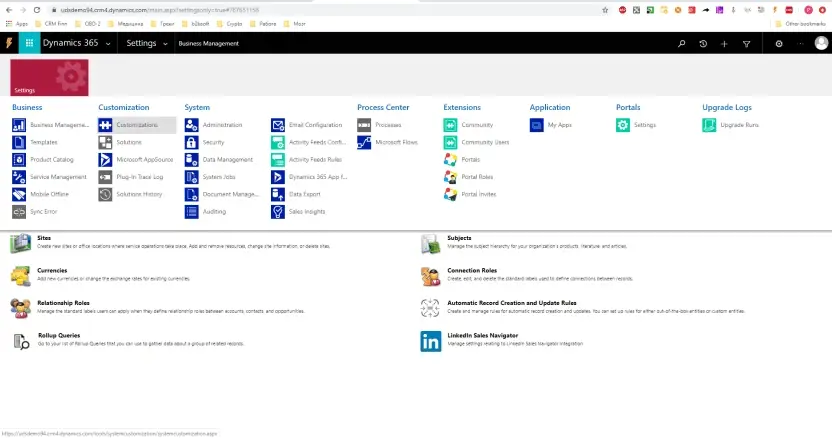
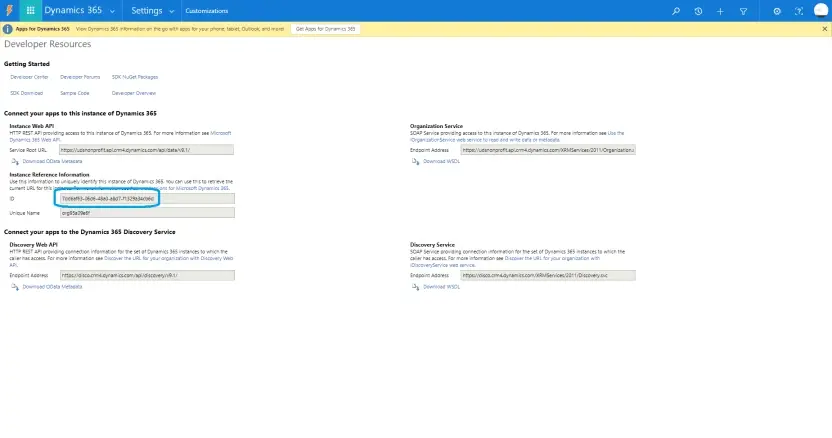
Expand Settings and click Customizations. Open Developer resources.
Here you need to copy the ID for future use. I will reference it as Organization ID later.
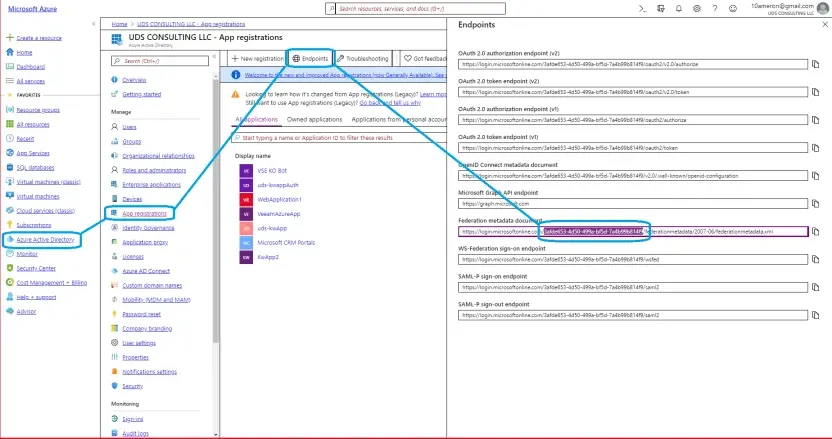
Now return to Azure Portal and get the tenant id. To get it, Open Azure Active Directory -> App Registrations -> Endpoints and copy the ID highlighted on the screen.
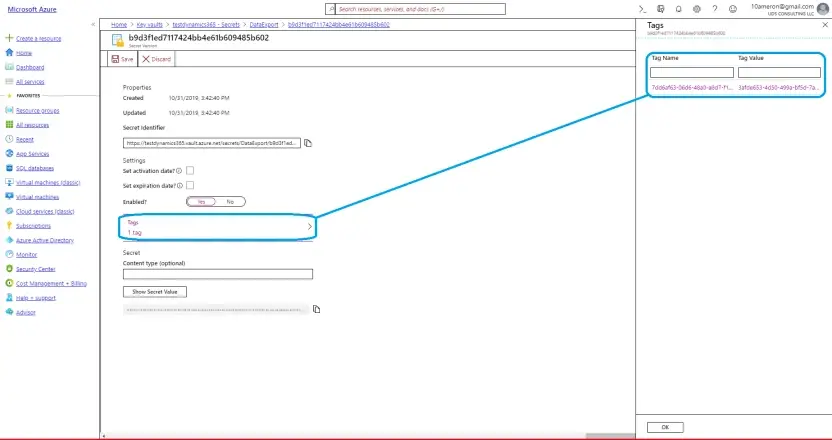
Next, go to the secret we created in the previous stage and specify its tags. An open secret, then click tags and add Organization ID left and Tenant ID right.
Well, the complicated part behind the next sections should be easier.
3. Enabling Synchronization for Data Export Service
Let’s now configure the Dynamics Data Export Service add-on.
This will contain 2 steps:
3.1 Enable Change tracking for entities you want to synchronize. It should be activated by default, so you can skip this step and return to it only if the required entity is missing in the add-on configuration
3.2 Configuring the add-on itself
3.1 ENABLE CHANGE TRACKING FOR ENTITIES YOU WANT TO SYNCHRONIZE
First, you need to check change tracking for the required entities. Log in to your Dynamics 365. Click the Settings icon and then Advanced Settings.

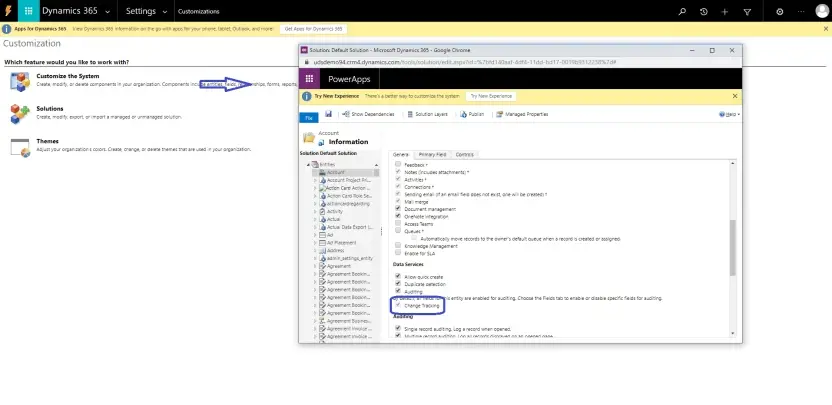
Expand Settings and Click Customizations. Click Customize the System. Expand Entities and select the Entity you want to be exported. Ensure Change Tracking is set for it. Do the same procedure for all required entities.

3.2 CONFIGURING THE ADD-ON ITSELF
Let’s configure the Data Export Service add-on.
Log in to your Dynamics 365. Click the Settings icon and then Advanced Settings.

Expand Settings and click Data Export.

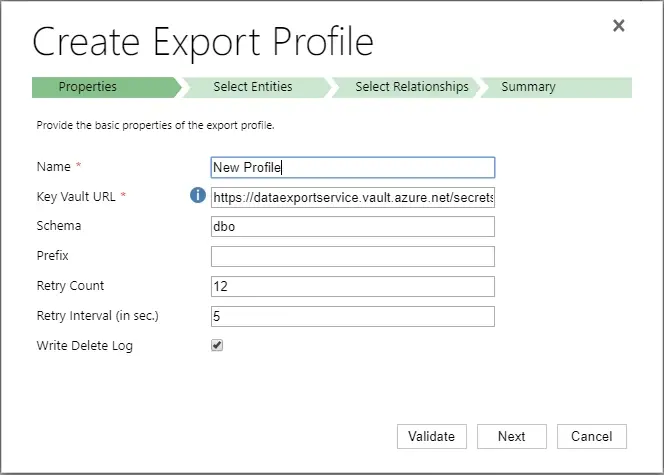
Create a new Profile. Most important here is to place the correct Key Vault URL, other parameters can be left default. The Key Vault URL is the Key Identifier we got in the previous stage.
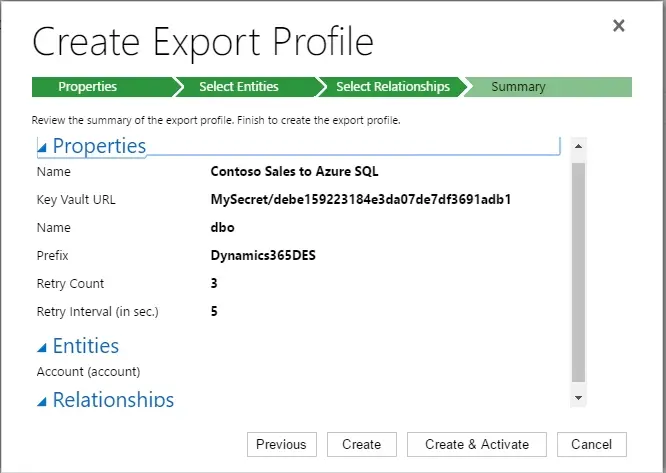
Select entities and relationships (depending on selected entities) you want to be synchronized on the next steps. Verify configuration on the last step and click Create & Activate.
This should start the synchronization process and data should be available in your Azure SQL database after some time. I hope your journey through the installation and configuration process was successful, otherwise please contact us.